One of the best things about Ubuntu is the care and attention that’s gone into developing its desktop layout. Based on the GNOME desktop environment (unless you are using Kubuntu or Xubuntu), it provides a slick and intuitive interface to your computer (as do both Xfce and KDE).
The screen grab in Figure 4-6 shows a typical Ubuntu desktop soon after installation. The only minor difference between the screen grab and what you will see on your computer is the wallpaper, which was produced especially for this book.
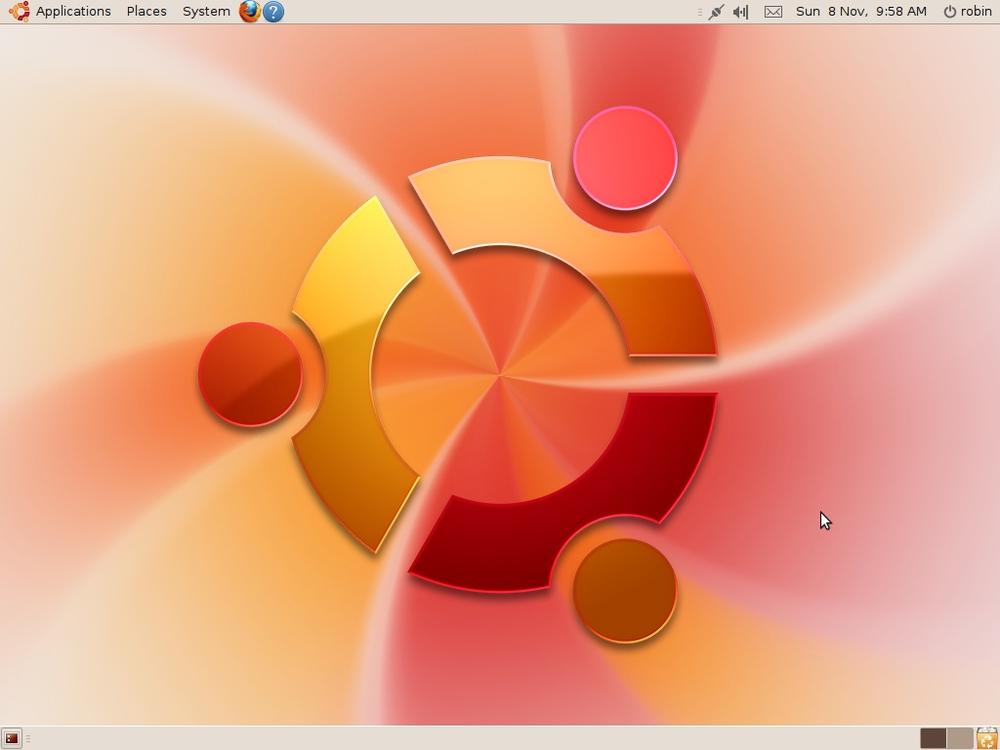
So, let’s take a look at the various parts by taking a clockwise tour, starting at the top left where there are the three main menus. If you are used to using Windows, you can think of these menus as being three Start menus instead of one; rather than having to drill down through a single tree of menu items, Ubuntu divides the options into things dealing with applications, places, and the system itself.
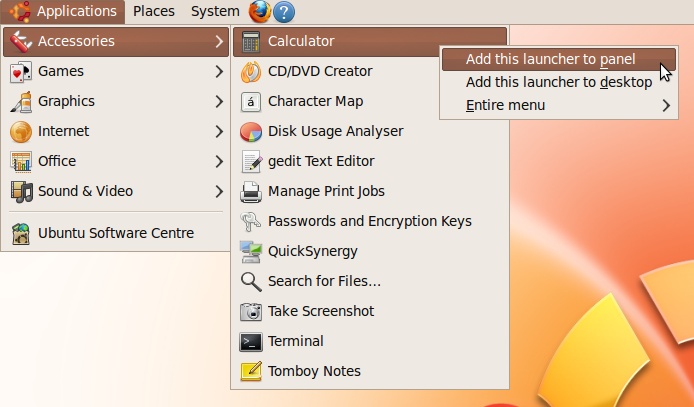
The Applications menu (see Figure 4-7) contains the main programs and accessories you use. This includes things such as Calculator, CD/DVD Creator, and Terminal under the Accessories subheading; over a dozen games under Games; the GIMP image editor and F-Spot Photo Manager under Graphics; the Firefox web browser and Empathy instant messenger (IM) program under Internet; Dictionary and the OpenOffice.org applications under Office; and Sound Recorder, Brasero Disc Burner, and Movie Player under Sound & Video. The Ubuntu Software Center (see Chapter 8) can also be accessed from here. This is where you can easily install and uninstall new software.
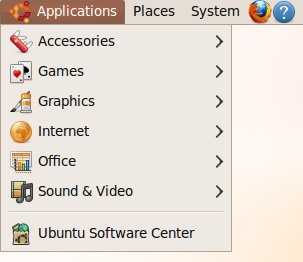
As you use Ubuntu and start to install more applications, they will usually appear in this menu under new subheadings such as Education, System Tools, Universal Access, and so on. So, if you can’t find a program, the Applications menu is the first place to look.
The Places menu (see Figure 4-8) is where you can browse and search all the folders on your computer, as well as any external drives or USB memory sticks. It is also the place for connecting to other computers on the network.
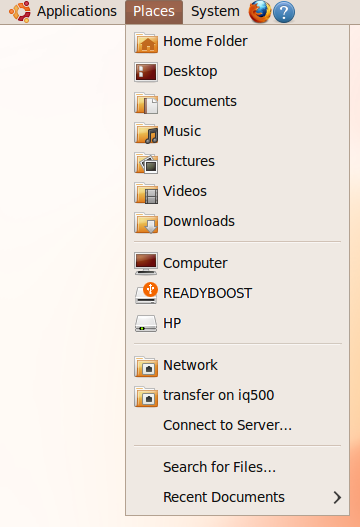
The first group of entries in this menu relate to your local computer, as follows:
- Home Folder
Each user on the computer has a different home folder, so this is your main folder on the computer. In my case the path to the folder is /home/robin. For a user named hannah, it would be /home/hannah. All the folders referred to in this group are subfolders of this main one. So, in my case, my Desktop is at /home/robin/Desktop. Note the capital letter D. Linux is case-sensitive, so you must use the capital letter when referring to this folder.
- Desktop
This folder contains all your desktop items, excluding mounted drives.
- Documents
This is the place where you’ll find your documents as stored by default by applications such as OpenOffice.org.
- Music
Music applications will usually use this folder for storing music you download, record, or edit.
- Pictures
Your photos and other images as handled by programs such as the GIMP will be stored here.
- Videos
- Downloads
The second group of entries relates to your computer’s hard disk drives and any attached USB memory sticks or external hard drives. In Figure 4-8, you can see the first item is called Computer. When you click it, a new window similar to the one shown in Figure 4-9 will appear showing all the storage devices and networks attached to your computer or connected to the network.
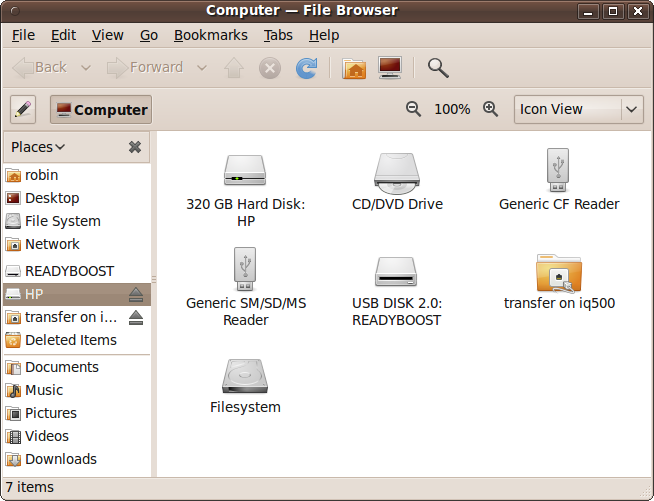
In both the Places menu and the File Browser, you may have noticed that this computer has a USB memory stick attached called READYBOOST, which is used to provide additional memory caching to Windows Vista. Because that computer has Ubuntu installed alongside Vista in a dual-boot system, I have left that device alone so that it’s ready for use whenever I need to reboot into Windows (not that I use it that often anymore).
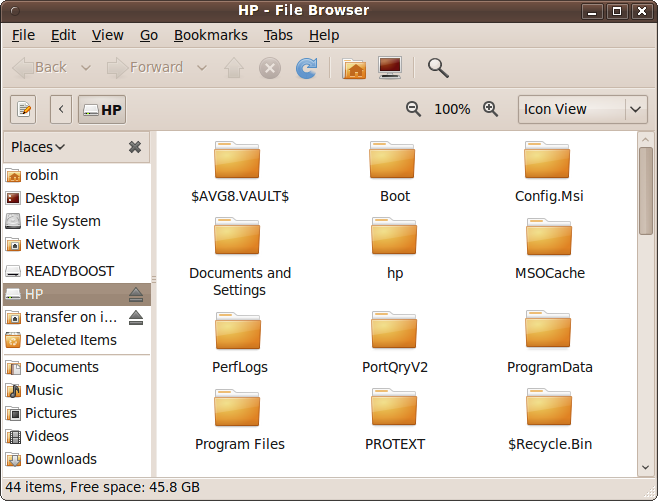
Speaking of Windows, on that computer the HP drive is the name of the Windows partition. Such partitions can be accessed from Ubuntu. When you click one (either in the File Browser or the Places menu) you may be prompted for your password; if so, enter it. A window such as the one in Figure 4-10 will then open, and as long as the folders and files have the required permissions, you can copy files between the Ubuntu and Windows partitions.
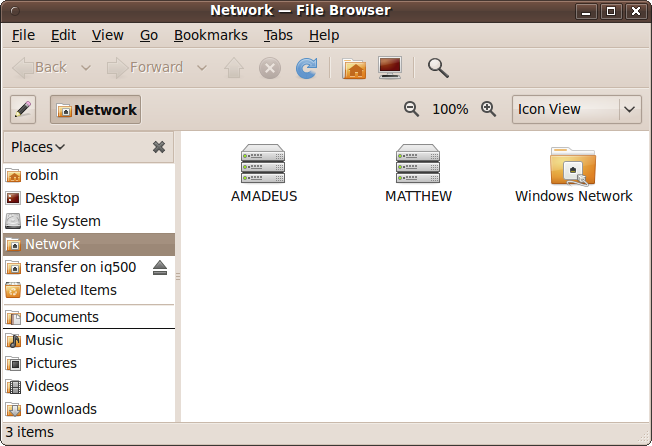
In Figure 4-8, you can see that I have mounted a network folder called transfer on iq500 in the Network group of the Places menu. This name means the folder called transfer on the computer called iq500. To access other computers and folders on the network, you click the Network entry to bring up a File Browser window such as the one in Figure 4-11, where two computers on the local network have been found (AMADEUS and MATTHEW), and a Windows network has also been detected.
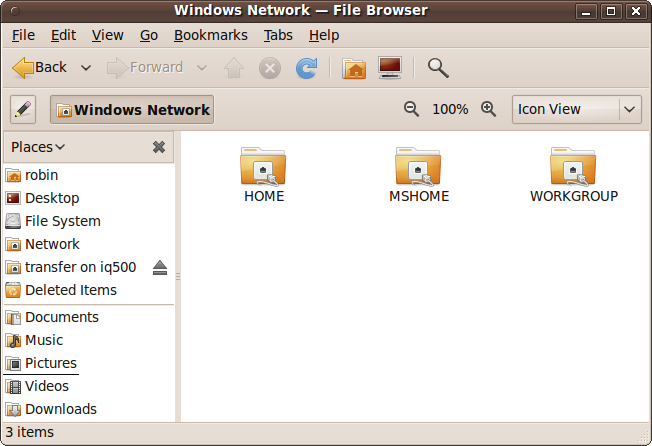
Clicking AMADEUS takes me to the shared folders on another Linux computer on my desk, whereas clicking Windows Network first brings up the workgroups Ubuntu has detected within the Windows network. In my case, as shown in Figure 4-12, three workgroups have been found: HOME, MSHOME, and WORKGROUP.
Clicking any of these will bring up another window showing all the computers within that network. So, for example, clicking MSHOME brings up five computers in the workgroup, as shown in Figure 4-13. From here on in, you can choose a computer and then select available folders on that machine, although you will have to enter the right passwords for computers that require them.

Once you have connected to another computer and opened up a folder, it will then become accessible directly from the Places menu, and will also be mounted on the desktop as an icon.
Of course, if your computer isn’t part of a network or you have a different set of workgroups, what you see when you use the Networks group of the Places menu may be quite different. In any case, you should be able to access whatever Windows and Mac systems that your site can access.
The final group in the Places menu is for searching for files or selecting recently accessed documents. Figure 4-14 shows both the Search for Files window and the Recent Documents submenu of the Places menu.
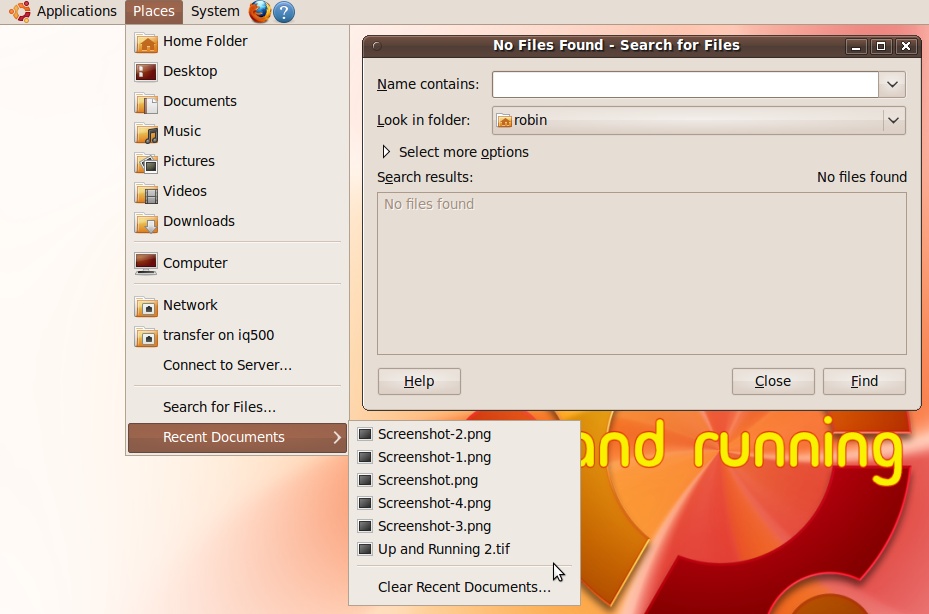
When searching for files you can tell Ubuntu where to look by clicking the “Look in folder” drop-down list and selecting the folders and/or computers or external drives to search.
If you wish to search for specific text within your files, click “Select more options” and you’ll be able to enter text to search for, and also narrow down results by date, file size, and several other specifiers.
The System menu (see Figure 4-15) has two groups of items.
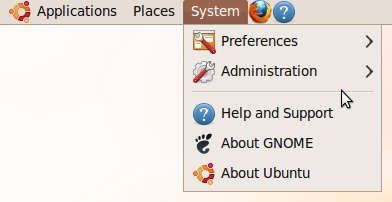
We’ll explore the first group in this section.
As you will recall from Chapter 3, the System → Preferences menu (see Figure 4-16) is the place to go when you need to change various settings in your Ubuntu configuration, ranging from the keyboard and display to power management, sound, and the applications to run automatically when the computer boots up.
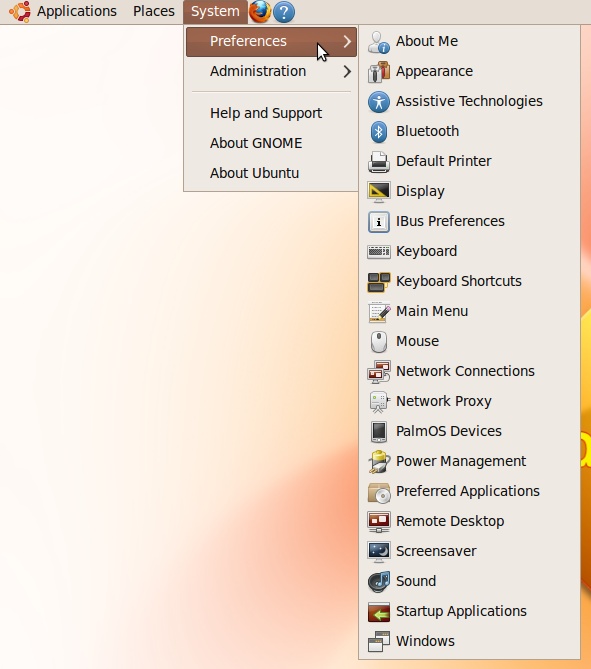
There’s plenty of information on customizing your computer in the rest of this chapter and throughout this book, so I won’t go into further details in this section.
The System → Administration menu (see Figure 4-17) is where you make more fundamental changes to your computer, such as installing hardware device drivers, setting up TV tuners or webcams, and installing new packages.
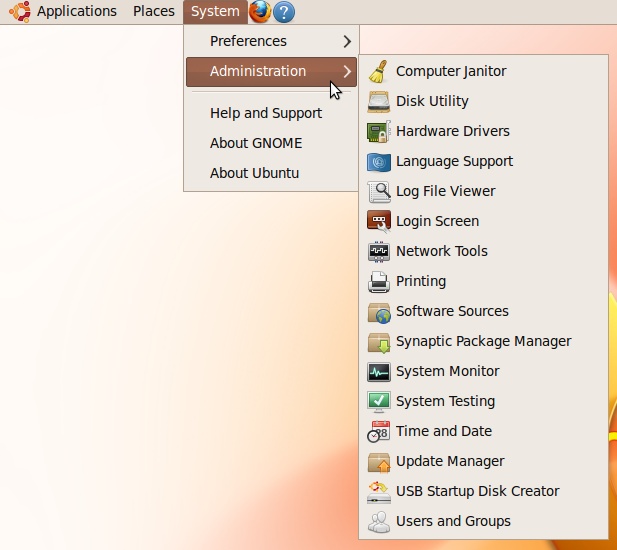
All of these operations and more are fully explained throughout this chapter and the rest of this book.
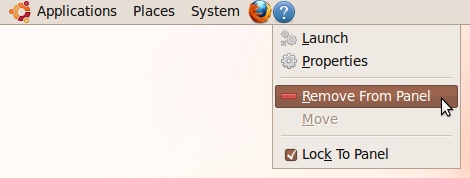
As you move your eyes past the menus at the top-left side of the GNOME screen, you’ll see icons to their immediate right. These are intended to represent some of the most frequently used programs and features. By default, the icons are likely to be for Firefox and Help, but you can remove any of them by right-clicking and selecting Remove from Panel (see Figure 4-18).
Likewise, you can add a program to the panel as an icon by right-clicking it from within the various menus and selecting “Add this launcher to panel” (see Figure 4-19). You can also add an icon to the desktop by selecting the second option, “Add this launcher to desktop.” Or by selecting “Entire menu,” you can add a complete menu and its suboptions to either the panel or the desktop.
Starting at the top-righthand corner and working from right to left, the very first icon is the Quit button, which will display your username (see Figure 4-20). When you click it, a menu will come up with various options, described next.
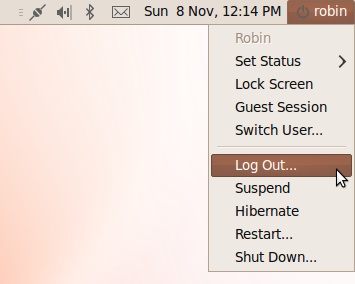
If you are logged into the Pidgin or Empathy messaging programs, the first thing you can do is set your user presence by selecting the Set Status submenu. You can then choose to set your presence status to any of the following:
- Available
I am available to be contacted.
- Away
I am not at my computer.
- Busy
I am busy; please don’t try to contact me.
- Invisible
You can’t see me; effectively, I’m not here.
- Offline
My computer is offline.
If you are not logged into either IM program, these options will be grayed out and unselectable.
This blanks out the screen, leaving only a password entry box, which is woken up only when a key is pressed or the mouse is moved (see Figure 4-21). To resume working on your computer, enter your password and click the Unlock button. Alternatively, you can use Switch User to log in as another user.
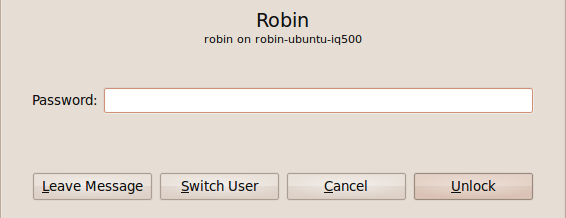
Other people can also leave you a message while you’re away with the Leave Message button. The Cancel button is there to darken the screen again without waiting for the blanking timeout delay. In Figure 4-21, you’ll see that the box reminds you which user you are on which computer. In this instance, I am user robin on the machine identified as robin-ubuntu-iq500.
This option lets you commence a guest session, which creates a new desktop with the user Guest logged in. Guest users have severely restricted permissions and are prevented from making any major changes. To exit from this session, click the icon again and select Log Out…. You will then be prompted for your password in order to resume using the account from which the Guest user desktop was called up.
This takes you back to the login screen shown earlier in Figure 4-1, where you can log in as another user or log back into your previous session.
This option logs you out of your current session and returns you to the login screen, where you can choose to log in again as another (or the same) user, reboot the computer, or turn it off. The difference between Switch User… and Log Out… is that the former keeps your programs open when returning to the Login screen, whereas the latter closes them all first.
With the Suspend option you can put the computer to sleep so that all processing is suspended until you reawaken it by pressing a key or by using the mouse. A word of caution here though, because Ubuntu has a known history of occasional problems with this feature, and sometimes, depending on your hardware, it may crash and won’t reawaken (or Resume) in a usable state. I recommend that you test it without any important programs open before deciding whether to use it in the future.
The Hibernate option goes a step further because it saves the current configuration to hard disk and then completely turns the computer off. This is the best method for saving electricity while being able to return to exactly where you left off the next time you turn the computer on. Again, testing is recommended before relying on this feature.
When you select this option, your computer starts a 60-second countdown timer in a window on the desktop, leading to the restarting of your computer. You can choose to click the Cancel button if you didn’t intend to restart your PC, or the Restart button to bypass the timer and restart immediately.
However, if other users are logged into the computer, another window will pop up requesting your password before allowing the restart to occur. You can either type in your password and click the Authenticate button to force a restart, or click the Cancel button to halt the process.
This option works identically to Restart, except that the computer is turned off and does not turn on again until you press its on button.
Starting with Ubuntu 10.04, the Quit menu has been divided in two, with all the status indicators now having their own Me Menu on the left and the current username shown next to a speech bubble as the heading/drop-down menu button. The Me Menu lists your username at the top, alongside a thumbnail image which you can personalize by clicking it. Underneath that is an input box where you can enter updates to Twitter, Facebook, and/or other similar sites once you have configured Ubuntu to access them. You can also directly enter any Chat or Broadcast accounts you have set up, or open Ubuntu One from here. To the right, all the user functions such as shutdown and restart are now selectable from the universal broken circle power button.
The remaining icons to the left of the Quit button will vary from computer to computer, but generally there will be some or all of the following.
Although it shows as text, as soon as you pass your mouse over it, you’ll see that the date and time display is actually part of a button that brings up a calendar when clicked, as shown in Figure 4-22.
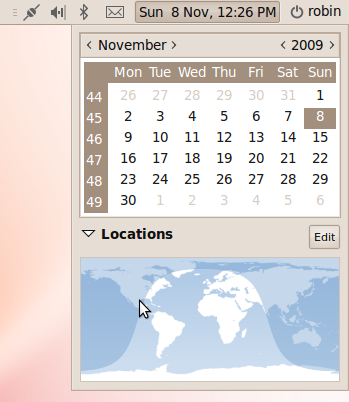
When you click any dates, the Evolution email groupware application is called up to help you manage appointments, tasks, and so on. If it’s the first time you’ve used it, you’ll be taken through a setup process before it opens.
If you just want to insert today’s date or time into a document, you can right-click the button and select either Copy Time or Copy Date.
Note
If the time and/or date is incorrect on your computer, you can fix it by selecting System → Administration → Time and Date. To change any settings, select “Click to make changes” and, after requesting your password, this will bring up a new window in which you can specify your local time zone and the time and date where you are.
The new mail icon (which looks like an unopened letter) is likely to be displayed immediately after installing Ubuntu because there is a friendly email from the Evolution email program developers waiting to be read. Once you have set up the program by providing your email account details, you’ll be able to view the welcome message, as well as your other emails.
Whether or not the sound volume icon is displayed seems to depend on your sound hardware. When it is visible, you can click it to slide the volume up and down, and right-clicking provides access to the Mute checkbox and the Sound Preferences window. If you did not hear an introductory tune when Ubuntu booted up and you have a working sound card, then most likely this checkbox will be selected, so look there first before investigating whether you have a hardware or driver issue.
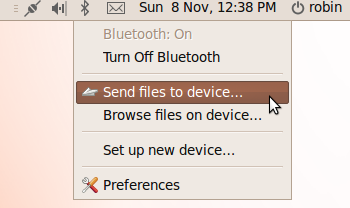
If your computer has Bluetooth capability, you may also see a Bluetooth icon. You can click it to bring up a menu with which you can turn it on and off, send files and browse devices, set up new devices, and change your Bluetooth preferences (see Figure 4-23). For this icon, both the left and right mouse buttons pull up the same menu.
This icon changes according to the network hardware you have:
If you don’t have a networking device, the icon will show a symbol similar to the one for a mobile phone’s connectivity, but with the four bars showing no signal, which indicates that there is no connection.
If you are using a WiFi card and it is working, the four ascending bars will show your signal level. If it’s unconnected, no signal level will be shown.
If you have a wired connection that is working, the icon will resemble two plugs connected to each other diagonally.
When you click the icon, a menu will open in which you can select the connections you require activated (see Figure 4-24). You can also configure VPN (Virtual Private Networking) from here, as well as connect to hidden wireless networks (those that do not broadcast their name) or create a new wireless network.

Right-clicking brings up a different menu with which you can turn all networking (or just wireless networking) on and off. You can also view information about your connection and edit your connection settings. See Chapter 3 for more on this icon.
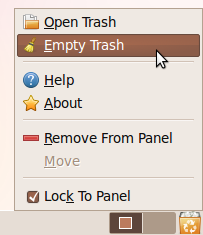
Down at the far right of your desktop, you’ll find a couple more icons, including the Trash, as shown in Figure 4-25.
Note
Users of non-American English will see this referred to using the word Wastebasket instead of Trash.
Whenever you wish to delete a file, just drag and drop it into the Trash and it will be deleted. But there’s a failsafe to prevent you from accidentally deleting files you didn’t mean to: erased files are stored in the Trash until you empty it by right-clicking the icon and selecting Empty Trash.
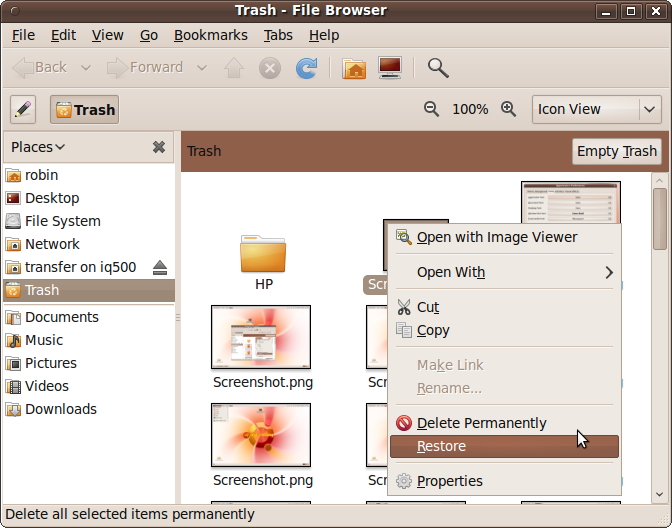
To restore or undelete a file, click the Trash icon and a window will open up displaying its contents (see Figure 4-26). You can then drag and drop the files shown to other places in the computer’s filesystem, or right-click any item for a list of further features, including options to permanently delete or restore a file. There is also an Empty Trash button in this window.
Using the workspace switcher, you can have multiple desktops (up to 36, in fact), each displaying different programs and windows. Each workspace is represented by an icon showing where the various windows are located within it. To switch between them, you can:
Click the icon representing the workspace you wish to access.
Use the keyboard shortcut alternatives of Ctrl-Alt-Left arrow to select the workspace to the left or Ctrl-Alt-Right arrow to select the one to the right. When you do this, a grid will appear in the center of the screen showing which workspace you are currently viewing, where the other ones are located relative to it, and the windows each one contains.
Place the mouse pointer over the workspace switcher and scroll the middle mouse wheel.
The icons on your desktop will remain where they are, but the open windows and programs will change.
There are also a number of ways you can move a window from one workspace to another. You can:
Right-click the title bar (or left-click the small dot at the far left of the title bar) and select Move to Workspace Right, Move to Workspace Left, or Move to Another Workspace. The former two will move the window one place to the left or right, whereas the latter opens up a submenu from which you can choose which workspace the window should be moved to.
Locate the miniature representation of the window to move within the workspace icons at the bottom right of the desktop, and then click and drag it to another workspace.
Select the window to move by clicking it or its title bar, and then press Ctrl-Alt-Shift-Left arrow to move it to the workspace on the left of the current one (if there is one) or Ctrl-Alt-Shift-Right arrow to move it to the workspace immediately to the right (if there is one).
Drag any window by its title bar to any workspace of your choice. (For this to work, you need to have a suitable Nvidia graphics card and the Nvidia proprietary drivers installed, as discussed in the section Display Preferences of Chapter 3.)
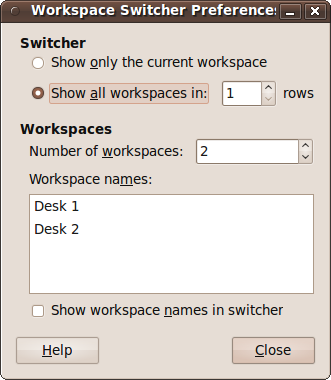
You can change the way your workspaces are laid out by right-clicking one of the workspace switcher icons in the bottom-righthand corner and selecting Preferences. A new Workspace Switcher Preferences window will then appear (see Figure 4-27). From here, you can effectively disable all additional workspaces by choosing to display only the current one, or change the number of rows and the total number of workspaces available.
If you choose to have more than one row of workspaces, you’ll also find that all the previous key presses mentioned are augmented with Up arrow and Down arrow shortcuts to move or select workspaces above and/or below the current one. For example, you’ll be able to move a window up by pressing Ctrl-Alt-Shift-Up arrow.
You can also give each workspace different names from the rather inexpressive defaults, such as Desk 1 and Desk 2, and can choose between displaying either the icons or the workspace names.
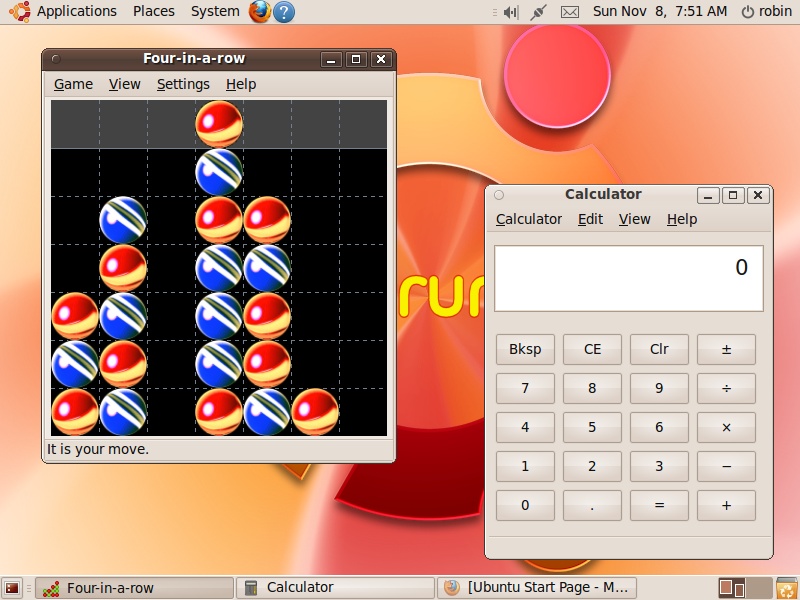
The bottom panel holds the previously discussed workspace switcher and Trash, as well as all the buttons for controlling the open programs and windows. Figure 4-28 shows three programs open (Four-in-a-Row, Calculator, and Firefox, which is minimized), with matching entries in the bottom panel, which I’ll call tabs for want of a better name.
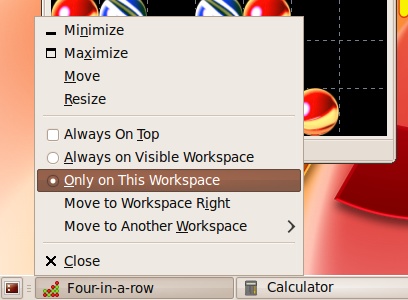
Clicking a program or a window’s tab toggles between displaying and hiding it. By right-clicking, you can call up a context menu with which you can move and resize the window, set its attributes, such as On Top status or Visibility, and move the window to another workspace (see Figure 4-29).
The final icon in this desktop roundup is in the bottom-left corner, looking like a miniature representation of a monitor showing a desktop. You can click this icon to hide or reveal all the windows on the desktop at once. Each time you click it, Ubuntu toggles the desktop between the two states. This is a great feature when you need to quickly remove all windows to access an icon on the desktop, and then restore the windows back to where they were in order to continue working with them.
Get Ubuntu: Up and Running now with the O’Reilly learning platform.
O’Reilly members experience books, live events, courses curated by job role, and more from O’Reilly and nearly 200 top publishers.

