Mapping One Image onto Another
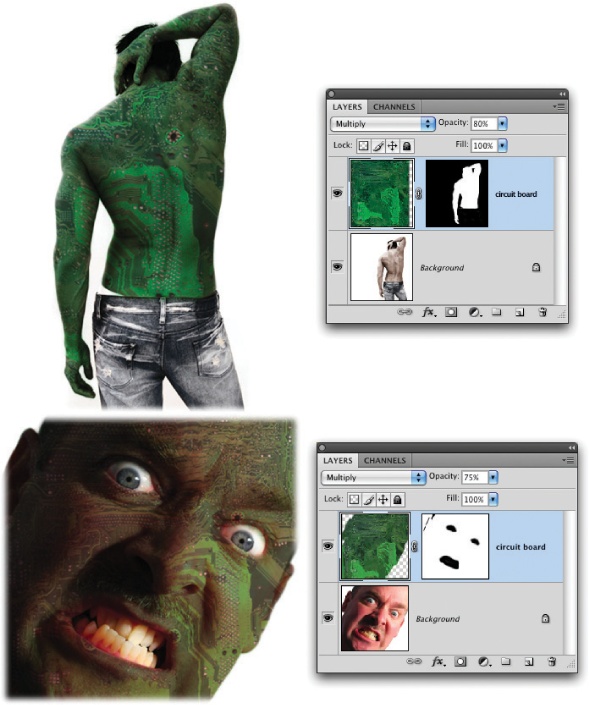
You can combine two images in an impressive way by wrapping one around the contours of another so the first image follows every nook and cranny of the second. To perform this feat, you need to create a displacement map—a grayscale image that Photoshop uses to warp and bend one image to the curvature of another. Trying this technique on photos of friends and family is great fun. For example, you can take a circuit board and wrap it around a body or a face, as shown in Figure 7-30.

Figure 7-30. With a displacement map, you can apply all kinds of wild textures to skin. Know anyone who needs to be turned into a reptile? I'll bet you do!
Note
Want to follow along with this tutorial? Visit this book's Missing CD page at www.missingmanuals.com/cds and download the practice file Map.zip.
Open the image you want to map another image onto (like a face) and hunt down the channel with the greatest contrast.
To make the best displacement map possible, you need to find the channel with the highest contrast. If you're in RGB mode (and you probably are), you can cycle through your channels by pressing ⌘-3, 4, and 5 (Ctrl+3, 4, and 5 on a PC). Because digital cameras have so many more green sensors than red or blue ones, you'll most likely pick the green channel.
Duplicate that channel and send it to a new document.
Open your Channels panel (The Channels Panel and You) by clicking ...
Get Photoshop CS5: The Missing Manual now with the O’Reilly learning platform.
O’Reilly members experience books, live events, courses curated by job role, and more from O’Reilly and nearly 200 top publishers.

