One of the most apreciated features of the modern word processor is its ability to corect embarassing misspellings. Pages can’t save you from choosing the wrong word—it still can’t tell a “heroine” from “heroin,” or “there” from “their” from “they’re”—but it can at least let you know when you’ve misspelled “appreciated,” “correct,” or “embarrassing.”
Make a spell check the last stop before considering any document finished. Even if you’re a spelling bee champ, typos eventually befall anyone who puts fingers to a keyboard. To catch these gaffes, Pages makes use of Mac OS X’s systemwide spell checker—tapping the same dictionary used by other Apple programs like Mail, Keynote, Numbers, TextEdit, iPhoto, and so on.
Unless you tell it otherwise, Pages quietly watches as you type and nudges you when it spots a problem. The moment that you type an unrecognized word, the program flags it with a red dashed underline and provides fast access to spelling suggestions—if you want them. This Check Spelling as You Type feature is turned on by default, but you can turn it on or off by choosing Edit → Spelling → “Check Spelling as You Type”. When the feature is on, Pages shows a check mark next to that menu item.
When Pages adds a red underline to a suspicious spelling, Control-click the word. A shortcut menu appears, topped with the spell checker’s guesses of correct spellings (Figure 4-4). Choose the word you’re after, and Pages makes the correction.
Note
You can also tell Pages to automatically replace unknown words with the suggested spelling as you type, without waiting for you to approve the suggestion. See Tracking Changes for details.
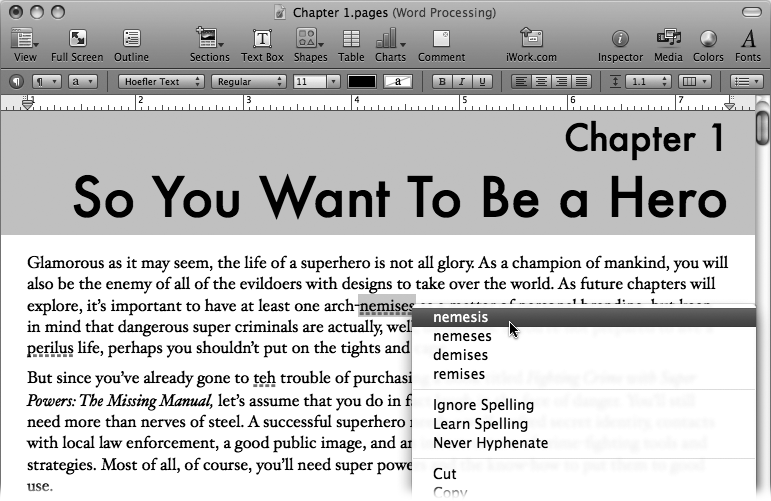
Figure 4-4. The easiest way to correct misspellings is to Control-click the underlined words. The top of the pop-up menu presents Pages’ best guesses of the correct spelling. Choose the one you want from the list, and Pages makes the substitution in your document. If the flagged word is actually correctly spelled—an unusual name, for example—choose Learn Spelling to add that word to the dictionary. If you don’t want to add the word to the dictionary, yet want to accept it as correctly spelled for this document only, choose Ignore Spelling and Pages refrains from flagging it as misspelled for the rest of the document.
Just because Pages flags a word doesn’t necessarily mean that it’s misspelled—only that the spell checker doesn’t recognize it. This is common, for example, with names, addresses, or specialized technical lingo not included in your Mac’s dictionary. (This also happens with foreign words, but that’s a special case—more on that in a moment.) You can teach the spell checker a new word by Control-clicking a red-underlined word and choosing Learn Spelling from the menu. The word is added to your Mac’s dictionary and will stop getting flagged—not only by Pages but every other program that uses the Mac OS X spell checker.
Another choice in the pop-up menu is Ignore Spelling. Choose this setting when you don’t want that word flagged in the current document, but you don’t want it added to the dictionary either. For example, when your “Flying for Beginners” chapter makes several mentions of the SonicWing Z-10 and JetGirl anti-gravity boots, you might choose Ignore Spelling for “SonicWing” and “JetGirl.” Pages will stay quiet about these brand names—as well as lowercase variations, “sonicwing” and “jetgirl”—for the rest of your editing session. New documents, however, will continue to catch those words as misspellings.
Note
Your Ignore Spelling commands last until you close the document. When you reopen the file later, Pages again flags your once-ignored words as unrecognized.
Once you’ve chosen to correct the word, Learn Spelling, or Ignore Spelling, Pages removes the red underline.
Whoops! You accidentally told the spell checker to learn the word, “superheroe,” and now none of your programs spot the misspelling. Control-click the word and choose Unlearn Spelling from the shortcut menu. Ah, the red underline is back. Pages and all the other programs that use the Mac OS X spell checker immediately start flagging the word as a misspelling again. (This maneuver works only for words that you’ve added yourself—Mac OS X won’t allow you to remove words from its standard dictionary.)
Tip
The “Unlearn Spelling” option was introduced in Mac OS X 10.5 “Leopard.” If you’re using Pages with version 10.4 (“Tiger”), you’ll find the option to unlearn, or “forget,” a word in the Spelling window (Edit → Spelling → Spelling). In the window’s text field, type the word you want your Mac to forget, and click the Forget button.
If red underlines derail your creative train of thought, you can turn them off. Choose Edit → Spelling → “Check Spelling as You Type” to remove the checkmark in front of that menu item. The red lines vanish and you can turn your attention back to your masterpiece. When you’re ready to ask for the spell checker’s help, you can ask it to take you through all the unknown words in your document one by one.
Place your insertion point where you’d like to begin spell checking—at the beginning of the document, for example—and press ⌘-; (semicolon) or choose Edit → Spelling → Check Spelling to tell Pages to highlight the first unrecognized word. Control-click the word to choose an alternative or tell Pages to learn or ignore the word. Press ⌘-; again to move on to the next misspelled word.
If all this Control-clicking is wearing you down, you can use the Spelling window to move through your document, showing you each unrecognized word and its suggested replacements simultaneously. Put your insertion point where you would like to start checking, and choose Edit → Spelling → Spelling (or press ⌘-:) to call up the Spelling window and highlight the next misspelled word. The Spelling window shows you the word and offers suggestions for changes, as shown in Figure 4-5.
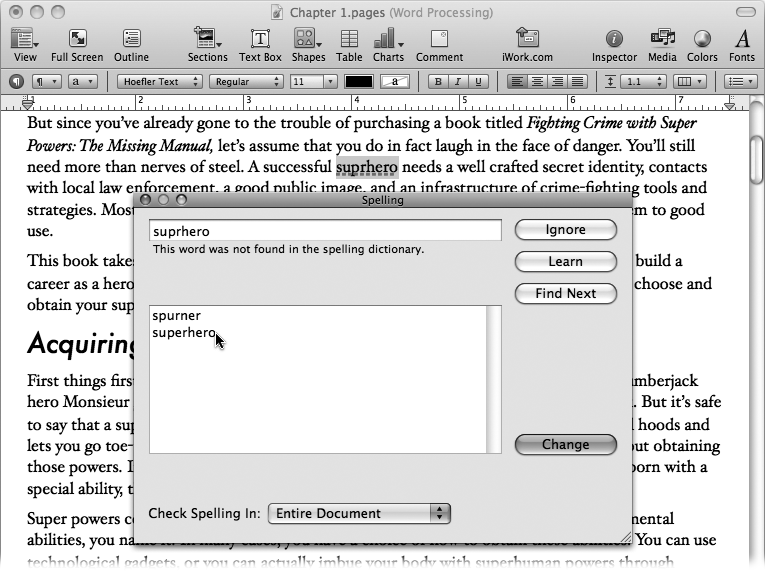
Figure 4-5. The Spelling window allows you to click your way through the misspelled words Pages has flagged, see its guesses, correct misspellings, teach the dictionary a new word, or skip to the next word. Pages highlights each unrecognized word in the document as you do this, so you can see the word’s context. The Check Spelling In pop-up menu determines whether Pages limits its spell check to the main body of the document, or broadens the search to include headers, footers, and footnotes.
Pages offers its recommendations with a list of suggested spellings. If you see the correct word, double-click it (or click once to select the word and then click Change)—Pages replaces it in the document and moves on to the next misspelling. The Ignore button skips this word for the rest of the document; the Learn button adds it to the dictionary. If you just want to skip over the word and move on to the next misspelling, click Find Next (or press ⌘-;).
If none of the displayed spelling alternatives is correct, or if none are provided, you can type the correct spelling yourself and click Change.
Your computer knows lots of languages and has a dictionary for each of them. Normally, the spell checker uses the dictionary that matches your Mac’s system language setting. (If you change that setting in System Preferences → International → Language, you also change the language for your menus and dialog boxes.)
But say that you write multilingual documents, or perhaps you’re known to sprinkle your prose with languages of the world to demonstrate your cosmopolitan credentials. When Pages spell-checks your document, it doesn’t find those foreign-language words in your standard dictionary and incorrectly marks them as misspelled. Your chapter on global crime fighting is flummoxed by the mere mention of Frau Fantastische or Monsieur Magnifique. Quelle horreur!
You can sidestep this international crisis by telling Pages exactly what language you’re using for certain words, paragraphs, or even the whole document. Use the Text Inspector’s More tab for this, as shown in Figure 4-6. Now the dictionary for the selected foreign language governs spell checking for the specified portion of the document, while the rest of the document uses the standard language dictionary.
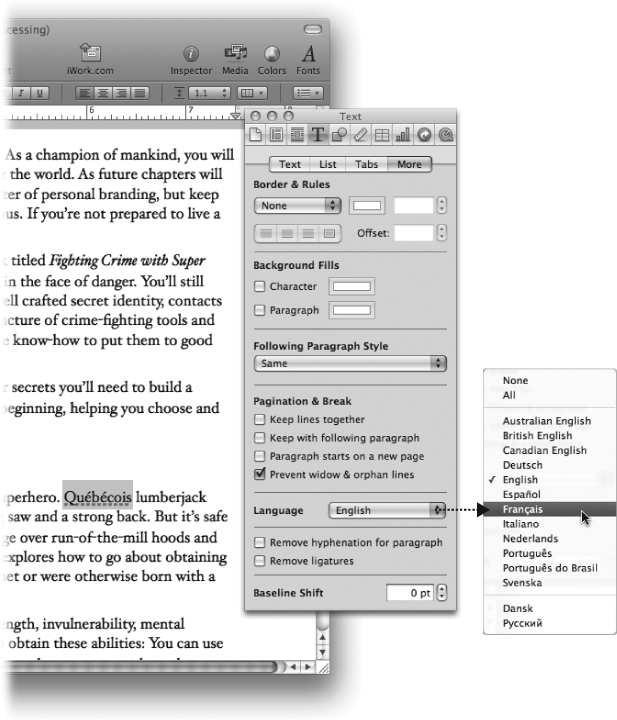
Figure 4-6. The Language setting, in the Text Inspector → More pane, lets you tell Pages what language you’re using for specific passages of your text. Highlight the text and choose the appropriate language from the Language pop-up menu.
If your entire document is in a different language than your standard dictionary, one approach is to use Select All (⌘-A) to highlight all your text and then choose the new language in the Text Inspector. This is OK for a quick fix, but as you continue working with your text, you might discover that the Language setting slips back into the standard language for new paragraphs or when you apply a style. That’s because the language setting is actually cooked into the document’s paragraph and character styles. For a more permanent solution, you should instead update the document’s styles to use your preferred language by going through each style in the Styles drawer and updating its Language setting in the Text Inspector. For more on this, see Style Overrides.
Note
If you frequently write documents in this second language, you might find it useful to save your restyled document as a template: Choose File → Save as Template, and Pages prompts you to save the file in your My Templates folder. Choose a name (“Fichier français,” perhaps) and click Save. From now on, you’ll find your new template in the Template Chooser in the My Templates category. For more on saving custom templates, see Chapter 10 (Template-Building Basics).
Get iWork '09: The Missing Manual now with the O’Reilly learning platform.
O’Reilly members experience books, live events, courses curated by job role, and more from O’Reilly and nearly 200 top publishers.

