GREP by Example
It may be easiest to see how GREP works with a few examples. But first a quick comparison with InDesign’s Text search, which is useful because the comparison reveals GREP’s strength.
InDesign’s text search is used mainly for searching literal text: when you search for cats, you find just that (disregarding settings such as case-sensitivity and whole-word only). But in the Text tab you can use some wildcards: ^9 finds any digit, ^$ stands for any letter, ^? matches any character, and ^w is used to find any whitespace. Thus with Figure^w^9 you search for the literal text Figure followed by any space, followed by a digit. When you use any of these wildcards, you’re no longer looking for literal text, but for a pattern. The four wildcards in the Text tab are useful, though rather limited—for instance, you can’t use them for replacements, only for searching.
In contrast, with GREP you mainly look for patterns. For example, you can look for series of digits rather than for a single digit. Figure\d+ matches the literal text Figure followed by any number (2, 34, 121, etc.): \d stands for digit, the plus sign means “at least one.” The GREP expression \u\l+ finds an uppercase letter \u followed by one or more lowercase letters \l+. GREP also deals with simple alternation. For example, to find both centre and center, search for cent(re|er); alternatives are separated by pipe symbols (|). Optionality adds more flexibility: to find both the singular and plural forms of these alternatives, search for cent(re|er)s?. The question mark says that the s should be matched if present, otherwise not. This simple GREP, then, finds centre, centres, center, and centers.
More flexibility is offered by so-called character classes. For instance, p[aeiouy]t matches p followed by one vowel, followed by t, so you’ll find pat, pet, pit, pot, and put (though you’ll find pyt in python and pat in spat as well; we’ll see later how to do whole-word-only searches). This example also demonstrates how you can define your own wildcards: here we defined a wildcard “vowel” by enclosing all vowels in brackets: [aeiouy]. Other homemade wildcards could be “ascender letter” [bdfhkl] and “descender letter” [gjpqy].
GREP expressions can be used to style text patterns. For instance, to apply a character style “smallcaps” to any sequence of two or more capitals, enter \u\u+ in the Find What field, leave the Change To field empty, and specify the style in the Change Format field. Again, \u is the wildcard for uppercase letters, and the plus stands for “one or more,” so \u\u+ matches strings of at least two capital letters.
To demonstrate replacement with wildcards, let’s return to the Figure example. To replace the word Figure with Map when it is used to refer to an illustration—that is, when it is followed by a digit—search for Figure (\d) and replace with Map $1. \d matches any digit, and the parentheses surrounding \d indicate that the contents of the parenthetical should be captured. The string $1 in the replacement string corresponds with what was captured in the search string, so that Figure 1 is replaced with Map 1, Figure 2 with Map 2, etc.
As a last example, and to show that simple expressions can achieve a great deal, we’ll take this seemingly difficult task: you have an address list that contains, among other things, an email address for each person. Your task is to add the word Email: before each email address. Let us assume for the moment that @ is used for nothing else, so that any line that contains the @ symbol is an email address. What we need now is two expressions that combine to say “If a line contains an @, add Email: at the beginning.” The required expressions are shown in Figure 1. The expression used here to find the beginning of a paragraph that contains an @ is indeed as simple as ^(.+@). To insert Email: at the beginning, simply use it as the replacement text followed by $1, which stands for whatever was captured by the part of the search expression in parentheses, which is in each case the text from the paragraph start up to and including the @. You can see this in the highlighted part in the document in Figure 1. The figure shows that we’ve done the first address and are about to change the second one. We’ll not go into the details right now; the rest of the Short Cut will make clear what happens here (briefly, ^ stands for “beginning of paragraph,” and .+@ says “one or more (+) of any character (.) up to an @”). As I said, the details will become clear later in the Short Cut; the point of the example is to show that short and simple expressions can achieve a lot.
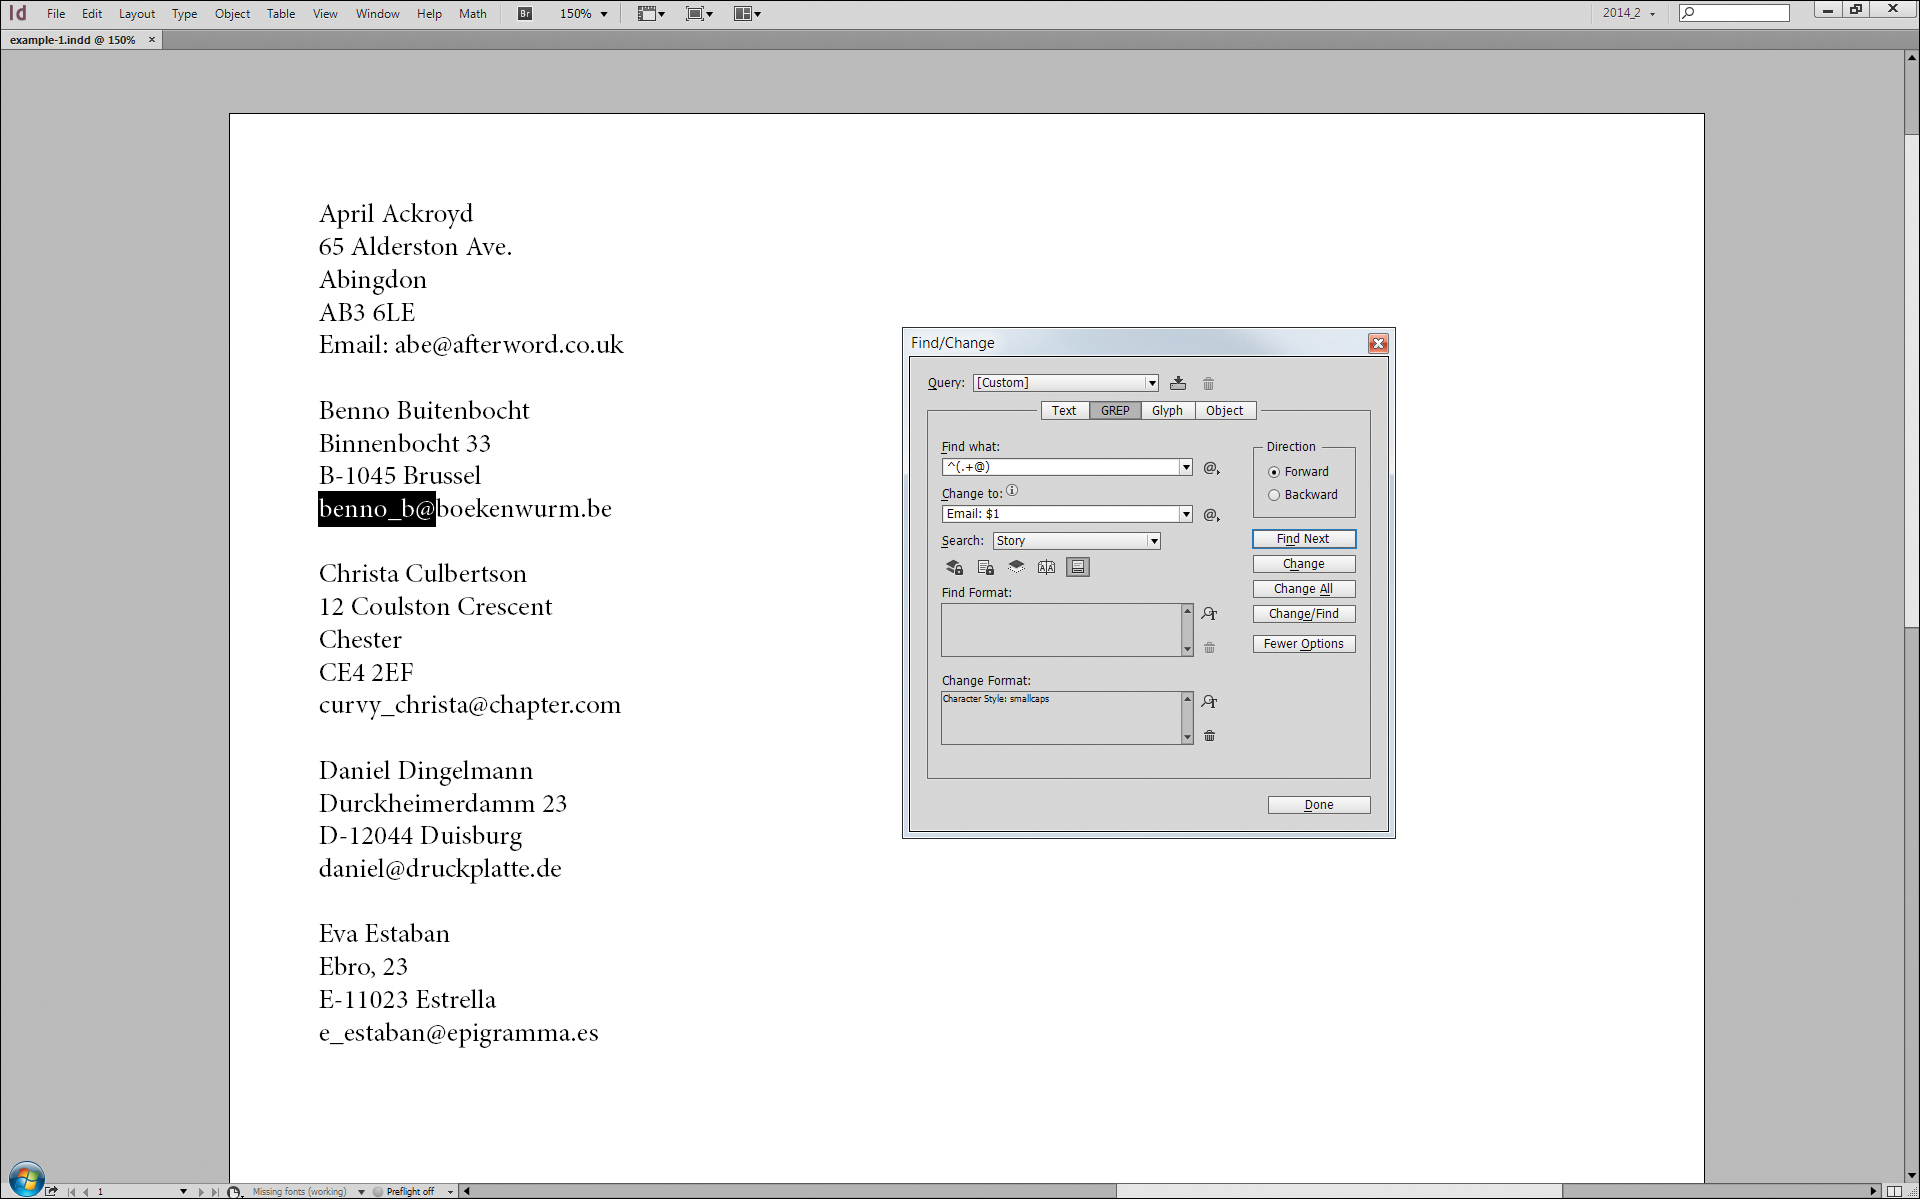
Figure 1. Adding text to a paragraph depending on its contents
Get GREP in InDesign now with the O’Reilly learning platform.
O’Reilly members experience books, live events, courses curated by job role, and more from O’Reilly and nearly 200 top publishers.

