Download the file rolling_ball.fla and save it on your computer. Launch Flash, and then choose File →Open (the Welcome screen goes away automatically). When the Open dialog box appears, navigate to the file you just downloaded and then click Open. Flash shows you the animation on the Stage, surrounded by the usual Timeline, toolbars, panels, and (at the bottom) the Property Inspector. It should look like Figure 1-19. (To run the example animation, either press Enter or select Control → Play.)
Note
If you don't see the Property Inspector, you can display it by selecting Window →Properties →Properties or by typing Ctrl+F3.
The Property Inspector appears automatically beneath the Stage when you open a new document. As shown in Figure 1-19, it displays specific information about whatever object you've selected on the Stage. Such details can be helpful when you want to recreate an object precisely in another program, or incorporate your finished animation into a Web page you've already created. For example, the Size button shows your animation's dimensions (550 x 200 pixels, say) which is information you need if you want to place your animation in a Web page by hand. (In Chapter 14, you'll learn how to tell Flash to create a simple Web page that includes your animation so you don't have to do this work by hand.)
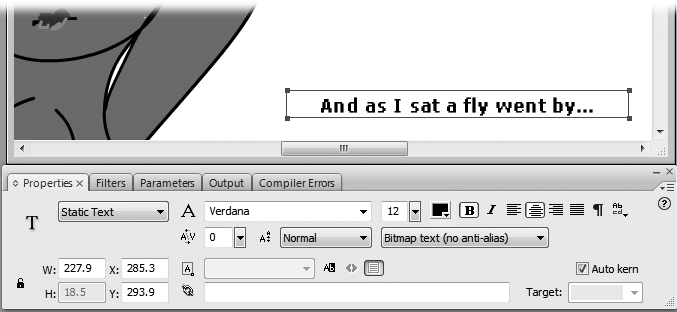
Figure 1-19. Select an object on the Stage, and the Property Inspector automatically displays the properties (characteristics) of that object. You can change most of the properties in this panel; when you do, Flash redisplays the object on the Stage to reflect your changes. Here, looking at the details for a text box, you can change the text to centered or justified, or change the font or font color used.
To see how it works, click the letter "F" in the rolling _ball.fla example animation. On the Property Inspector, you'll see the following:
Height and width. The pixel dimensions of this "F" are 10.4 wide x 13.0 high.
Color. The color of this letter is black.
Note
If you don't see dimensions in the Properties panel, try double-clicking on the tab. The dimensions boxes will appear beneath the other properties.
By typing in new values or changing a setting, you can edit the selected object. To see the Property Inspector in action, you'll use it to resize the Stage itself, described next.
In addition to just inspecting the properties of a selected object, you can also edit those properties using the Property Inspector. In Flash, the size of your Stage is the actual finished size of your animation, so setting its exact dimensions is one of the first things you do when you create an animation, as you'll see in the next chapter. But you can resize the Stage at any time.
Here's how to change the size of your Stage:
Click the Selection tool and then click on a blank area of the Stage (to make sure nothing on the Stage is selected).
Alternatively, you can click the Selection tool and then chose Edit → Deselect All.
In the Property Inspector, click the Size button.
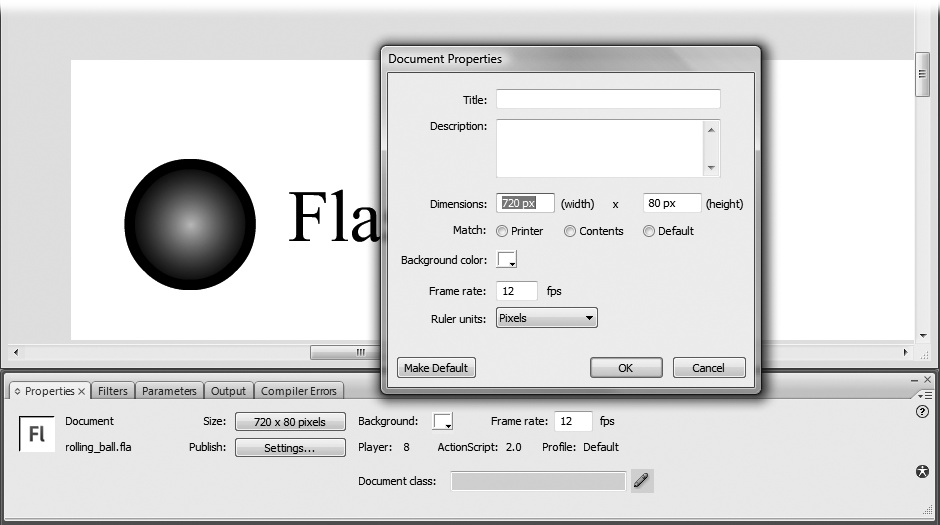
The Document Properties window appears. Around the middle of the window are boxes labeled Dimensions. That's where you're going to work your magic.
Click in the width box (which currently reads 800 px) and type 720 px. Click in the height box and change it from 600 px to 80 px. Click OK when you're done.
Flash accepts the new dimensions and resizes your Stage, as shown in Figure 1-20.
Tip
If you resize the Stage so big that you can't see the entire thing, check out the scrollbars Flash puts at the bottom and the right side of your work area. You can use them to scroll around and see everything.
Figure 1-20. Because the Stage is your canvas, you'll want to change its size and shape depending on how you want your finished animation to look. For an across-the-top-of-a-Web-page banner ad, for example, you'll want a long, skinny stage–somewhere around 720 x 80 as shown here, depending on the size of your target screen. Any modification you make to the size of the Stage immediately changes the dimensions of the Stage itself as it appears in your workspace.
Sometime in your Flash career, you'll draw a picture so enormous you can't see it all on the Stage. The scroll bars let you move around a big Stage, but they can't help you get a full overview. Next, you'll learn how to use the Zoom tools to pull back your view and see the entire animation at once. You can find these tools in the View section of the Tools panel. They let you zoom in, zoom out, and pan around the stage. You can even get in so close, you can modify your drawing pixel by pixel.
Here's how the Zoom tools work:
Click the Zoom tool (the little magnifying glass) in the View section of the Tools panel.
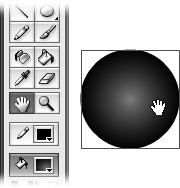
The Tools panel usually sits at the left side of your screen (but you're free to move it, as described on Panels). As you can see in Figure 1-21, when you click the Zoom tool, the Options section at the bottom of the panel changes to show only zoom-related buttons.
Move your cursor, which now looks like a magnifying glass with a plus sign on it, to the area on the Stage that you want to zoom in on and then click.
Flash enlarges the Stage and everything on it. The area where you clicked stays in full view.
Click the Hand tool.
Your cursor turns into a little hand.
Click anywhere on the Stage and drag your cursor around.
Flash moves the Stage beneath your cursor so you can get a better look at whatever section of your bigger-than-life drawing you're most interested in.
Now that you've seen how to work on an animation while it's standing still, it's time for some action. After all, an animation by definition must move. Using the Controller toolbar, which you display by choosing Window →Toolbars →Controller (see the box on Playing an Animation), you can play, pause, and rewind, much like a videotape or DVD. When you click Play on the Controller, your animation plays once through from beginning to end.
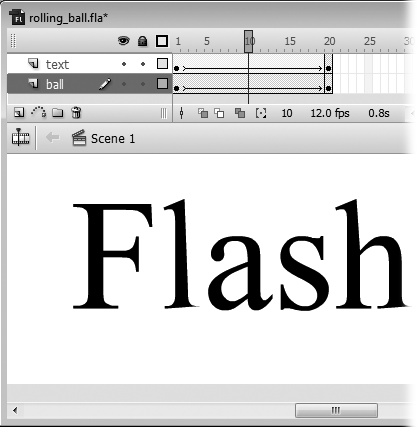
For finer control, you can use the Timeline's playhead to click through your animation frame by frame, like the slideshows of yore. Playhead is nothing more than a fancy term for currently selected frame. Click a frame, and Flash displays the red playhead rectangle to show that you've successfully selected that frame (see Figure 1-22). If you select Control →Play to run your animation, your animation plays on the Stage, beginning with the selected frame.
Saving your work frequently in Flash is a good idea. You might think you'll remember how to recreate a particularly great drawing or animated sequence if the unthinkable happens and your computer crashes, but why take the chance? You've got better things to do with your time.
Figure 1-22. You select a frame (specify a playhead position) the same way you select everything else in Flash: by clicking. In this example, the currently selected frame (playhead position) is the tenth frame. You can watch the playhead move from frame to frame by selecting Control → Play. Dragging the playhead back and forth (called scrubbing) is an even quicker way to test portions of your animation–and a fun way, too: dragging the playhead from right to left displays your frames in reverse order.
The minute you finish a sizable chunk of work, save your Flash file by following these steps:
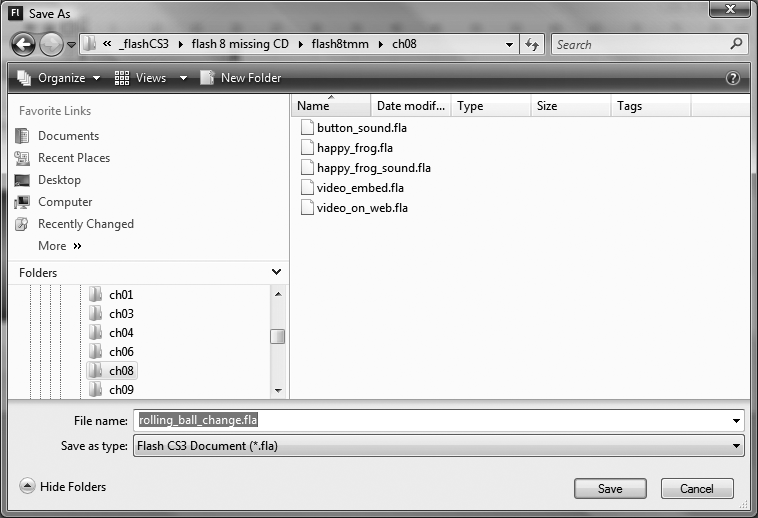
Select File → Save As.
The Save As window appears (Figure 1-23). Choosing Save As (instead of Save) lets you create a new version of the file rather than overwriting the old one. Saving a new version of a file is always a good idea when you're experimenting, since some experiments invariably end up not working and you want to drop back to the previous working version of your file.
From the Save In pop-up menu, choose the file folder where you want Flash to save your file.
If you like, you can skip this step. If you do—and you're running Windows— Flash assumes you want it to save your file in the My Documents folder. If you're running Mac, Flash assumes you want it to save your file in the Home → Documents folder.
In the File Name box, type a unique name for this file.
A short, descriptive name that helps you easily identify the file later like rolling_ ball_changes) is your best choice. Make sure you either include the standard Flash file extension (.fla) or don't type any extension at all, as shown in Figure 1-23.
Click Save.
Flash saves your file using the location and file name you specified.
Get Flash CS3: The Missing Manual now with the O’Reilly learning platform.
O’Reilly members experience books, live events, courses curated by job role, and more from O’Reilly and nearly 200 top publishers.
