Saving a Texture Library
You will want to create an organized and easy-to-access library for your texture images (Fig. 7.12). Save your materials and textures in a single folder location. Create any additional folder subcategories organized by material type—for example, folders for concrete, fabrics, carpets, wood, ceramic, etc. (Fig. 7.13). Of the many steps in the rendering process, this might be one of the most important. Having an organized and plentiful Texture Library makes the rendering process considerably easier.
Fig. 7.12: A flowchart indicating the main folder and subfolders of a Texture Library
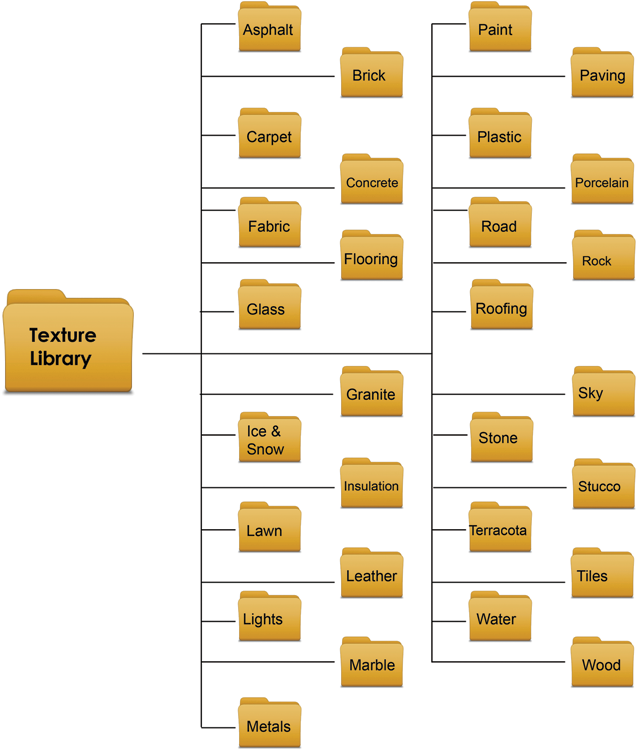
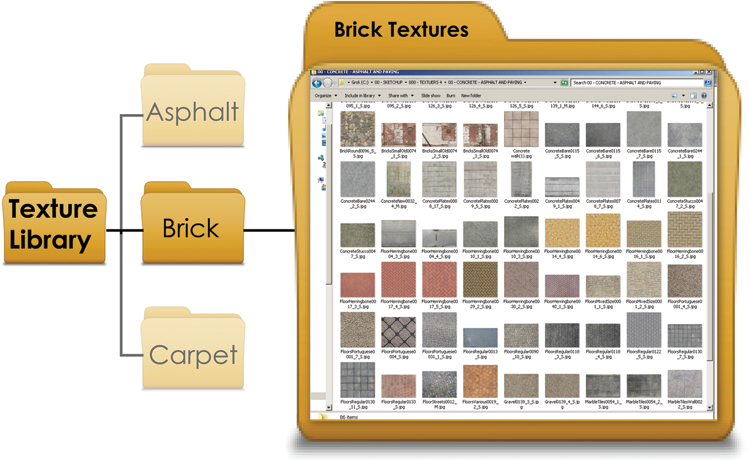
Fig. 7.13: An expanded flowchart showing brick texture images located in the Brick subfolder located in the Texture Library
Save the Material Library in an easily accessible location. You will be linking the Material Library to SketchUp’s Paint Bucket tool; see below.
One of the most effective ways to build a Texture Library is on a project-by-project basis. Different models and projects will require different materials. The average model uses between 10 and 20 textures. After three or four renderings, your library could exceed 100 images. Before long, you will be reusing textures from the library, knowing which ones work best for a given model.
The bottom line is, download ...
Get Rendering in SketchUp: From Modeling to Presentation for Architecture, Landscape Architecture and Interior Design now with the O’Reilly learning platform.
O’Reilly members experience books, live events, courses curated by job role, and more from O’Reilly and nearly 200 top publishers.

