Creating a Web Form
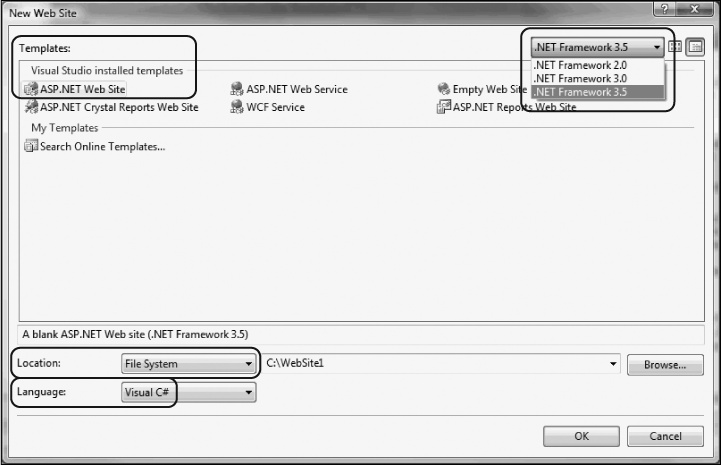
To create the simple Web Form that we will use in the next example, start up Visual Studio .NET and select File → New Web Site. In the New Web Site dialog, choose ASP.NET Web Site from the templates, File System for the location (you can also create web sites remotely using HTTP or FTP), and Visual C# as your language. Give your web site a location and a name and choose your .NET Framework, as shown in Figure 17-1.

Figure 17-1. Creating your new web application
Visual Studio creates a folder named ProgrammingCSharpWeb in the directory you've indicated, and within that directory it creates your Default.aspx page (for the user interface), Default.aspx.cs file (for your code), web.config file (for web site configuration settings), and an App_Data directory (currently empty but often used to hold .mdb files or other data-specific files).
Tip
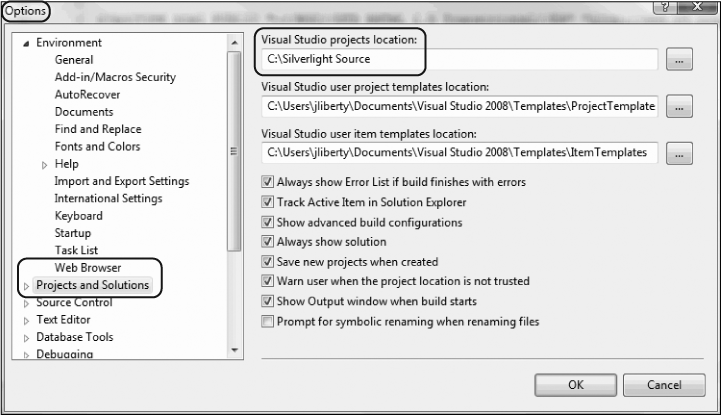
Although Visual Studio no longer uses projects for web applications, it does keep solution files to allow you to quickly return to a web site or desktop application you've been developing. The solution files are kept in a directory you can designate through the Tools → Options window, as shown in Figure 17-2.

Figure 17-2. Project location options
Code-Behind Files
Let's take a closer look at the .aspx and code-behind files that Visual Studio ...
Get Programming C# 3.0, 5th Edition now with the O’Reilly learning platform.
O’Reilly members experience books, live events, courses curated by job role, and more from O’Reilly and nearly 200 top publishers.

