Special Effects
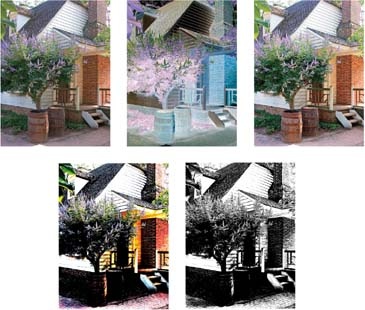
Elements gives you some other useful ways of drastically changing the look of your image. You can apply these effects as Adjustment layers (Layer → New Adjustment Layer) or by going to Filter → Adjustments (there's much more about filters on Section 11.10). Either way gives you the same options for their settings. You can see them in action in Figure 9-25.
In most cases, you use these adjustments as steps along the way in a more complex treatment of your photo, but they're effective by themselves, too. Here's what each does:
Invert makes your photo look like a negative. It's so useful in doing artistic effects that you can also invert any time in the Editor just by pressing Ctrl+I.
Note
If you think choosing the Invert option sounds like a great way to get your negatives scanned in with a basic flatbed scanner and turned to positive images, sorry, but you need to think again.
Color negatives have an orange mask on them that Elements can't easily undo. You're best off with a dedicated film scanner that's designed to cope with negatives, or at least with a scanner that has software designed to deal with the mask.

Figure 9-25. You can get some interesting special effects with the Adjustment commands, whether you apply them as filters or as Adjustment layers. If you want to use them as filters, it's not a bad idea to start with a duplicate layer. Top row (left to right): The ...
Get Photoshop Elements 4: The Missing Manual now with the O’Reilly learning platform.
O’Reilly members experience books, live events, courses curated by job role, and more from O’Reilly and nearly 200 top publishers.

