Making Selections and Masks with Paths
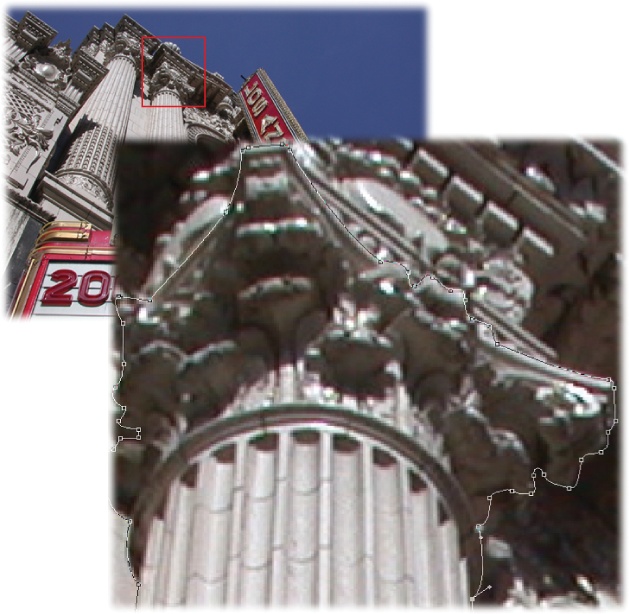
As you learned in Chapter 4, Photoshop is loaded with selection tools. However, when you're trying to select something really detailed, like the column section shown in Figure 13-23, none of the regular selection tools can help. That's because the shape is complex and there's very little contrast between the area being selected and the surrounding pixels.
Luckily, you can use the Pen tool to draw a path that follows the contours of any shape you want to select (Figure 13-23, bottom), no matter how intricate it is. The beauty of this method is that the Pen tool is so forgiving—if you don't get it right the first time, you can edit the path. When you've got the path in place, you can load it as a selection and proceed merrily on your way, doing whatever you want with the selected object.

Figure 13-23. The lack of contrast in this image makes it nearly impossible to select just part of the façade (top). But with the Pen tool, you can draw a path around the section you want by hand (bottom).
To load a path as a selection, first create the path with the Pen tool and then choose one of these methods:
Choose Make Selection from the Paths panel's menu. This summons the dialog box shown in Figure 13-24, where you can adjust settings like the selection's feather amount and whether you want Photoshop to apply anti-aliasing. In the Operation section, you can ...
Get Photoshop CS5: The Missing Manual now with the O’Reilly learning platform.
O’Reilly members experience books, live events, courses curated by job role, and more from O’Reilly and nearly 200 top publishers.

