Whitening Teeth
If you've ever enjoyed a big cup of coffee or a Texas-sized glass of red wine and then had your picture taken, you'll want to bookmark this page. Stained teeth are even more embarrassing than shiny spots, but they're easy to fix (see Figure 10-8). The hardest part of whitening teeth is selecting the little buggers in the first place, but that step got easier when Adobe added the Quick Selection tool back in CS3.
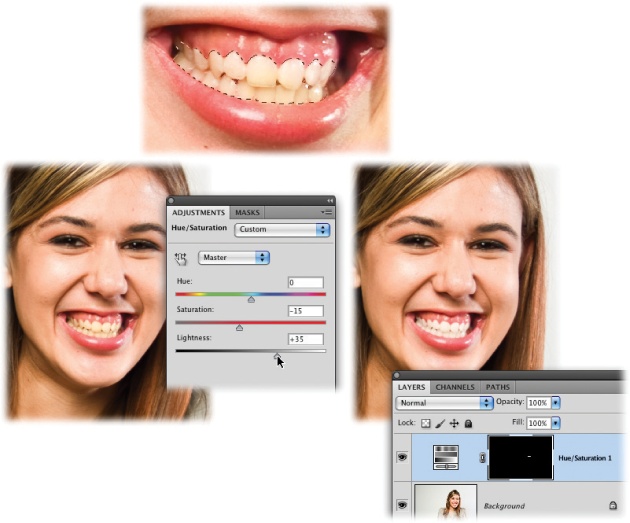
Figure 10-8. Once you select the teeth (top), you can fix them with a Hue/Saturation Adjustment layer (bottom left). That way, the fixing happens on its own layer so you're not harming the original image (bottom right).
Here's how to make those pearly whites, well, white:
Open your image and zoom in so you can see the teeth.
Press ⌘ and the + key (Ctrl and the + key on a PC) to zoom in on your document. Press ⌘ (Ctrl) and the – key to zoom out.
Open a duplicate of your image and leave it at close to actual size.
Choose Window→Arrange→"New window for [your document's name]". Since it's so doggone easy to over-whiten teeth, it's helpful to keep an eye on a copy of the same image at roughly the size you plan to print it. The cool part is that Photoshop reflects what you do in one window in the other window—in real time—because it's the same document. This duplicate-window trick helps you see what kind of effect your changes have at actual size.
It's good to get into ...
Get Photoshop CS5: The Missing Manual now with the O’Reilly learning platform.
O’Reilly members experience books, live events, courses curated by job role, and more from O’Reilly and nearly 200 top publishers.

