Making Colors Pop
Once you've corrected your image's color and lighting, you can have some serious fun by boosting or intensifying its colors. You've already learned how to do that in Camera Raw with the Clarity, Vibrance, and Saturation adjustments. In Photoshop, you can adjust two out of those three—sadly, there's no Clarity adjustment…yet!
Intensifying Colors
You can easily use a Vibrance Adjustment layer to intensify your image's colors. This kind of layer has less of an effect on intense colors (because they're already highly saturated) than on lighter tones—yet it manages to leave skin tones relatively unchanged. You can also use a Vibrance Adjustment layer to tweak your image's saturation (it includes a regular ol' Saturation slider), but when you do, Photoshop applies the change evenly to the whole image no matter how intense the colors are and with no regard for skin tones. So if you've got people in your picture, you're better off increasing the Adjustment layer's Vibrance slider and leaving the Saturation slider alone. Figure 9-28 has the scoop.
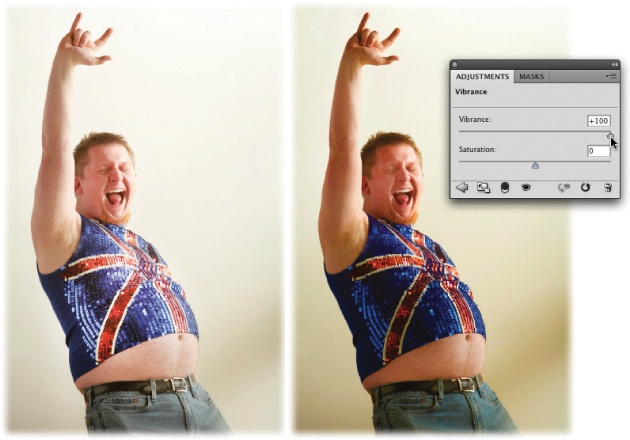
Figure 9-28. To create a Vibrance Adjustment layer, click its button in the Adjustments panel (it looks like V-shaped triangle) or click the half-black/half-white circle at the bottom of the Layers panel and choose Vibrance. Unlike a regular saturation adjustment, a Vibrance Adjustment layer won't completely destroy skin tones, even ...
Get Photoshop CS5: The Missing Manual now with the O’Reilly learning platform.
O’Reilly members experience books, live events, courses curated by job role, and more from O’Reilly and nearly 200 top publishers.

