Chapter 4. Branches
[ 4 ]
Branches
|
In the last chapter, you learned about the process of making a commit and you made your first commit in the rainbow repository. In this chapter, you’ll learn what branches are and why we use them. You will continue making commits in the rainbow repository and see how this affects the branches in your project. Finally, you will make a new branch and learn how to switch (or change) onto it. In addition, in the process of making more commits in the rainbow repository you will learn about the concept of unmodified and modified files and how commits are linked to one another. |
State of the Local Repository
In Chapter 2, we built a Git Diagram with the four important areas of Git: the working directory, the staging area, the commit history, and the local repository. Visualize it 4-1 uses the Git Diagram to show the state of the rainbow repository at the start of this chapter.
|
[ Visualize it 4-1 ] |
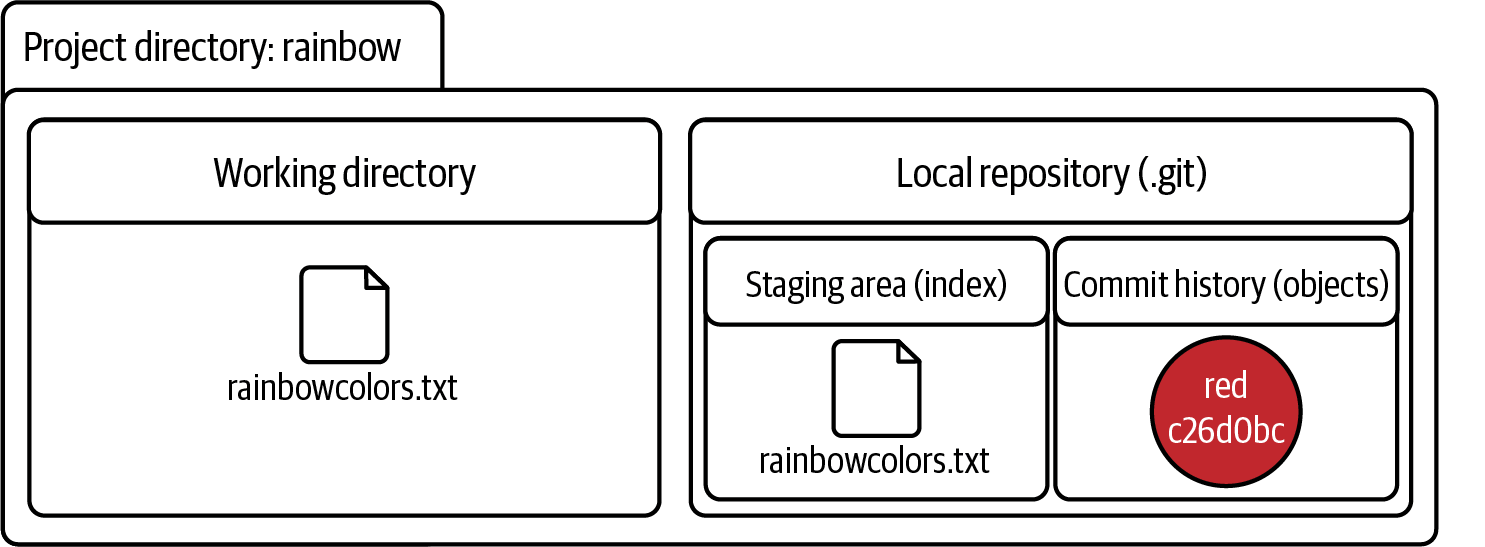
|
The Git Diagram showing the state of the rainbow repository at the start of Chapter 4, with one commit, the red commit |
|
[ Note ] From this point forward, the Visualize It diagrams will only display the name of the color in the commit, or an abbreviation of the name. I will no longer include the first seven characters of the commit hash. |
To focus on the commit history, I’m now going to introduce a new diagram ...
Get Learning Git now with the O’Reilly learning platform.
O’Reilly members experience books, live events, courses curated by job role, and more from O’Reilly and nearly 200 top publishers.

