Connecting to the Arduino
While the original Arduino board used RS-232 serial to connect to the development machine, more recent models use USB. We therefore need an adaptor to translate from RS-232 serial used by the Redpark cable to the TTL serial that we can easily connect to the Arduino transmit/receive (TX/RX) pins (pin 1 and 0, respectively).
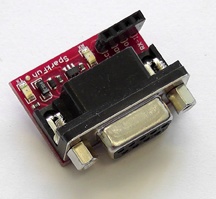
To do this conversion I’m using the SparkFun RS-232 Shifter (see Figure 2-4; http://www.sparkfun.com/products/449; $13.95), although any equivalent unit would suffice. For instance, the Maker Shed carries the equally effective but slightly cheaper ($7) P4 Adapter Kit.

Figure 2-4. The SparkFun RS-232 Shifter SMD (sku: PRT-00449)
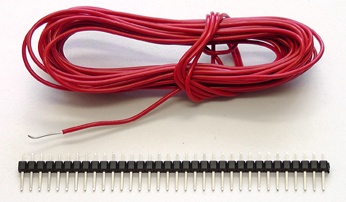
As you can see from Figure 2-4, the TTL end has four wires: RX, TX, GND, and VCC (5V). The easiest way to connect this to our Arduino is to solder some snapable header pins to four lengths of single core wire (see Figure 2-5) and build a custom jumper cable (see Figure 2-6). You can, of course, just make use of premade jumper cables; the Maker Shed, for instance, sells a set of Breadboard Jumper Wires that you could use instead of soldering up your own cable.

Figure 2-5. Single core wire (top) and snapable header pins (bottom)
Figure 2-6. The completed jumper cable
Once you have bought or built your jumper cable, connect ...
Get iOS Sensor Apps with Arduino now with the O’Reilly learning platform.
O’Reilly members experience books, live events, courses curated by job role, and more from O’Reilly and nearly 200 top publishers.

