Chapter 5
Orthographic Views
5-1 Introduction
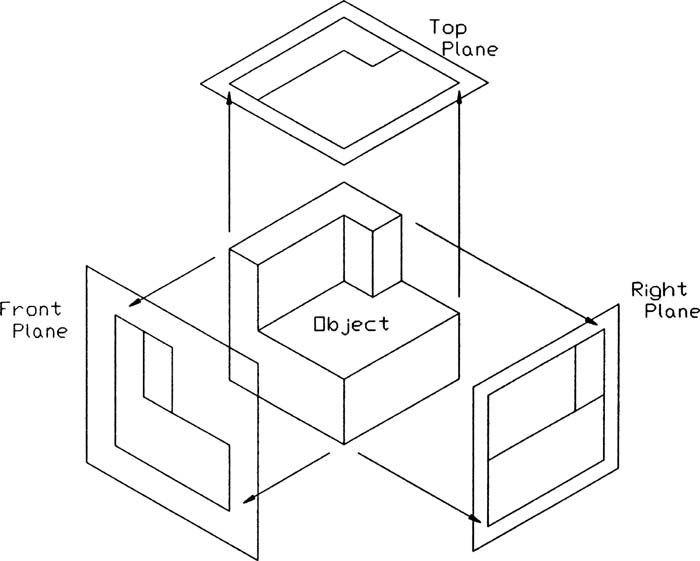
This chapter introduces orthographic views. An orthographic view is a two-dimensional view of a three-dimensional object. Orthographic views are created by projecting a view of an object onto a plane which is usually positioned so that it is parallel to one of the planes of the object (Figure 5-1).

Figure 5-1
You can position orthographic projection planes at any angle relative to an object, but in general, the six views parallel to the six sides of a rectangular object are used (Figure 5-2). Technical drawings usually include only the front, top, and right-side orthographic views because together ...
Get Engineering Graphics with AutoCAD 2023 now with the O’Reilly learning platform.
O’Reilly members experience books, live events, courses curated by job role, and more from O’Reilly and nearly 200 top publishers.

