Using the Ant View
Eclipse comes with a dedicated view for working with Ant—called the Ant view—which is a window that gives you an overview of the targets in build files. To open this view, select Window→ Show View→ Ant; the Ant view appears at right in Figure 11-12.
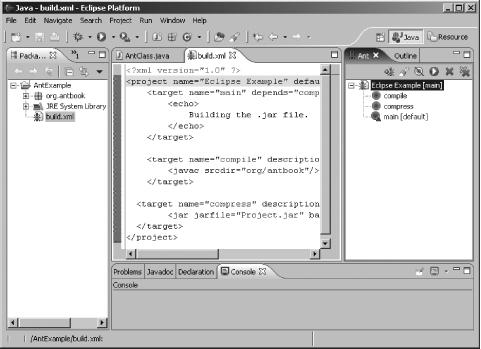
Figure 11-12. The Ant view
The toolbar in this view contains these buttons (from left to right):
Add Build Files
Add Build Files with Search
Hide Internal Targets
Run the Default Target
Remove Selected Build File
Remove All Build Files
To add a build file to the Ant view, click the Add Build Files button, opening the Choose Location dialog. In the left box, select the Eclipse project you want to use, and in the right box, select the build file you want to add to the Ant view. Click OK, adding the build file to the Ant view.
Tip
In Windows, you can add build files to the Ant View with drag and drop.
Besides giving you an overview of a build file, the Ant view lets you run build files. Select a build file in the Ant view and click the Run the Default Target button. Or right-click a target and select the Run item in the context menu that appears. Double-clicking a build file in the Ant view opens it in the Ant editor (as does right-clicking the build file and selecting the Open With→ Ant Editor item).
Using Ant with Eclipse is a potent combination. Eclipse allows you to develop and debug code, and Ant lets you build and deploy ...
Get Ant: The Definitive Guide, 2nd Edition now with the O’Reilly learning platform.
O’Reilly members experience books, live events, courses curated by job role, and more from O’Reilly and nearly 200 top publishers.

