ADAM R2 Installation
A Windows Server 2003 R2 server does not automatically have ADAM up and running. So in order to use it, you must first install it. Fortunately, the installation routine is a rather trivial process that you can complete in short order. Microsoft also delivers on the promise of reduced reboots in that you will not need to reboot after installing ADAM.
The ADAM installation is broken up into two main pieces, installation of the base components and installation of new instances. The base component installation only needs to occur once per server while new instance installations will occur every time you want to install a new instance or replica of an existing instance.
Installing Components
Base component installation is as simple as opening up the Add/Remove Programs Dialog, selecting Windows Components, clicking on the proper checkbox, and hitting Next a couple of times.
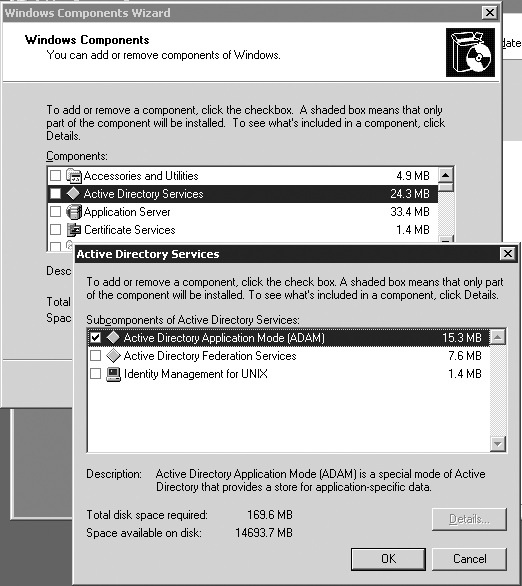
The R2 installation adds a new category of Windows Components named Active Directory Services; if you select the Details button, you will be presented with several new feature packs including ADAM. Select the checkbox that corresponds to this selection (see Figure 18-1), click on OK, and then click Next until you see the dialog indicating you have successfully completed the Windows Component Wizard and are presented with a Finish button.

Figure 18-1. Active Directory Services Windows components
Installing ...
Get Active Directory, 3rd Edition now with the O’Reilly learning platform.
O’Reilly members experience books, live events, courses curated by job role, and more from O’Reilly and nearly 200 top publishers.

