Nondestructive Sharpening with Smart Objects
Once you've put the final touches on your image, you may want to add a little sharpening. At this point, you're looking at things creatively, so it would be nice to be able to readjust your sharpening choices in much the same way you can change your mind about tone and color corrections using layers. Thanks to Smart Objects, you can do exactly that, by taking advantage of nondestructive sharpening.
Smart Objects are essentially a file within a file, or as I mentioned earlier, a magic layer. You can create a Smart Object from a single-layer image or, as we're going to do here, from a multilayered photograph.
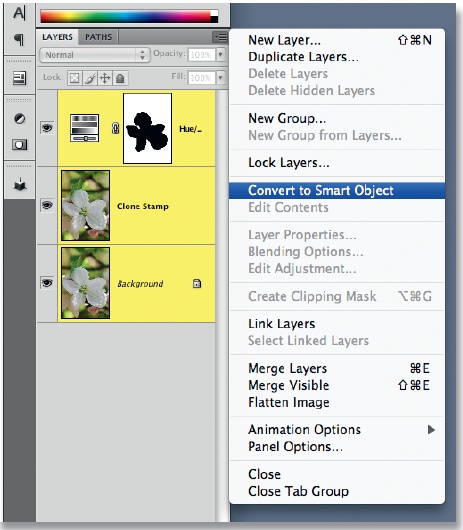
Start by selecting all your layers in the Layers panel. I usually click once on the top layer, and then hold down the Shift key and click the bottom layer. Once you've highlighted all your layers, go to the Layers Panel menu (in the upper-right corner of the Layers panel) and choose Convert to Smart Object. All your layers will collapse and become embedded in the new Smart Object thumbnail that also displays a new Smart Object icon in its lower right-hand corner. This may take a minute or two. As wonderful as Smart Objects are, they can slow things down quite a bit. But this is the price you pay for nondestructive sharpening.

Figure 6-17. Select all your layers, and then create a Smart Object from the Layers Panel menu.
You'll notice that ...
Get The Photoshop CS4 Companion for Photographers now with the O’Reilly learning platform.
O’Reilly members experience books, live events, courses curated by job role, and more from O’Reilly and nearly 200 top publishers.

