Using Levels
The adjustments you've seen so far are okay when you're starting out with Photoshop, and they're darn handy when you're pressed for time. But to become a real pixel wrangler, you've got to kick it up a notch and learn to use Levels and Curves. With a single Levels adjustment, you can fix lighting problems, increase contrast, and—in some cases—balance the color in your image. (If you've got serious color problems, you need to use Curves; skip ahead to Working with Curves to learn how.) Levels adjustments change the intensity levels—hence the tool's name—of your shadows, midtones, and highlights. They're a very visual and intuitive way to improve your images. And because they're available as an Adjustment layer (yay!), they're non-destructive and won't harm your original image.
In this section, you'll learn how to use Levels adjustments in a few different ways so you can pick the one you like best. But, first, you need to get up close and personal with the mighty histogram, your secret decoder ring for interpreting problems in your images.

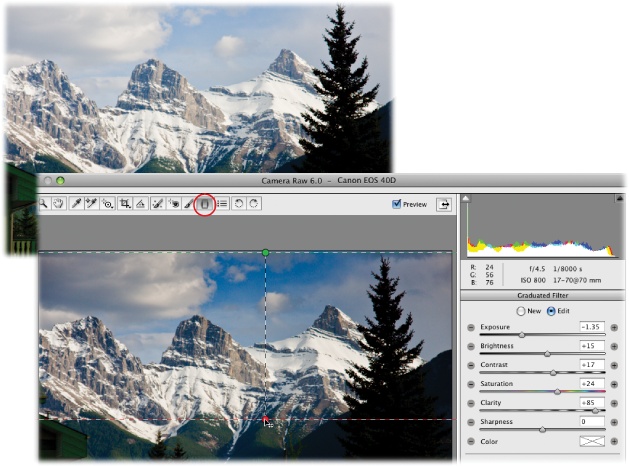
Figure 9-12. You can use the Graduated Filter tool to darken and intensify this sky gradually. The horizontal dotted line that runs through the green dot represents the start of the mask, and the similar line running through the red dot represents the end. To delete the mask, click the red dot and then press Delete (Backspace on a PC). ...
Get Photoshop CS5: The Missing Manual now with the O’Reilly learning platform.
O’Reilly members experience books, live events, courses curated by job role, and more from O’Reilly and nearly 200 top publishers.

