Chapter 13. Using multiple databases 167
13.3.3 Duplicating database-specific files in IIS
As mentioned in the adding new database to the registry procedure in Chapter 5,
“Using the LearningSpace Database Utility”, in the LearningSpace 5.01 System
Administrator’s Guide, you need to create a new directory for the
database-specific files.
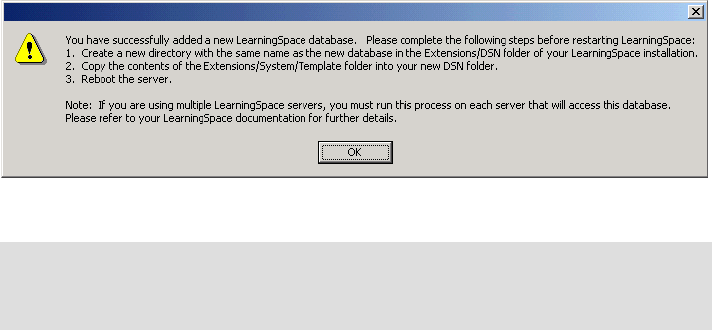
The registration process warns you to do this as well (see Figure 13-15).
Figure 13-15 Warning to create database-specific interface files
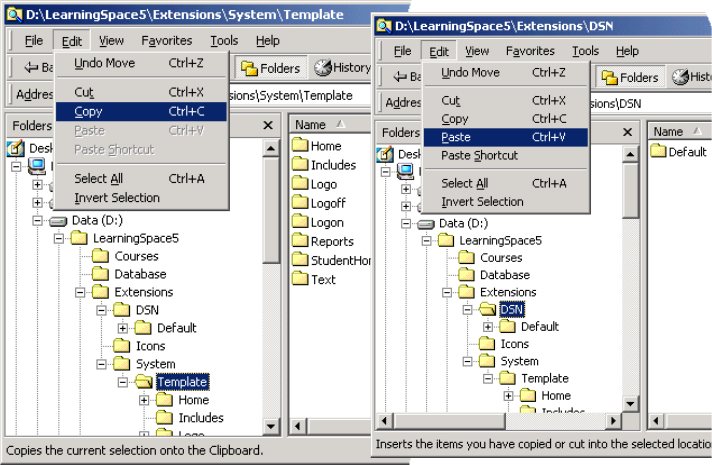
The directory structure to copy is shown in Figure 13-16 on page 168.
Attention: The LearningSpace 5.01 System Administrator’s Guide suggests
you copy the Default folder in Step 9. Instead, make a copy of the
Extensions\System\Template directory, as Default can already be customized.
Chapter 13. Using multiple databases 169
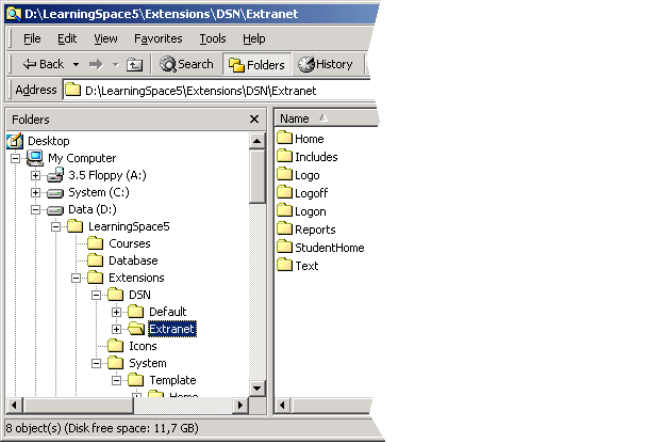
Figure 13-17 Renaming the DSN subfolder
13.3.4 Configuring FTP settings for publishing assessments
According to Chapter 6, “Configuring the Core Servers”, in the LearningSpace
5.01 Installation Guide, a different FTP setting must be specified for each
LearningSpace database, because the assessments are unique for each
database.
This can be accomplished by defining the FTP Publishing section on the Core
Settings page. But before doing so, you might want to create the FTP directory
on your Content server (or on another FTP server) and point to there.
For example, if your Core server serves as the content server as well, you may
want to set up a directory on the data drive in D:\LearningSpace5Assessments.
Then you should:
Create a Virtual Directory (VD) on the IIS for Web access, such as
MaterialsPublishExt.
Create an FTP redirection to enable assessment publishing (uploading), such
as Ext.
170 Lotus LearningSpace R5.01 Deployment Guide
Creating a Virtual Directory for published assessments
Follow these steps to create a virtual directory on IIS:
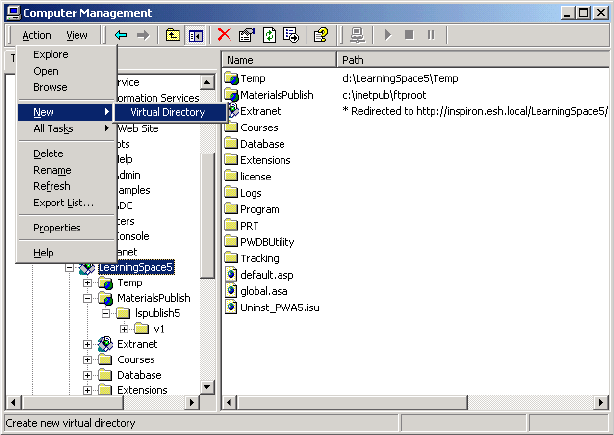
1. Click Action -> New -> Virtual Directory (Figure 13-18).
Figure 13-18 Accessing the Virtual Directory screen
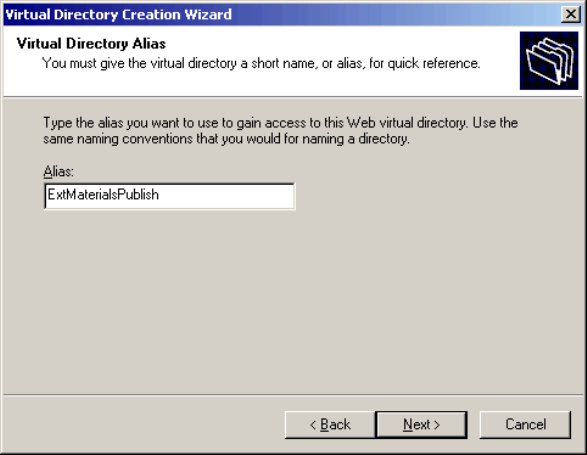
2. Type a shortname (alias) and click Next (see Figure 13-19 on page 171).
Get Lotus LearningSpace R5.01 Deployment Guide now with the O’Reilly learning platform.
O’Reilly members experience books, live events, courses curated by job role, and more from O’Reilly and nearly 200 top publishers.
