Chapter 4. Browser-Agnostic Features
This chapter reviews those features of Selenium WebDriver that are interoperable in different web browsers. In this group, a relevant multipurpose characteristic is executing JavaScript. Also, the Selenium WebDriver API allows configuring timeouts for page and script loading. Another convenient feature is making screenshots of the browser screen, or only the portion corresponding to a given element. Then, we can manage different aspects of the controlled browser using WebDriver, such as browser size and position, history, or cookies. Then, WebDriver provides various assets for controlling specific web elements, such as dropdown lists (i.e., HTML select fields and data lists), navigation targets (i.e., windows, tabs, frames, and iframes), or dialog boxes (i.e., alerts, prompts, confirmations, and modal dialogs). Finally, we discover how to handle local and session data using web storage, implement event listeners, and use the exceptions provided by the Selenium WebDriver API.
Executing JavaScript
JavaScript is a high-level programming language supported by all major browsers. We can use JavaScript in the client side of web applications for a wide variety of operations, such as DOM manipulation, user interaction, handling requests-responses from remote servers, or working with regular expressions, among many other functions. Luckily for test automation, Selenium WebDriver allows injecting and executing arbitrary pieces of JavaScript. To that aim, Selenium WebDriver API provides the interface JavascriptExecutor. Table 4-1 introduces the available public methods in this interface grouped into three categories: synchronous, pinned, and asynchronous scripts. The subsections following provide more details and illustrate their use through different examples.
Any driver object that inherits from the class RemoteWebDriver also implements the JavascriptExecutor interface. Therefore, when using a major browser (e.g., ChromeDriver, FirefoxDriver, etc.) declared using the generic WebDriver interface, we can cast it to JavascriptExecutor as shown in the following snippet. Then, we can use the executor (using variable js in the example) to invoke the methods presented in Table 4-1.
WebDriverdriver=newChromeDriver();JavascriptExecutorjs=(JavascriptExecutor)driver;
Synchronous Scripts
The method executeScript() of a JavascriptExecutor object allows executing a piece of JavaScript in the context of the current web page in a WebDriver session. The invocation of this method (in Java) blocks the control flow until the script terminates. Therefore, we typically use this method for executing synchronous scripts in a web page under test. The method executeScript() allows two arguments:
String script-
Mandatory JavaScript fragment to be executed. This code is executed in the body of the current page as an anonymous function (i.e., a JavaScript function without a name).
Object... args-
Optional arguments script. These arguments must be one of the following types: number, boolean, string,
WebElement, or aListof these types (otherwise, WebDriver throws an exception). These arguments are available in the injected script using theargumentsbuilt-in JavaScript variable.
When the script returns some value (i.e., the code contains a return statement), the Selenium WebDriver executeScript() method also returns a value in Java (otherwise, executeScript() returns null). The possible returned types are:
WebElement-
When returning an HTML element
Double-
For decimals
Long-
For nondecimal numbers
Boolean-
For boolean values
List<Object>-
For arrays
Map<String, Object>-
For key-value collections
String-
For all other cases
The situations that require executing JavaScript with Selenium WebDriver are very heterogeneous. The following subsections review two cases where the Selenium WebDriver does not provide built-in features, and instead, we need to use JavaScript to automate them: scrolling a web page and handling a color picker in a web form.
Scrolling
As explained in Chapter 3, Selenium WebDriver allows impersonating different mouse actions, including click, right-click, or double-click, among others. Nevertheless, scrolling down or up a web page is not possible using the Selenium WebDriver API. Instead, we can achieve this automation easily by executing a simple JavaScript line. Example 4-1 shows a basic example using a practice web page (see the URL of this page in the first line of the test method).
Example 4-1. Test executing JavaScript to scroll down a pixels amount
@TestvoidtestScrollBy(){driver.get("https://bonigarcia.dev/selenium-webdriver-java/long-page.html");JavascriptExecutorjs=(JavascriptExecutor)driver;Stringscript="window.scrollBy(0, 1000);";js.executeScript(script);}

Open a practice web page containing very long text (see Figure 4-1).

Cast the
driverobject toJavascriptExecutor. We will use the variablejsto execute JavaScript in the browser.
Execute a piece of JavaScript code. In this case, we call the JavaScript function
scrollBy()to scroll the document by a given amount (in this case, 1,000 px down). Notice that this fragment does not usereturn, and therefore, we do not receive any returned object in the Java logic. In addition, we are not passing any argument to the script.
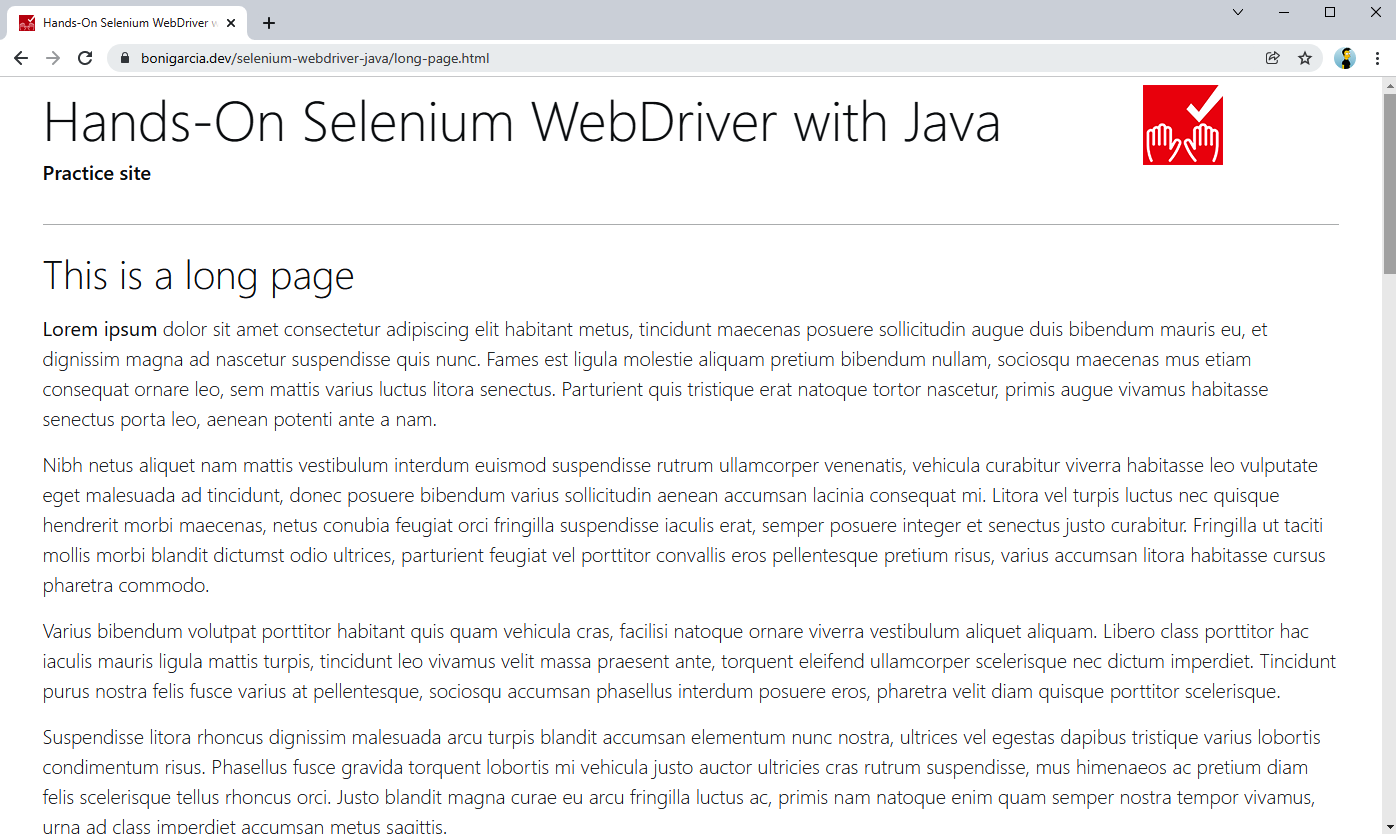
Figure 4-1. Practice web page with long content
Example 4-2 shows another test using scrolling and the same example web page as before. This time, instead of moving a fixed number of pixels, we move the document scroll until the last paragraph in the web page.
Example 4-2. Test executing JavaScript to scroll down to a given element
@TestvoidtestScrollIntoView(){driver.get("https://bonigarcia.dev/selenium-webdriver-java/long-page.html");JavascriptExecutorjs=(JavascriptExecutor)driver;driver.manage().timeouts().implicitlyWait(Duration.ofSeconds(10));WebElementlastElememt=driver.findElement(By.cssSelector("p:last-child"));Stringscript="arguments[0].scrollIntoView();";js.executeScript(script,lastElememt);}
To make this test robust, we specify an implicit timeout. Otherwise, the test might fail if the page is not entirely loaded when executing the subsequent commands.
We locate the last paragraph in the web page using a CSS selector.
We define the script to be injected into the page. Notice the script does not return any value, but as a novelty, it uses the first function argument to invoke the JavaScript function
scrollIntoView().
We execute the previous script, passing the located
WebElementas an argument. This element will be the first argument for the script (i.e.,arguments[0]).
The last example of scrolling is infinite scroll. This technique enables the dynamic loading of more content when the user reaches the end of the web page. Automating this kind of web page is an instructive use case since it involves different aspects of the Selenium WebDriver API. For example, you can use a similar approach to crawl web pages using Selenium WebDriver. Example 4-3 shows a test using an infinite scroll page.
Example 4-3. Test executing JavaScript in an infinite scroll page
@TestvoidtestInfiniteScroll(){driver.get("https://bonigarcia.dev/selenium-webdriver-java/infinite-scroll.html");JavascriptExecutorjs=(JavascriptExecutor)driver;WebDriverWaitwait=newWebDriverWait(driver,Duration.ofSeconds(10));BypLocator=By.tagName("p");List<WebElement>paragraphs=wait.until(ExpectedConditions.numberOfElementsToBeMoreThan(pLocator,0));intinitParagraphsNumber=paragraphs.size();WebElementlastParagraph=driver.findElement(By.xpath(String.format("//p[%d]",initParagraphsNumber)));Stringscript="arguments[0].scrollIntoView();";js.executeScript(script,lastParagraph);wait.until(ExpectedConditions.numberOfElementsToBeMoreThan(pLocator,initParagraphsNumber));}
Color picker
A color picker in HTML is an input type that allows users to select a color by clicking and dragging the cursor using a graphical area. The practice web form contains one of these elements (see Figure 4-2).
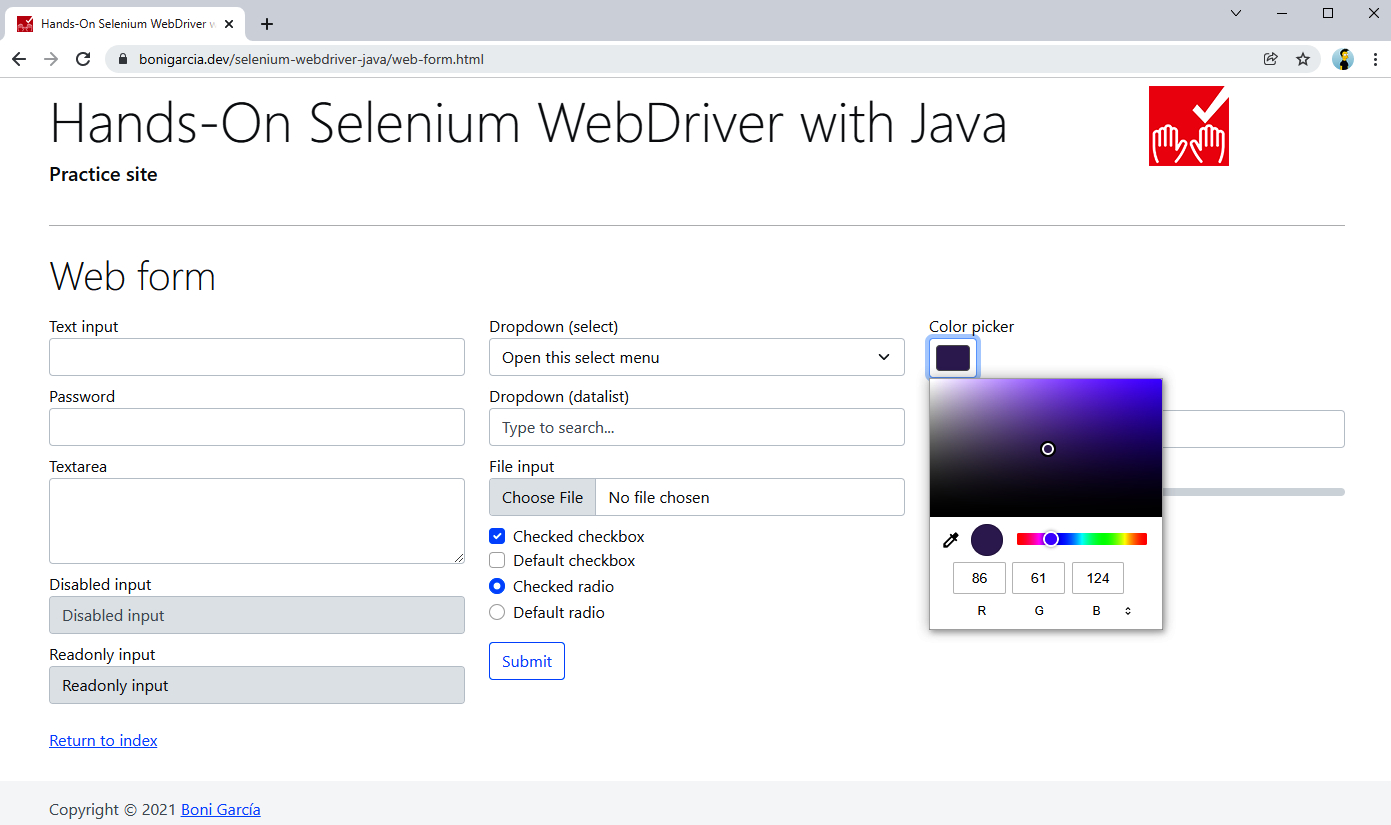
Figure 4-2. Color picker in the practice web form
The following code shows the HTML markup for the color picker. Notice that it sets an initial color value (otherwise, the default color is black).
<inputtype="color"class="form-control form-control-color"name="my-colors"value="#563d7c">
Example 4-4 illustrates how to interact with this color picker. Because the Selenium WebDriver API does not provide any asset to control color pickers, we use JavaScript. In addition, this test also illustrates the use of Color, a support class available in the Selenium WebDriver API for working with colors.
Example 4-4. Test executing JavaScript to interact with a color picker
@TestvoidtestColorPicker(){driver.get("https://bonigarcia.dev/selenium-webdriver-java/web-form.html");JavascriptExecutorjs=(JavascriptExecutor)driver;WebElementcolorPicker=driver.findElement(By.name("my-colors"));StringinitColor=colorPicker.getAttribute("value");log.debug("The initial color is {}",initColor);Colorred=newColor(255,0,0,1);Stringscript=String.format("arguments[0].setAttribute('value', '%s');",red.asHex());js.executeScript(script,colorPicker);StringfinalColor=colorPicker.getAttribute("value");log.debug("The final color is {}",finalColor);assertThat(finalColor).isNotEqualTo(initColor);assertThat(Color.fromString(finalColor)).isEqualTo(red);}
We locate the color picker by name.
We read the initial value of the color picker (it should be
#563d7c).We define a color to work with using the following RGBA components: red=255 (maximum value), green=0 (minimum value), blue=0 (minimum value), and alpha=1 (maximum value, i.e., fully opaque).
We use JavaScript to change the value selected in the color picker. Alternatively, we can change the selected color invoking the statement
colorPicker.sendKeys(red.asHex());.
We read the resulting value of the color picker (it should be
#ff0000).
We assert that the color is different from the initial value, but as expected.
Pinned Scripts
The Selenium WebDriver API allows you to pin scripts in Selenium WebDriver 4. This feature enables attaching JavaScript fragments to a WebDriver session, assigning a unique key to each snippet, and executing these snippets on demand (even on different web pages). Example 4-5 shows a test using pinned scripts.
Example 4-5. Test executing JavaScript as pinned scripts
@TestvoidtestPinnedScripts(){StringinitPage="https://bonigarcia.dev/selenium-webdriver-java/";driver.get(initPage);JavascriptExecutorjs=(JavascriptExecutor)driver;ScriptKeylinkKey=js.pin("return document.getElementsByTagName('a')[2];");ScriptKeyfirstArgKey=js.pin("return arguments[0];");Set<ScriptKey>pinnedScripts=js.getPinnedScripts();assertThat(pinnedScripts).hasSize(2);WebElementformLink=(WebElement)js.executeScript(linkKey);formLink.click();assertThat(driver.getCurrentUrl()).isNotEqualTo(initPage);Stringmessage="Hello world!";StringexecuteScript=(String)js.executeScript(firstArgKey,message);assertThat(executeScript).isEqualTo(message);js.unpin(linkKey);assertThat(js.getPinnedScripts()).hasSize(1);}
We attach a JavaScript fragment to locate an element in the web page. Notice that we could do the same with the standard WebDriver API. Nevertheless, we use this approach for demo purposes.
We attach another piece of JavaScript that returns whatever we pass to it as a first parameter.
We read the set of pinned scripts.
We assert the number of pinned scripts is as expected (i.e.,
2).We execute the first pinned script. As a result, we get the third link in the web page as a
WebElementin Java.We click on this link, which should correspond to the practice web link. As a result, the browser should navigate to that page.

We assert the current URL is different from the initial one.

We execute the second pinned script. Notice that it is possible to run the pinned script even though the page has changed in the browser (since the script is attached to the session and not to a single page).

We assert the returned message is as expected.

We unpin one of the scripts.

We verify the number of pinned scripts is as expected (i.e.,
1at this point).
Asynchronous Scripts
The method executeAsyncScript() of the JavascriptExecutor interface allows executing JavaScript scripts in the context of a web page using Selenium WebDriver. In the same way that executeScript() explained previously, executeAsyncScript() executes an anonymous function with the provided JavaScript code in the body of the current page. The execution of this function blocks the Selenium WebDriver control flow. The difference is that in executeAsyncScript(), we must explicitly signal the script termination by invoking a done callback. This callback is injected into the executed script as the last argument (i.e., arguments[arguments.length - 1]) in the corresponding anonymous function. Example 4-6 shows a test using this mechanism.
Example 4-6. Test executing asynchronous JavaScript
@TestvoidtestAsyncScript(){driver.get("https://bonigarcia.dev/selenium-webdriver-java/");JavascriptExecutorjs=(JavascriptExecutor)driver;Durationpause=Duration.ofSeconds(2);Stringscript="const callback = arguments[arguments.length - 1];"+"window.setTimeout(callback, "+pause.toMillis()+");";longinitMillis=System.currentTimeMillis();js.executeAsyncScript(script);Durationelapsed=Duration.ofMillis(System.currentTimeMillis()-initMillis);log.debug("The script took {} ms to be executed",elapsed.toMillis());assertThat(elapsed).isGreaterThanOrEqualTo(pause);}
We define a pause time of
2seconds.We define the script to be executed. In the first line, we define a constant for the callback (i.e., the last script argument). After that, we use the JavaScript function
window.setTimeout()to pause the script execution for a given amount of time.We get the current system time (in milliseconds).
We execute the script. If everything works as expected, the test execution blocks in this line for second seconds (as defined in step 1).
We calculate the time required to execute the previous line.
We assert the elapsed time is as expected (typically, some milliseconds above the defined pause time).
Tip
You can find an additional example that executes an asynchronous script on âNotificationsâ.
Timeouts
Selenium WebDriver allows specifying three types of timeouts. We can use them by invoking the method manage().timeouts() in the Selenium WebDriver API. The first timeout is the implicit wait, already explained in âImplicit Waitâ (as part of waiting strategies). The other options are page loading and script loading timeouts, explained next.
Page Loading Timeout
The page loading timeout provides a time limit to interrupt a navigation attempt. In other words, this timeout limits the time in which a web page is loaded. When this timeout (which has a default value of 30 seconds) is exceeded, an exception is thrown. Example 4-7 shows an example of this timeout. As you can see, this piece of code is a dummy implementation of a negative test. In other words, it checks unexpected conditions in the SUT.
Example 4-7. Test using a page loading timeout
@TestvoidtestPageLoadTimeout(){driver.manage().timeouts().pageLoadTimeout(Duration.ofMillis(1));assertThatThrownBy(()->driver.get("https://bonigarcia.dev/selenium-webdriver-java/")).isInstanceOf(TimeoutException.class);}
We specify the minimum possible page loading timeout, which is one millisecond.
We load a web page. This invocation (implemented as Java lambda) will fail since it is impossible to load that web page in less than one millisecond. For this reason, the exception
TimeoutExceptionis expected to be thrown in the lambda, using the AssertJ methodassertThatThrownBy.
Note
You can play with this test by removing the timeout declaration (i.e., step 1). If you do that, the test will fail since an exception is expected but not thrown.
Script Loading Timeout
The script loading timeout provides a time limit to interrupt a script that is being evaluated. This timeout has a default value of three hundred seconds. Example 4-8 shows a test using a script loading timeout.
Example 4-8. Test using a script loading timeout
@TestvoidtestScriptTimeout(){driver.get("https://bonigarcia.dev/selenium-webdriver-java/");JavascriptExecutorjs=(JavascriptExecutor)driver;driver.manage().timeouts().scriptTimeout(Duration.ofSeconds(3));assertThatThrownBy(()->{longwaitMillis=Duration.ofSeconds(5).toMillis();Stringscript="const callback = arguments[arguments.length - 1];"+"window.setTimeout(callback, "+waitMillis+");";js.executeAsyncScript(script);}).isInstanceOf(ScriptTimeoutException.class);}
We define a script timeout of three seconds. This means that a script lasting for more than that time will throw an exception.
We execute an asynchronous script that pauses the execution of five seconds.
The script execution time is greater than the configured script timeout, resulting in a
ScriptTimeoutException. Again, this example is a negative test, i.e., designed to expect this exception.
Screenshots
Selenium WebDriver is used mainly to carry out end-to-end functional testing of web applications. In other words, we use it to verify that web applications behave as expected by interacting with their user interface (i.e., using a web browser). This approach is very convenient to automate high-level user scenarios, but it also presents different difficulties. One of the main challenges in end-to-end testing is to diagnose the underlying cause of a failed test. Supposing the failure is legitimate (i.e., not induced by a poorly implemented test), the root cause might be diverse: the client side (e.g., incorrect JavaScript logic), the server side (e.g., internal exception), or the integration with other components (e.g., inadequate access to the database), among other reasons. One of the most pervasive mechanisms used in Selenium WebDriver for failure analysis is making browser screenshots. This section presents the mechanisms provided by the Selenium WebDriver API.
Tip
âFailure Analysisâ reviews the framework-specific techniques to determine when a test has failed to carry out different failure analysis techniques, such as screenshots, recordings, and log gathering.
Selenium WebDriver provides the interface TakesScreenshot for making browser screenshots. Any driver object inheriting from RemoteWebDriver (see Figure 2-2) also implements this interface. Thus, we can cast a WebDriver object that instantiates one of the major browsers (e.g., ChromeDriver, FirefoxDriver, etc.) as follows:
WebDriverdriver=newChromeDriver();TakesScreenshotts=(TakesScreenshot)driver;
The interface TakesScreenshot only provides a method called getScreenshotAs(OutputType<X> target) to make screenshots. The parameter OutputType<X> target determines the screenshot type and the returned value. Table 4-2 shows the available alternatives for this parameter.
Tip
The method getScreenshotAs() allows making screenshots of the browser viewport. In addition, Selenium WebDriver 4 allows creating full-page screenshots using different mechanisms (see âFull-page screenshotâ).
Example 4-9 shows a test for taking a browser screenshot in PNG format. Example 4-10 shows another test for creating a screenshot as a Base64 string. The resulting screenshot is shown in Figure 4-3.
Example 4-9. Test making a screenshot as a PNG file
@TestvoidtestScreenshotPng()throwsIOException{driver.get("https://bonigarcia.dev/selenium-webdriver-java/");TakesScreenshotts=(TakesScreenshot)driver;Filescreenshot=ts.getScreenshotAs(OutputType.FILE);log.debug("Screenshot created on {}",screenshot);Pathdestination=Paths.get("screenshot.png");Files.move(screenshot.toPath(),destination,REPLACE_EXISTING);log.debug("Screenshot moved to {}",destination);assertThat(destination).exists();}
We make the browser screen a PNG file.
This file is located in a temporary folder by default, so we move it to a new file called
screenshot.png(in the root project folder).We use standard Java to move the screenshot file to the new location.
We use assertions to verify that the target file exists.
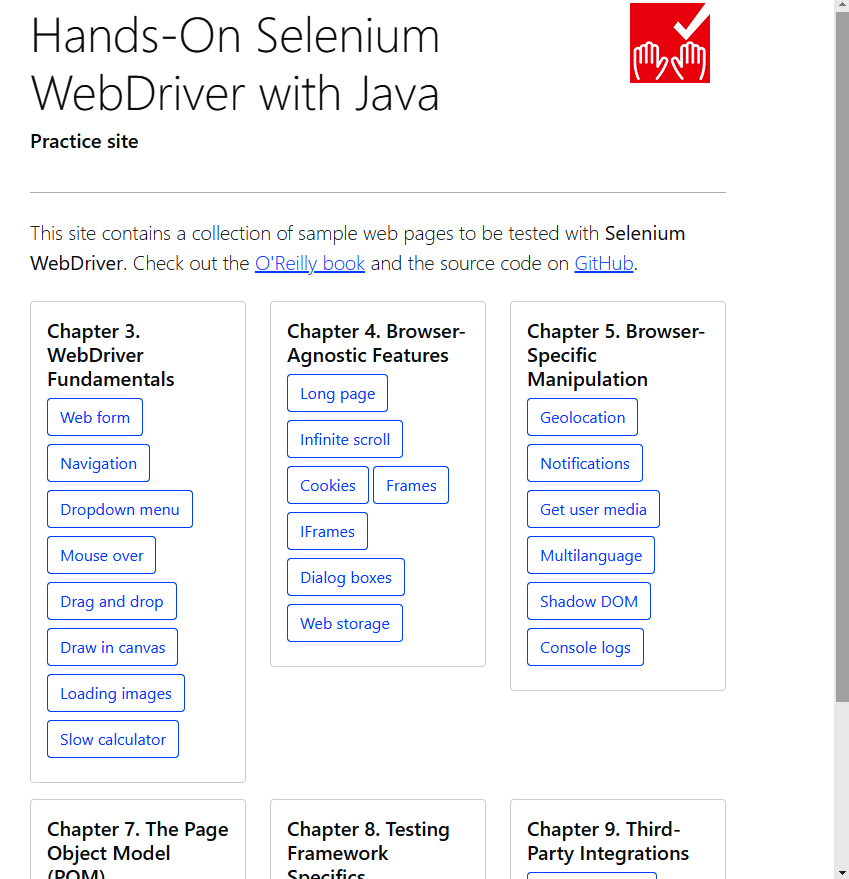
Figure 4-3. Browser screenshot of the practice site index page
Example 4-10. Test making a screenshot as Base64
@TestvoidtestScreenshotBase64(){driver.get("https://bonigarcia.dev/selenium-webdriver-java/");TakesScreenshotts=(TakesScreenshot)driver;Stringscreenshot=ts.getScreenshotAs(OutputType.BASE64);log.debug("Screenshot in base64 "+"(you can copy and paste it into a browser navigation bar to watch it)\n"+"data:image/png;base64,{}",screenshot);assertThat(screenshot).isNotEmpty();}
We make the browser screen in Base64 format.
We append the prefix
data:image/png;base64,to the Base64 string and log it in the standard output. You can copy and paste this resulting string in a browser navigation bar to display the picture.We assert that the screenshot string has content.
Note
Logging the screenshot in Base64 as presented in the previous example could be very useful for diagnosing failures when running tests in CI servers in which we do not have access to the file system (e.g., GitHub Actions).
WebElement Screenshots
The WebElement interface extends the TakesScreenshot interface. This way, it is possible to make partial screenshots of the visible content of a given web element. (See Example 4-11.) Notice that this test is very similar to the previous one using PNG files, but in this case, we invoke the method getScreenshotAs() directly using a web element. Figure 4-4 shows the resulting screenshot.
Example 4-11. Test making a partial screenshot as a PNG file
@TestvoidtestWebElementScreenshot()throwsIOException{driver.get("https://bonigarcia.dev/selenium-webdriver-java/web-form.html");WebElementform=driver.findElement(By.tagName("form"));Filescreenshot=form.getScreenshotAs(OutputType.FILE);Pathdestination=Paths.get("webelement-screenshot.png");Files.move(screenshot.toPath(),destination,REPLACE_EXISTING);assertThat(destination).exists();}
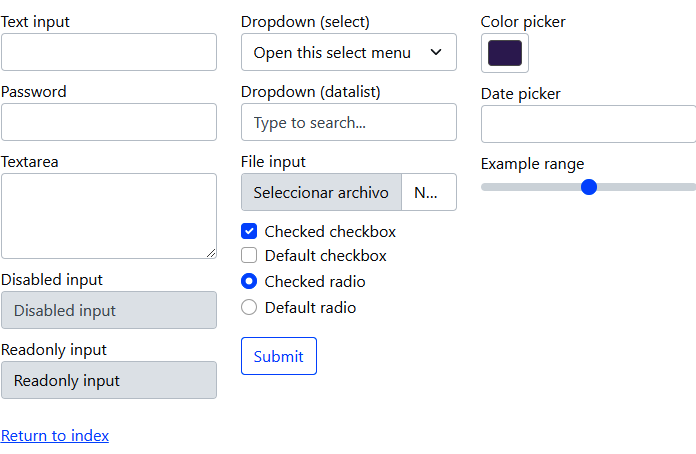
Figure 4-4. Partial screenshot of the practice web form
Window Size and Position
The Selenium WebDriver API allows manipulating browser size and position very easily using the Window interface. This type is accessible from a driver object using the following statement. Table 4-3 shows the available methods in this interface. Then, Example 4-12 shows a basic test about this feature.
Windowwindow=driver.manage().window();
| Method | Return | Description |
|---|---|---|
|
|
Get the current window size. It returns the outer window dimension, not just the viewport (i.e., the visible area of a web page for end users). |
|
|
Change the current window size (again, its outer dimension, and not the viewport). |
|
|
Get current window position (relative to the upper left corner of the screen). |
|
|
Change the current window position (again, relative to the screenâs upper left corner). |
|
|
Maximize the current window. |
|
|
Minimize the current window. |
|
|
Fullscreen the current window. |
Example 4-12. Test reading and changing the browser size and position
@TestvoidtestWindow(){driver.get("https://bonigarcia.dev/selenium-webdriver-java/");Windowwindow=driver.manage().window();PointinitialPosition=window.getPosition();DimensioninitialSize=window.getSize();log.debug("Initial window: position {} -- size {}",initialPosition,initialSize);window.maximize();PointmaximizedPosition=window.getPosition();DimensionmaximizedSize=window.getSize();log.debug("Maximized window: position {} -- size {}",maximizedPosition,maximizedSize);assertThat(initialPosition).isNotEqualTo(maximizedPosition);assertThat(initialSize).isNotEqualTo(maximizedSize);}
Browser History
Selenium WebDriver allows manipulating the browser history through the Navigation interface. The following statement illustrates how to access this interface from a WebDriver object. Using this interface is quite simple. Table 4-4 shows its public methods, and Example 4-13 shows a basic example. Notice that this test navigates into different web pages using these methods, and at the end of the test, it verifies the web page URL is as expected.
Navigationnavigation=driver.navigate();
| Method | Return | Description |
|---|---|---|
|
|
Go back in the browser history |
|
|
Go forward in the browser history |
|
|
Load a new web page in the current window |
|
|
Refresh the current page |
The Shadow DOM
As introduced in âThe Document Object Model (DOM)â, the DOM is a programming interface that allows us to represent and manipulate a web page using a tree structure. The shadow DOM is a feature of this programming interface that enables the creation of scoped subtrees inside the regular DOM tree. The shadow DOM allows the encapsulation of a group of a DOM subtree (called shadow tree, as represented in Figure 4-5) that can specify different CSS styles from the original DOM. The node in the regular DOM in which the shadow tree is attached is called the shadow host. The root node of the shadow tree is called the shadow root. As represented in Figure 4-5, the shadow tree is flattened into the original DOM in a single composed tree to be rendered in the browser.
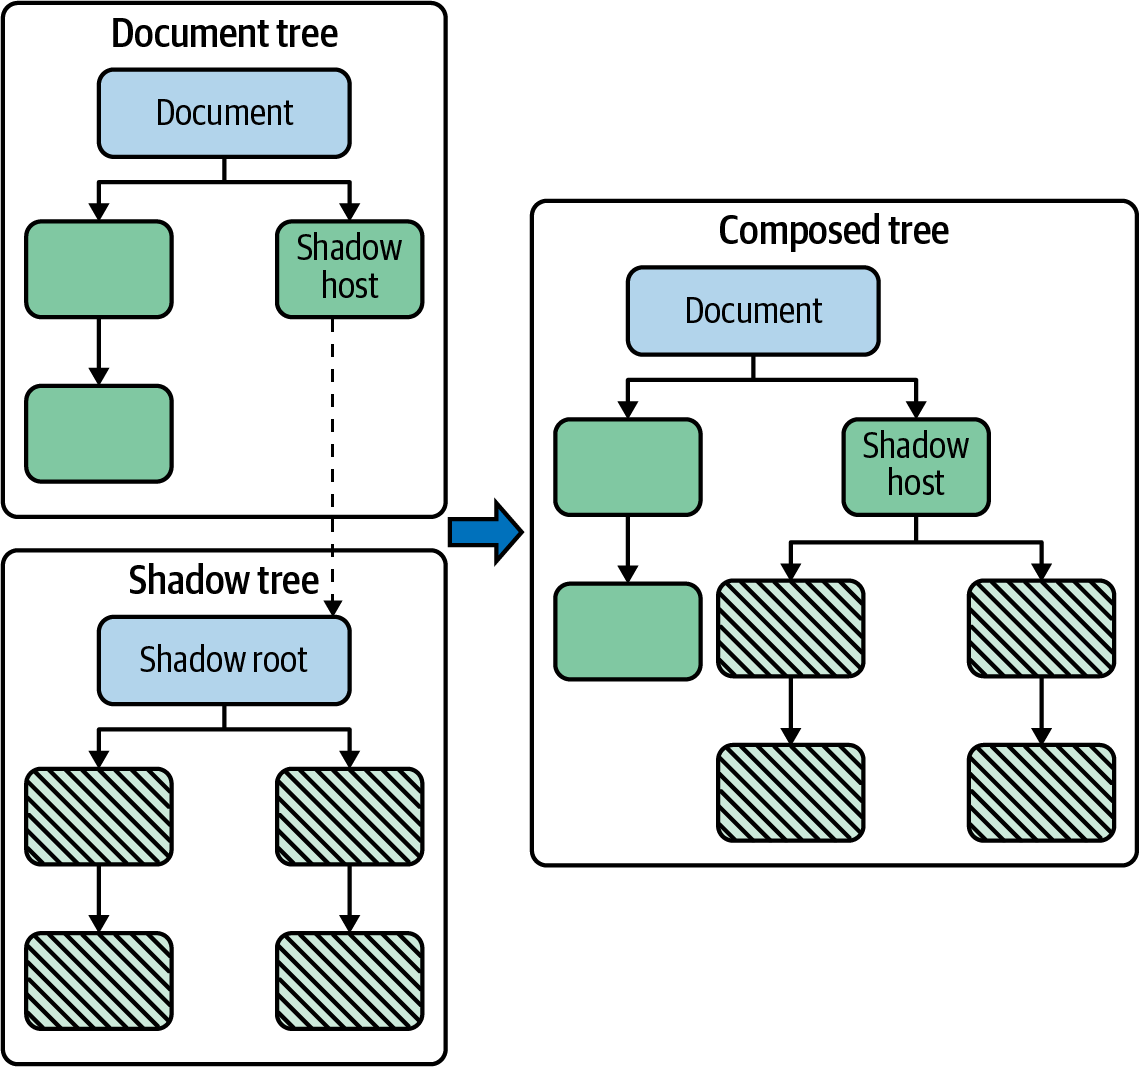
Figure 4-5. Schematic representation of the shadow DOM
Note
The shadow DOM is part of the standard suite (together with HTML templates or custom elements) that allows the implementation of web components (i.e., reusable custom elements for web applications).
The shadow DOM allows the creation of self-contained components. In other words, the shadow tree is isolated from the original DOM. This feature is useful for web design and composition, but it can be challenging for automated testing with Selenium WebDriver (since the regular location strategies cannot find web elements within the shadow tree). Luckily, Selenium WebDriver 4 provides a WebElement method that allows access to the shadow DOM. Example 4-14 demonstrates this use.
Example 4-14. Test reading the shadow DOM
@TestvoidtestShadowDom(){driver.get("https://bonigarcia.dev/selenium-webdriver-java/shadow-dom.html");WebElementcontent=driver.findElement(By.id("content"));SearchContextshadowRoot=content.getShadowRoot();WebElementtextElement=shadowRoot.findElement(By.cssSelector("p"));assertThat(textElement.getText()).contains("Hello Shadow DOM");}
We open the practice web page that contains a shadow tree. You can inspect the source code of this page to check the JavaScript method used to create a shadow tree.
We get the shadow root from the host element. As a result, we get an instance of
SearchContext, an interface implemented byWebDriverandWebElement, that allows us to find elements using the methodsfindElement()andfindâEleâ ments().We find the first paragraph element in the shadow tree.
We verify the text content of the shadow element is as expected.
Cookies
HTTP 1.x is a stateless protocol, meaning that the server does not track the user state. In other words, web servers do not remember users across different requests. The cookies mechanism is an extension to HTTP that allows tracking users by sending small pieces of text called cookies from server to client. These cookies must be sent back by clients, and this way, servers remember their clients. Cookies allow you to maintain web sessions or personalize the user experience on the website, among other functions.
Web browsers allow managing the browser cookies manually. Selenium WebDriver enables an equivalent manipulation, but programmatically. The Selenium WebDriver API provides the methods shown in Table 4-5 to accomplish this. They are accessible through the manage() function of a WebDriver object.
| Method | Return | Description |
|---|---|---|
|
|
Add a new cookie |
|
|
Delete an existing cookie by name |
|
|
Delete an existing cookie by instance |
|
|
Delete all cookies |
|
|
Get all cookies |
|
|
Get a cookie by name |
As this table shows, the Cookie class provides an abstraction to a single cookie in Java. Table 4-6 summarizes the methods available in this class. In addition, this class has several constructors, which positionally accept the following parameters:
String name-
Cookie name (mandatory)
String value-
Cookie value (mandatory)
String domain-
Domain in which the cookie is visible (optional)
String path-
Path in which the cookie is visible (optional)
Date expiry-
Cookie expiration date (optional)
boolean isSecure-
Whether the cookie requires a secure connection (optional)
boolean isHttpOnly-
Whether this cookie is an HTTP-only cookie, i.e., the cookie is not accessible through a client-side script (optional)
String sameSite-
Whether this cookie is a same-site cookie, i.e., the cookie is restricted to a first-party or same-site context (optional)
| Method | Return | Description |
|---|---|---|
|
|
Read cookie name |
|
|
Read cookie value |
|
|
Read cookie domain |
|
|
Read cookie path |
|
|
Read if cookie requires a secure connection |
|
|
Read if cookie is HTTP-only |
|
|
Read cookie expiry date |
|
|
Read cookie same-site context |
|
|
Check the different fields of the cookie and throw an |
|
|
Map cookie values as a key-value map |
The following examples show different tests managing web cookies with the Selenium WebDriver API. These examples use a practice web page that shows the site cookies on the GUI (see Figure 4-6):
-
Example 4-15 illustrates how to read the existing cookies of a website.
-
Example 4-16 shows how to add new cookies.
-
Example 4-17 explains how to edit existing cookies.
-
Example 4-18 demonstrates how to delete cookies.
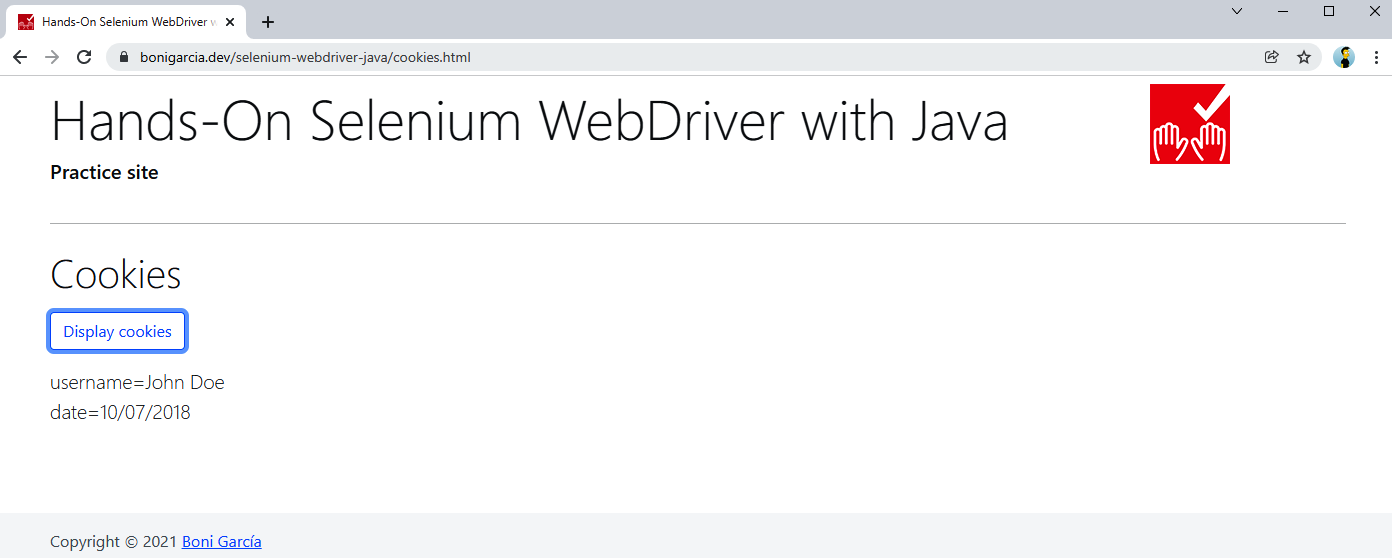
Figure 4-6. Practice web page for web cookies
Example 4-15. Test reading existing cookies
@TestvoidtestReadCookies(){driver.get("https://bonigarcia.dev/selenium-webdriver-java/cookies.html");Optionsoptions=driver.manage();Set<Cookie>cookies=options.getCookies();assertThat(cookies).hasSize(2);Cookieusername=options.getCookieNamed("username");assertThat(username.getValue()).isEqualTo("John Doe");assertThat(username.getPath()).isEqualTo("/");driver.findElement(By.id("refresh-cookies")).click();}
We get the
Optionsobject used to manage cookies.We read all the cookies available on this page. It should contain two cookies.
We read the cookie with the name
username.The value of the previous cookie should be
John Doe.The last statement does not affect the test. We invoke this command to check the cookies in the browser GUI.
Example 4-16. Test adding new cookies
@TestvoidtestAddCookies(){driver.get("https://bonigarcia.dev/selenium-webdriver-java/cookies.html");Optionsoptions=driver.manage();CookienewCookie=newCookie("new-cookie-key","new-cookie-value");options.addCookie(newCookie);StringreadValue=options.getCookieNamed(newCookie.getName()).getValue();assertThat(newCookie.getValue()).isEqualTo(readValue);driver.findElement(By.id("refresh-cookies")).click();}
We create a new cookie.
We add the cookie to the current page.
We read the value of the cookie just added.
We verify this value is as expected.
Example 4-17. Test editing existing cookies
@TestvoidtestEditCookie(){driver.get("https://bonigarcia.dev/selenium-webdriver-java/cookies.html");Optionsoptions=driver.manage();Cookieusername=options.getCookieNamed("username");CookieeditedCookie=newCookie(username.getName(),"new-value");options.addCookie(editedCookie);CookiereadCookie=options.getCookieNamed(username.getName());assertThat(editedCookie).isEqualTo(readCookie);driver.findElement(By.id("refresh-cookies")).click();}
We read an existing cookie.
We create a new cookie reusing the previous cookie name.
We add the new cookie to the web page.
We read the cookie just added.
We verify the cookie has been correctly edited.
Example 4-18. Test deleting existing cookies
@TestvoidtestDeleteCookies(){driver.get("https://bonigarcia.dev/selenium-webdriver-java/cookies.html");Optionsoptions=driver.manage();Set<Cookie>cookies=options.getCookies();Cookieusername=options.getCookieNamed("username");options.deleteCookie(username);assertThat(options.getCookies()).hasSize(cookies.size()-1);driver.findElement(By.id("refresh-cookies")).click();}
Dropdown Lists
A typical element in web forms is dropdown lists. These fields allow users to select one or more elements within an option list. The classical HTML tags used to render these fields are <select> and <options>. As usual, the practice web form contains one of these elements (see Figure 4-7), defined in HTML as follows:
<selectclass="form-select"name="my-select"><optionselected>Open this select menu</option><optionvalue="1">One</option><optionvalue="2">Two</option><optionvalue="3">Three</option></select>
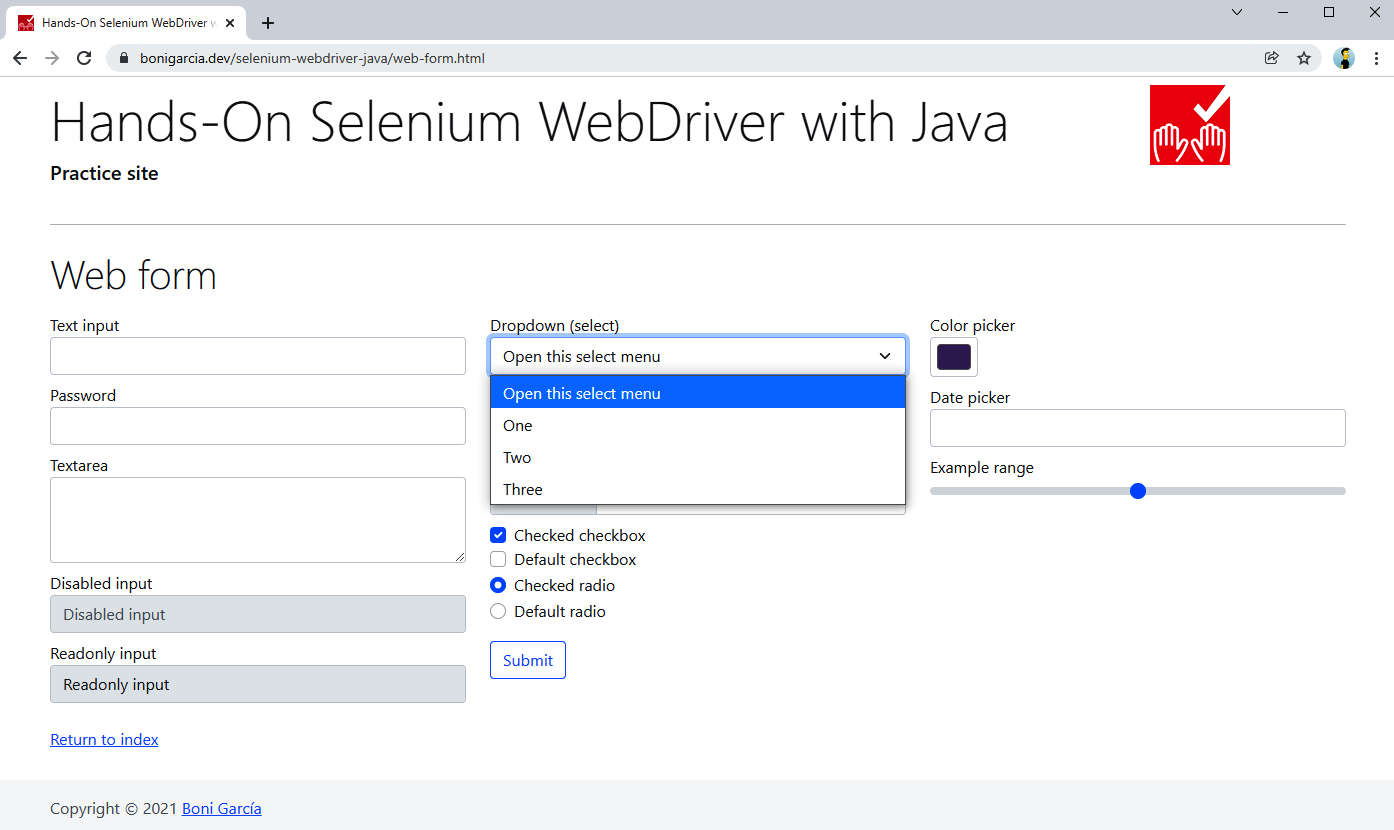
Figure 4-7. Select field in the practice web form
These elements are very spread out in web forms. For this reason, Selenium WebDriver provides a helper class called Select to simplify their manipulation. This class wraps a select WebElement and provides a wide variety of features. Table 4-7 summarizes the public methods available in the Select class. After that, Example 4-19 shows a basic test using this class.
| Method | Return | Description |
|---|---|---|
|
|
Constructor using a |
|
|
Get wrapped |
|
|
Whether the select element supports selecting multiple options |
|
|
Read all options that belong to the select element |
|
|
Read all selected options |
|
|
|
|
|
|
|
|
Select an option by index number |
|
|
Select option(s) by value attribute |
|
|
Deselect all options |
|
|
Deselect option(s) by value attribute |
|
|
Deselect by index number |
|
|
Deselect options that match a given displayed text |
Example 4-19. Test interacting with a select field
@Testvoidtest(){driver.get("https://bonigarcia.dev/selenium-webdriver-java/web-form.html");Selectselect=newSelect(driver.findElement(By.name("my-select")));StringoptionLabel="Three";select.selectByVisibleText(optionLabel);assertThat(select.getFirstSelectedOption().getText()).isEqualTo(optionLabel);}
We find the select element by name and use the resulting
WebElementto instantiate aSelectobject.We select one of the options available in this select, using a by-text strategy.
We verify the selected option text is as expected.
Data List Elements
Another way to implement dropdown lists in HTML is using data lists. Although data lists are very similar to select elements from a graphical point of view, there is a clear distinction between them. On the one hand, select fields display an options list, and users choose one (or several) of the available options. On the other hand, data lists show a list of suggested options associated with an input form (text) field, and users are free to select one of those suggested values or type a custom value. The practice web form contains one of these data lists. You can find its markup in the following snippet and a screenshot in Figure 4-8.
<inputclass="form-control"list="my-options"name="my-datalist"placeholder="Type to search..."><datalistid="my-options"><optionvalue="San Francisco"><optionvalue="New York"><optionvalue="Seattle"><optionvalue="Los Angeles"><optionvalue="Chicago"></datalist>
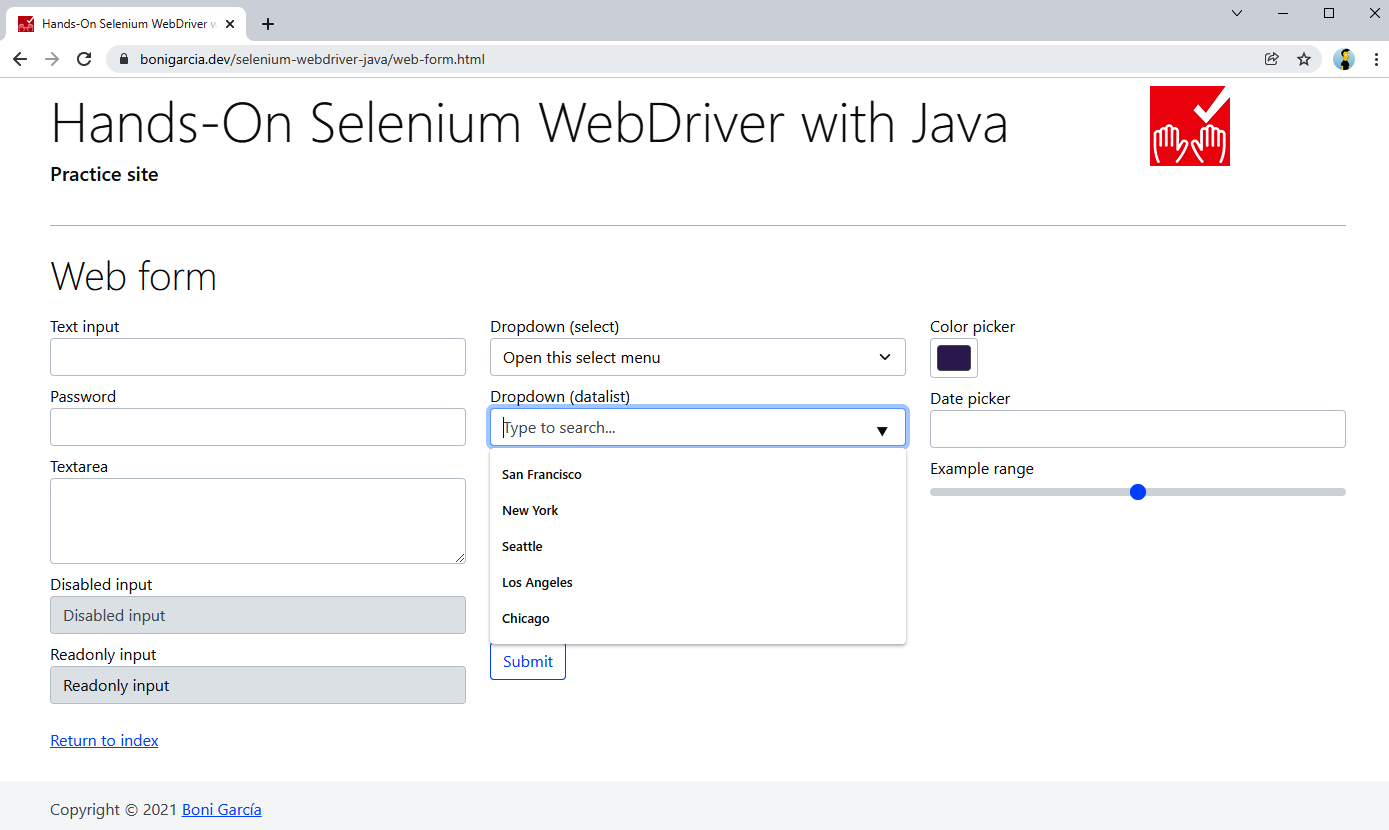
Figure 4-8. Data list field in the practice web form
Selenium WebDriver does not provide a custom helper class to manipulate data lists. Instead, we need to interact with them as standard input texts, with the distinction that their options are displayed when clicking on the input field. Example 4-20 shows a test illustrating this.
Example 4-20. Test interacting with a data list field
@TestvoidtestDatalist(){driver.get("https://bonigarcia.dev/selenium-webdriver-java/web-form.html");WebElementdatalist=driver.findElement(By.name("my-datalist"));datalist.click();WebElementoption=driver.findElement(By.xpath("//datalist/option[2]"));StringoptionValue=option.getAttribute("value");datalist.sendKeys(optionValue);assertThat(optionValue).isEqualTo("New York");}
Navigation Targets
When navigating web pages using a browser, by default, we use a single page corresponding to the URL in the navigation bar. Then, we can open another page in a new browser tab. This second tab can be explicitly opened when a link defines the attribute target, or the user can force navigation to a new tab, typically by using the modifier key Ctrl (or Cmd in macOS) together with the mouse click into a web link. Another possibility is opening web pages in new windows. For this, web pages typically use the JavaScript command window.open(url). Another way of displaying different pages at the same time is using frames and iframes. A frame is an HTML element type that defines a particular area (into a set called frameset) where a web page can be displayed. An iframe is another HTML element that allows embedding an HTML page into the current one.
Warning
Using frames is not encouraged since these elements have many drawbacks, such as performance and accessibility problems. I explain how to use them through Selenium WebDriver for compatibility reasons. Nevertheless, I strongly recommend avoiding frames on brand-new web applications.
The Selenium WebDriver API provides the interface TargetLocator to deal with the previously mentioned targets (i.e., tabs, windows, frames, and iframes). This interface allows changing the focus of the future commands of a WebDriver object (to a new tab, windows, etc.). This interface is accessible by invoking the method switchTo() in a WebDriver object.
Table 4-8 describes its public methods.
| Method | Return | Description |
|---|---|---|
|
|
|
|
|
Change focus to a frame (or iframe) by name or id. |
|
|
Change focus to a frame (or iframe) previously located as a WebElement. |
|
|
Change focus to the parent context. |
|
|
Switch the focus to another window, by name or handle. A window handle is a hexadecimal string that univocally identifies a window or tab. |
|
|
Creates a new browser window (using |
|
|
Select the main document (when using iframes) or the first frame on the page (when using a frameset). |
|
|
Get the element currently selected. |
|
|
Change focus to a window alert (see âDialog Boxesâ for further details). |
Tabs and Windows
Example 4-21 shows a test where we open a new tab for navigating a second web page. Example 4-22 shows an equivalent case but for opening a new window for the second web page. Notice that the difference between these examples is only the parameter WindowType.TAB and WindowType.WINDOW.
Example 4-21. Test opening a new tab
@TestvoidtestNewTab(){driver.get("https://bonigarcia.dev/selenium-webdriver-java/");StringinitHandle=driver.getWindowHandle();driver.switchTo().newWindow(WindowType.TAB);driver.get("https://bonigarcia.dev/selenium-webdriver-java/web-form.html");assertThat(driver.getWindowHandles().size()).isEqualTo(2);driver.switchTo().window(initHandle);driver.close();assertThat(driver.getWindowHandles().size()).isEqualTo(1);}
We navigate to a web page.
We get the current window handle.
We open another web page (since the focus is in the second tab, the page is opened in the second tab).
We verify that the number of window handles at this point is 2.
We change the focus to the initial window (using its handle).
We close only the current window. The second tab remains open.
We verify that the number of window handles now is 1.
Example 4-22. Test opening a new window
@TestvoidtestNewWindow(){driver.get("https://bonigarcia.dev/selenium-webdriver-java/");StringinitHandle=driver.getWindowHandle();driver.switchTo().newWindow(WindowType.WINDOW);driver.get("https://bonigarcia.dev/selenium-webdriver-java/web-form.html");assertThat(driver.getWindowHandles().size()).isEqualTo(2);driver.switchTo().window(initHandle);driver.close();assertThat(driver.getWindowHandles().size()).isEqualTo(1);}
Frames and Iframes
Example 4-23 shows a test in which the web page under test contains an iframe. Example 4-24 shows the equivalent case but using a frameset.
Example 4-23. Test handling iframes
@TestvoidtestIFrames(){driver.get("https://bonigarcia.dev/selenium-webdriver-java/iframes.html");WebDriverWaitwait=newWebDriverWait(driver,Duration.ofSeconds(10));wait.until(ExpectedConditions.frameToBeAvailableAndSwitchToIt("my-iframe"));BypName=By.tagName("p");wait.until(ExpectedConditions.numberOfElementsToBeMoreThan(pName,0));List<WebElement>paragraphs=driver.findElements(pName);assertThat(paragraphs).hasSize(20);}
We open a web page that contains an iframe (see Figure 4-9).
We use an explicit wait for waiting for the frame and switching to it.
We use another explicit wait to pause until the paragraphs contained in the iframe are available.
We assert the number of paragraphs is as expected.
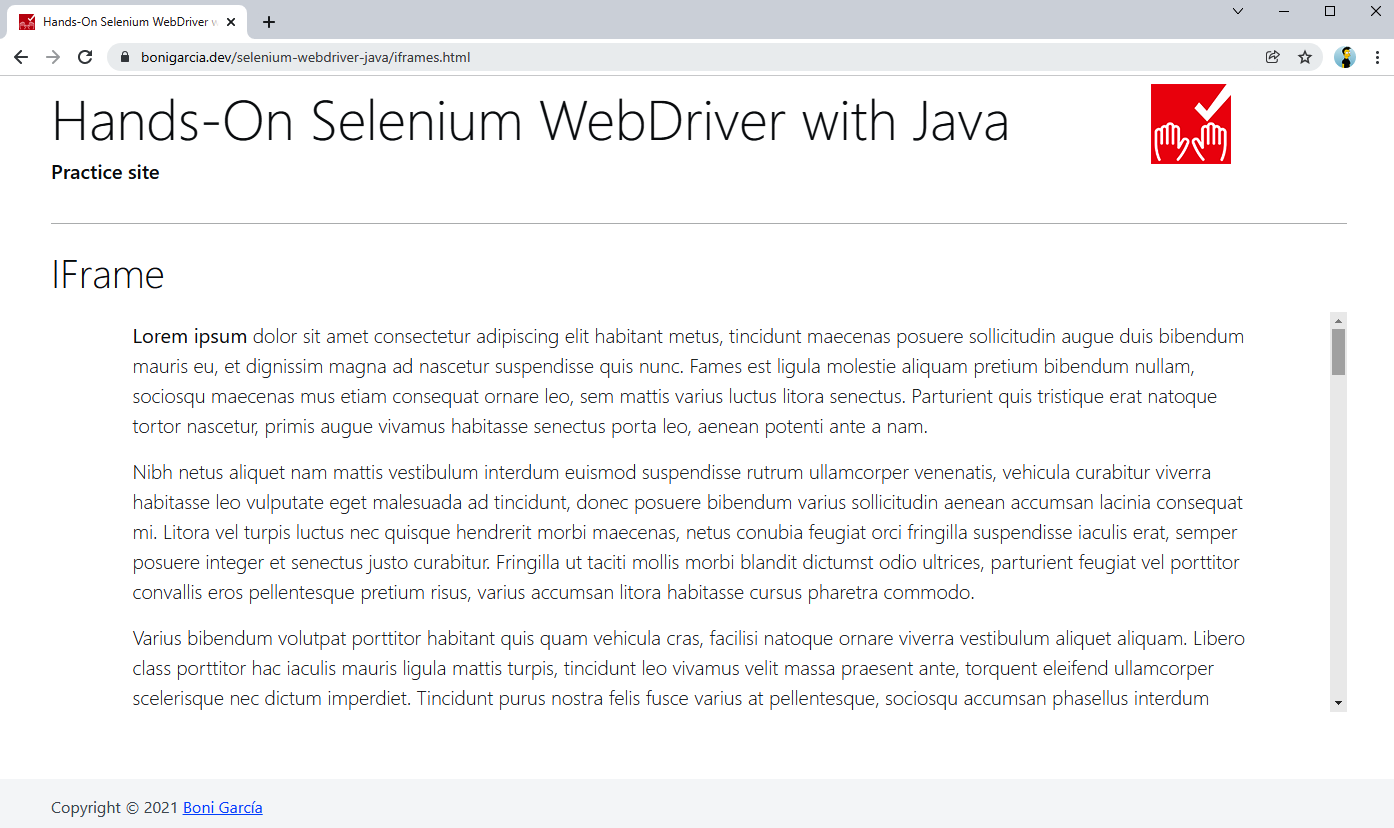
Figure 4-9. Practice web page using an iframe
Example 4-24. Test handling frames
@TestvoidtestFrames(){driver.get("https://bonigarcia.dev/selenium-webdriver-java/frames.html");WebDriverWaitwait=newWebDriverWait(driver,Duration.ofSeconds(10));StringframeName="frame-body";wait.until(ExpectedConditions.presenceOfElementLocated(By.name(frameName)));driver.switchTo().frame(frameName);BypName=By.tagName("p");wait.until(ExpectedConditions.numberOfElementsToBeMoreThan(pName,0));List<WebElement>paragraphs=driver.findElements(pName);assertThat(paragraphs).hasSize(20);}
We open a web page that contains a frameset (see Figure 4-10).
We wait for the frame to be available. Note that steps 2 and 3 in Example 4-23 are equivalent to this step.
We change the focus to this frame.

Figure 4-10. Practice web page using frames
Dialog Boxes
JavaScript provides different dialog boxes (sometimes called pop-ups) to interact with the user, namely:
- Alert
-
To show a message and wait for the user to press the button OK (only choice in the dialog). For instance, the following code will open a dialog that displays âHello world!â and waits for the user to press the OK button.
alert("Hello world!"); - Confirm
-
To show a dialog box with a question and two buttons: OK and Cancel. For instance, the following code will open a dialog showing the message âIs this correct?â and prompting the user to click on OK or Cancel.
letcorrect=confirm("Is this correct?"); - Prompt
-
To show a dialog box with a text message, an input text field, and the buttons OK and Cancel. For example, the following code shows a pop-up displaying âPlease enter your name,â a dialog box in which the user can type, and two buttons (OK and Cancel).
letusername=prompt("Please enter your name");
In addition, CSS allows implementing another type of dialog box called modal window. This dialog disables the main window (but keeps it visible) while overlaying a child pop-up, typically showing a message and some buttons. You can find a sample page on the practice web page containing all these dialog boxes (alert, confirm, prompt, and modal). Figure 4-11 shows a screenshot of this page when the modal dialog is active.

Figure 4-11. Practice web page with dialog boxes (alert, confirm, prompt, and modal)
Alerts, Confirms, and Prompts
The Selenium WebDriver API provides the interface Alert to manipulate JavaScript dialogs (i.e., alerts, confirms, and prompts). Table 4-9 describes the methods provided by this interface. Then, Example 4-25 shows a basic test interacting with an alert.
| Method | Return | Description |
|---|---|---|
|
|
|
|
|
|
|
|
|
|
|
To type some string in the input text (only available in prompts) |
Example 4-25. Test handling an alert dialog
@TestvoidtestAlert(){driver.get("https://bonigarcia.dev/selenium-webdriver-java/dialog-boxes.html");WebDriverWaitwait=newWebDriverWait(driver,Duration.ofSeconds(5));driver.findElement(By.id("my-alert")).click();wait.until(ExpectedConditions.alertIsPresent());Alertalert=driver.switchTo().alert();assertThat(alert.getText()).isEqualTo("Hello world!");alert.accept();}
We open the practice web page that launches dialog boxes.
We click on the left button to launch a JavaScript alert.
We wait until the alert dialog is displayed on the screen.
We change the focus to the alert pop-up.
We verify that the alert text is as expected.
We click on the OK button of the alert dialog.
We can replace steps 3 and 4 with a single explicit wait statement, as follows (you can find it in a second test in the same class in the examples repository):
Alertalert=wait.until(ExpectedConditions.alertIsPresent());
The next test (Example 4-26) illustrates how to deal with a confirm dialog. Notice this example is quite similar to the previous one, but in this case, we can invoke the method dismiss() to click on the Cancel button available on the confirm dialog. Finally, Example 4-27 shows how to manage a prompt dialog. In this case, we can type a string into the input text.
Example 4-26. Test handling a confirm dialog
@TestvoidtestConfirm(){driver.get("https://bonigarcia.dev/selenium-webdriver-java/dialog-boxes.html");WebDriverWaitwait=newWebDriverWait(driver,Duration.ofSeconds(5));driver.findElement(By.id("my-confirm")).click();wait.until(ExpectedConditions.alertIsPresent());Alertconfirm=driver.switchTo().alert();assertThat(confirm.getText()).isEqualTo("Is this correct?");confirm.dismiss();}
Example 4-27. Test handling a prompt dialog
@TestvoidtestPrompt(){driver.get("https://bonigarcia.dev/selenium-webdriver-java/dialog-boxes.html");WebDriverWaitwait=newWebDriverWait(driver,Duration.ofSeconds(5));driver.findElement(By.id("my-prompt")).click();wait.until(ExpectedConditions.alertIsPresent());Alertprompt=driver.switchTo().alert();prompt.sendKeys("John Doe");assertThat(prompt.getText()).isEqualTo("Please enter your name");prompt.accept();}
Modal Windows
Modal windows are dialog boxes built with basic CSS and HTML. For this reason, Selenium WebDriver does not provide any specific utility for manipulating them. Instead, we use the standard WebDriver API (locators, waits, etc.) to interact with modal windows. Example 4-28 shows a basic test using the practice web page that contains dialog boxes.
Example 4-28. Test handling a modal dialog
@TestvoidtestModal(){driver.get("https://bonigarcia.dev/selenium-webdriver-java/dialog-boxes.html");WebDriverWaitwait=newWebDriverWait(driver,Duration.ofSeconds(5));driver.findElement(By.id("my-modal")).click();WebElementclose=driver.findElement(By.xpath("//button[text() = 'Close']"));assertThat(close.getTagName()).isEqualTo("button");wait.until(ExpectedConditions.elementToBeClickable(close));close.click();}
Web Storage
The Web Storage API allows web applications to store data locally in the client file system. This API provides two JavaScript objects:
window.localStoragewindow.sessionStorage-
To store data during the session time (data is deleted when the browser tab is closed)
Selenium WebDriver provides the interface WebStorage for manipulating the Web Storage API. Most of the WebDriver types supported by Selenium WebDriver inherit this interface: ChromeDriver, EdgeDriver, FirefoxDriver, OperaDriver, and SafariDriver. This way, we can use this feature of these browsers. Example 4-29 demonstrates this use in Chrome. This test uses both types of web storage (local and session).
Example 4-29. Test using web storage
@TestvoidtestWebStorage(){driver.get("https://bonigarcia.dev/selenium-webdriver-java/web-storage.html");WebStoragewebStorage=(WebStorage)driver;LocalStoragelocalStorage=webStorage.getLocalStorage();log.debug("Local storage elements: {}",localStorage.size());SessionStoragesessionStorage=webStorage.getSessionStorage();sessionStorage.keySet().forEach(key->log.debug("Session storage: {}={}",key,sessionStorage.getItem(key)));assertThat(sessionStorage.size()).isEqualTo(2);sessionStorage.setItem("new element","new value");assertThat(sessionStorage.size()).isEqualTo(3);driver.findElement(By.id("display-session")).click();}
We cast the driver object to
WebStorage.We log the number of elements of local storage.
We log the session storage (it should contain two elements).
After adding a new element, there should be three elements in the session storage.
Event Listeners
The Selenium WebDriver API allows creating listeners that notify events happening in WebDriver and derived objects. In former versions of Selenium WebDriver, this feature was accessible through the class EventFiringWebDriver. This class is deprecated as of Selenium WebDriver 4, and instead, we should use the following:
EventFiringDecorator-
Wrapper class for
WebDriverand derived objects (e.g.,WebElement,TargetLocator, etc.). It allows registering one or more listeners (i.e.,WebDriverListenerinstances). WebDriverListener-
Interface that should implement the listeners registered in the decorator. It supports three types of events:
- Before events
-
Logic inserted just before some event starts
- After events
-
Logic inserted just after some event terminates
- Error events
-
Logic inserted before an exception is thrown
To implement an event listener, first, we should create a listener class. In other words, we need to create a class that implements the WebDriverListener. This interface defines all its methods using the default keyword, and therefore, it is optional to override their methods. Thanks to that feature (available as of Java 8), our class should only implement the method we need. There are plenty of listener methods available, for instance, afterGet() (executed after calling to the method get() in a WebDriver instance), or beforeQuit() (executed before calling to the quit() method in a WebDriver instance), to name a few. My recommendation for checking all these listeners is to use your favorite IDE to discover the possible methods to be overridden/implemented. Figure 4-12 shows the wizard for doing this in Eclipse.
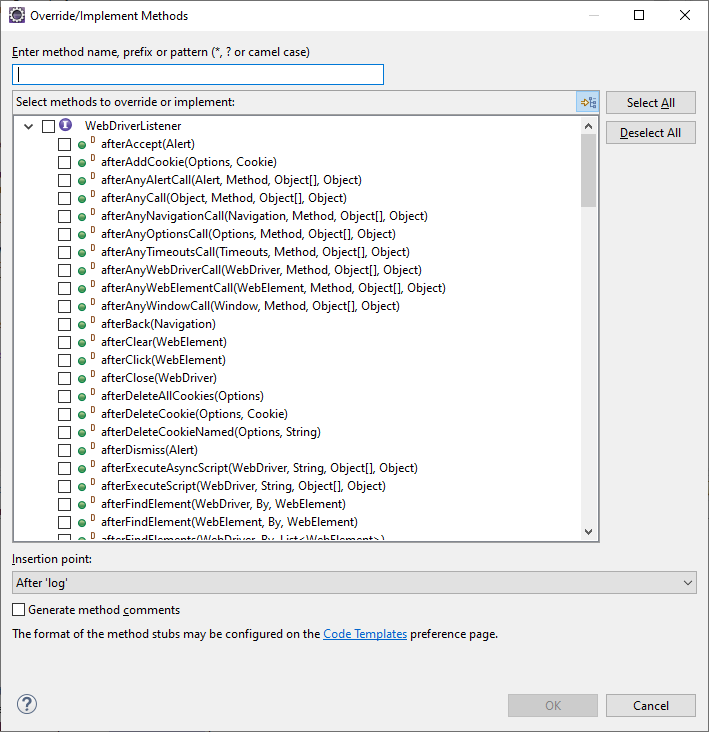
Figure 4-12. WebDriverListener methods in Eclipse
Once we have implemented our listener, we need to create the decorator class. There are two ways to do that. If we want to decorate a WebDriver object, we can create an instance of EventFiringDecorator (passing the listener as the argument to the constructor) and then invoke the method decorate() to pass the WebDriver object. For instance:
WebDriverdecoratedDriver=newEventFiringDecorator(myListener).decorate(originalDriver);
The second way is to decorate other objects of the Selenium WebDriver API, namely WebElement, TargetLocator, Navigation, Options, Timeouts, Window, Alert, or VirtualAuthenticator. In this case, we need to invoke the method createDecorated() in an EventFiringDecorator object to get a Decorated<T> generic class. The following snippet shows an example using a WebElement as a parameter:
Decorated<WebElement>decoratedWebElement=newEventFiringDecorator(listener).createDecorated(myWebElement);
Letâs look at a completed example. First, Example 4-30 shows the class that implements the WebDriverListener interface. Notice this class implements two methods: afterGet() and beforeQuit(). Both methods call takeScreenshot() to take a browser screenshot. All in all, we are collecting browser screenshots just after loading a web page (typically at the beginning of the test) and before quitting (typically at the end of the test). Then, Example 4-31 shows the test that uses this listener.
Example 4-30. Event listener implementing methods afterGet() and beforeQuit()
publicclassMyEventListenerimplementsWebDriverListener{staticfinalLoggerlog=getLogger(lookup().lookupClass());@OverridepublicvoidafterGet(WebDriverdriver,Stringurl){WebDriverListener.super.afterGet(driver,url);takeScreenshot(driver);}@OverridepublicvoidbeforeQuit(WebDriverdriver){takeScreenshot(driver);}privatevoidtakeScreenshot(WebDriverdriver){TakesScreenshotts=(TakesScreenshot)driver;Filescreenshot=ts.getScreenshotAs(OutputType.FILE);SessionIdsessionId=((RemoteWebDriver)driver).getSessionId();Datetoday=newDate();SimpleDateFormatdateFormat=newSimpleDateFormat("yyyy.MM.dd_HH.mm.ss.SSS");StringscreenshotFileName=String.format("%s-%s.png",dateFormat.format(today),sessionId.toString());Pathdestination=Paths.get(screenshotFileName);try{Files.move(screenshot.toPath(),destination);}catch(IOExceptione){log.error("Exception moving screenshot from {} to {}",screenshot,destination,e);}}}
We override this method to execute custom logic after loading web pages with the
WebDriverobject.We override this method to execute custom logic before quitting the
WebDriverobject.We use a unique name for the PNG screenshots. For that, we get the system date (date and time) plus the session identifier.
Example 4-31. Test using EventFiringDecorator and the previous listener
classEventListenerJupiterTest{WebDriverdriver;@BeforeEachvoidsetup(){MyEventListenerlistener=newMyEventListener();WebDriveroriginalDriver=WebDriverManager.chromedriver().create();driver=newEventFiringDecorator(listener).decorate(originalDriver);}@AfterEachvoidteardown(){driver.quit();}@TestvoidtestEventListener(){driver.get("https://bonigarcia.dev/selenium-webdriver-java/");assertThat(driver.getTitle()).isEqualTo("Hands-On Selenium WebDriver with Java");driver.findElement(By.linkText("Web form")).click();}}
WebDriver Exceptions
All the exceptions provided by the WebDriver API inherit from the class WebDriverException and are unchecked (see the following sidebar if you are unfamiliar with this terminology). Figure 4-13 shows these exceptions in Selenium WebDriver 4. As this image shows, there are many different exception types. Table 4-10 summarizes some of the most common causes.
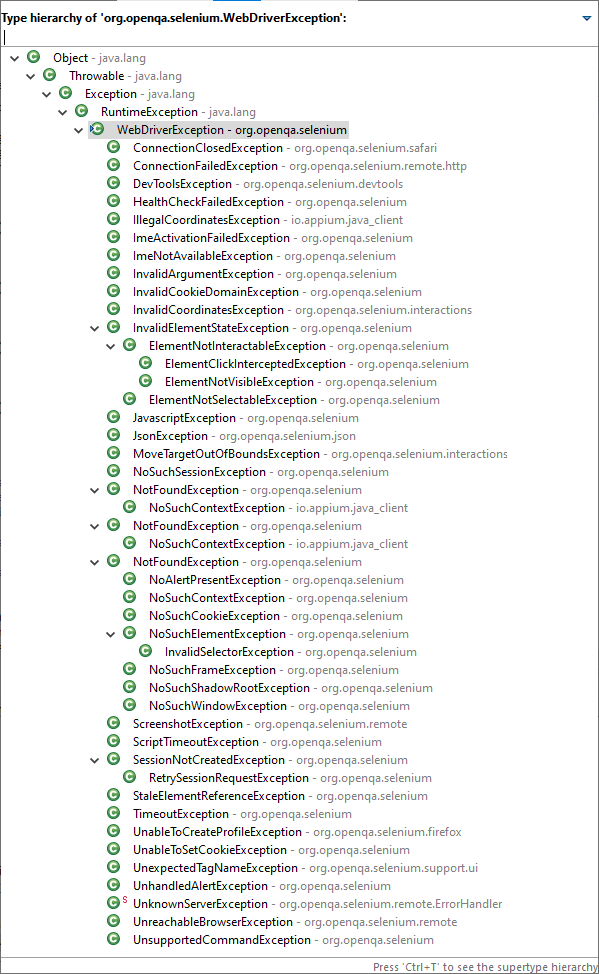
Figure 4-13. Selenium WebDriver exceptions
Summary and Outlook
This chapter provided a comprehensive review of those WebDriver API features interoperable in different web browsers. Among them, you discovered how to execute JavaScript with Selenium WebDriver, with synchronous, pinned (i.e., attached to a WebDriver session), and asynchronous scripts. Then, you learned about timeouts, used to specify a time limit interval for page loading and script execution. Also, you saw how to manage several browser aspects, such as size and position, navigation history, the shadow DOM, and cookies. Next, you discovered how to interact with specific web elements, such as dropdown lists (select and data lists), navigation targets (windows, tabs, frames, and iframes), and dialog boxes (alerts, prompts, confirms, and modals). Finally, we reviewed the mechanism for implementing web storage and event listeners in Selenium WebDriver 4 and the most relevant WebDriver exceptions (and their common causes).
The next chapter continues to expose the features of the Selenium WebDriver API. The chapter explains those aspects specific to a given browser (e.g., Chrome, Firefox, etc.), including browser capabilities (e.g., ChromeOptions, FirefoxOptions, etc.), the Chrome DevTools Protocol (CDP), network interception, mocking geolocation
coordinates, the WebDriver BiDirectional (BiDi) protocol, authentication mechanisms, or printing web pages to PDF, among other features.
Get Hands-On Selenium WebDriver with Java now with the O’Reilly learning platform.
O’Reilly members experience books, live events, courses curated by job role, and more from O’Reilly and nearly 200 top publishers.

