Chapter 4. 3D Art Optimization
Introduction
In this chapter, I cover why optimization is an immense challenge when it comes to developing assets for virtual reality (VR) and augmented reality (AR), with a heavy focus on the side of VR. I share different approaches and thought processes to consider in various areas involved in creating 3D art. Instead of focusing on specific tools, techniques, and tutorials, you will see an overall view of what you can do to optimize your 3D art. I share why it is important to really keep optimization as a high priority in the entire design process.
Let’s begin by talking about why optimization for VR is new to most artists who are beginning to work with VR content.
A typical 2D LCD monitor has a refresh rate of 60 Hz. When you look at a flat monitor running at this rate, you will have a fantastic visual experience. This has allowed for traditional asset development to be “heavy,” with heavy in this circumstance meaning that assets have higher poly counts and larger texture images, along with the scene itself having a higher quantity of models to view.
Head-mounted displays (HMDs) run at 90 Hz. To have a comfortable and convincing experience, VR content needs to run at 90 frames per second (FPS). If your experiences run lower than 90 FPS, you risk causing your users discomfort. Discomfort can include headaches, nausea, and eye pain. This will result in a subpar experience that users will want to leave quickly. Because of this high level of discomfort, you should not force users into a low-frame-rate experience.
Soon, VR is going to enter other fields. Instead of simply making VR, you will be making tools, experiences, apps, and so on in a field, and VR is your medium. Some of these fields will already be familiar with creating 3D content, and optimization will be important to learn. There will be multiple individuals whose background experience might not have prepared them properly for this major change in asset development, and it will be a challenge to acclimate to these new processes. Here are some examples of industry-related positions that will need to learn to create with optimization in mind:
-
High-resolution rendering (creating realistic models of real objects)
-
High-end games for PCs
-
In-VR art creation
These examples have benefits that will no longer be something that can be taken advantage of for VR and AR. Excluding high-end tethered headsets like the Oculus Rift or HTC Vive, most other devices out there will be lighter and more portable. You must keep in mind that the bigger your files are and the more content and draw calls there are, the closer you will get to risking the user having a poor performance.
Individuals creating content for film and rendering have the privilege to create 3D models with high poly counts. They aren’t limited to the complexity their models could have or the amount of rendering data required for the computer to visualize them. Following is an example of what can occur when someone new to optimization attempts to develop for VR:
But why is this such a large problem for the developer? If the person’s background is creating models to be rendered for photos, they’re most likely used to creating with high poly counts. It is not uncommon to see high numbers ranging from 50,000 triangles (called “tris” within the industry) to 1,000,000 triangles.
This however does not translate well over to real-time VR rendering. As stated earlier, the performance issues will prevent the end user from having a quality experience.
Options to Consider
Here are a couple of things to try to solve the problem:
-
Running a decimation tool to autoreduce the poly count.
You can find these in popular 3D modeling software. They usually do a good job of removing 50% of the triangle count without it affecting the shape and silhouette of the model.
-
Take a look at the layout of the model’s UVs (the axes of the 2D texture that’s being projected onto a 3D).
Is the UV texture laid out to take advantage of the entire square space? Are the UVs to scale and prioritizing the areas that need the most detail to be shown? We explore textures and materials in more detail later in the chapter.
Another good option to contemplate on is whether your model will enter a social VR place that permits user-generated content (UGC)? This will most likely continue to be a challenge for a long time. Keep in mind that the more avatars there are in a space, the less of a budget each person should have to respect everyone’s frame rate, allowing for a good experience.
Ideal Solution
The best solution is to reduce the model’s triangle count to the absolute minimum that it can have without affecting the shape. Reduce the texture size to the smallest size it can have without forcing the model to be blurry or having a lesser quality than preferred.
Make sure when the object is placed in its final environment that it allows enough leeway for the system’s frame rate in order for the experience to feel natural.
Let’s recap. Why is it important to optimize your 3D art?
Every model in your 3D environment is going to affect your experience’s performance. The more you add, the more you will need to consider how close you are getting to your budget. Talk with your team to determine what your ideal budget is.
Another consideration for where your 3D models are going includes social VR platforms. There are some social VR platforms out there that are built with UGC. You’ll most likely exist in these spaces as an avatar, and if you’re able to customize your avatar, remember that everything you learn here applies there, as well. Like with the rest of what you’ll learn here, try to keep everything about your avatar and what you’re wearing low poly and with the smallest number of draw calls that you can create. You might run into filters that help lower how much you’re making people download, but think ahead to what you’re asking people’s screens to render. Be mindful of their hardware and connection and keep yourself easy to render and download.
Let’s continue with a comprehensive overview of what you will need to check for when making 3D models for VR and AR.
Poly count budget
Do you have a concrete number of polygons that you cannot pass in a scene? Do you have a limit of poly count per model?
Always look for the number of triangles. The count of faces won’t always be accurate for gauging how many polys you have on your model. A face made up of four vertices, such as a square, is actually two triangles in one.
Delete any faces that will never be seen. If you are creating a street environment in which the interiors of the buildings will never be entered, the scene will need only building facades. The backs of the walls and interiors are not needed. If you are using content that has already been built, you can delete everything that won’t be seen.
If you are working on 3D models that will stay far from you in the experience, they don’t need all of the details you’d probably want were they closer. Doors and windows can be modeled and textured with less detail. The lower your poly count is, the better.
The following sections present some things to keep in mind when modeling.
Topology
Inspect the edge loops and spot any edge loops that do not contribute anything more to the shape. If an edge is running across a flat area, you would know that it’s not needed if you delete the entire edge and spot no difference in the silhouette. If it still holds up the shape and has the desired curve, you’re on your way to reducing poly count. There are even some areas where you can bring in edges to merge with others. Double-check that all of the removed edge loops did not leave any vertices behind, and delete those vertices that aren’t connecting any edges.
Figures 4-1 through 4-4 show the process of creating a gaming console. In Figure 4-1, you can see, in wireframe mode, the start of its creation using edge loops to define where more geometry will be needed; there are two steps between reducing polygons and the final version in Figure 4-4, which results in fewer triangles than its first pass.
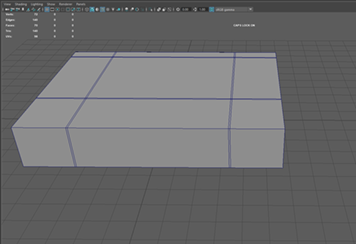
Figure 4-1. First pass on the game console: basic shapes established; triangle count: 140
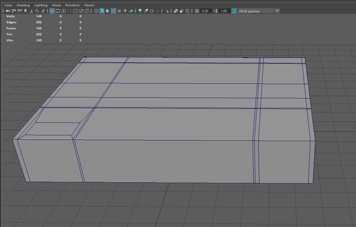
Figure 4-2. Second pass on the game console: defining where faces and edges will lift and curve; triangle count: 292
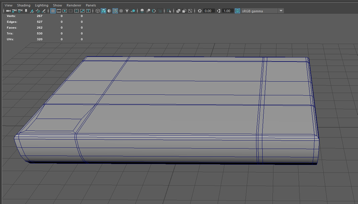
Figure 4-3. Third pass on the game console: softening edges and beginning to think about edge removal; triangle count: 530
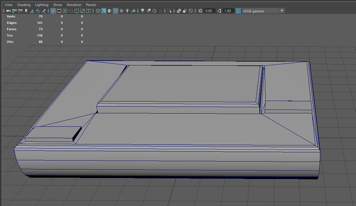
Figure 4-4. Fourth and final version: removed edges that didn’t contribute to the model’s shape; triangle count: 136
The process shown in Figures 4-1 through 4-4 is similar to the process taken to model a few more assets for this gaming console set. Figure 4-5 depicts the result of the set. It contains several models in one combined mesh that is ready to have the textures applied to them. Together, they will share one texture atlas. Later in this chapter, you will see how the texture atlas looks.
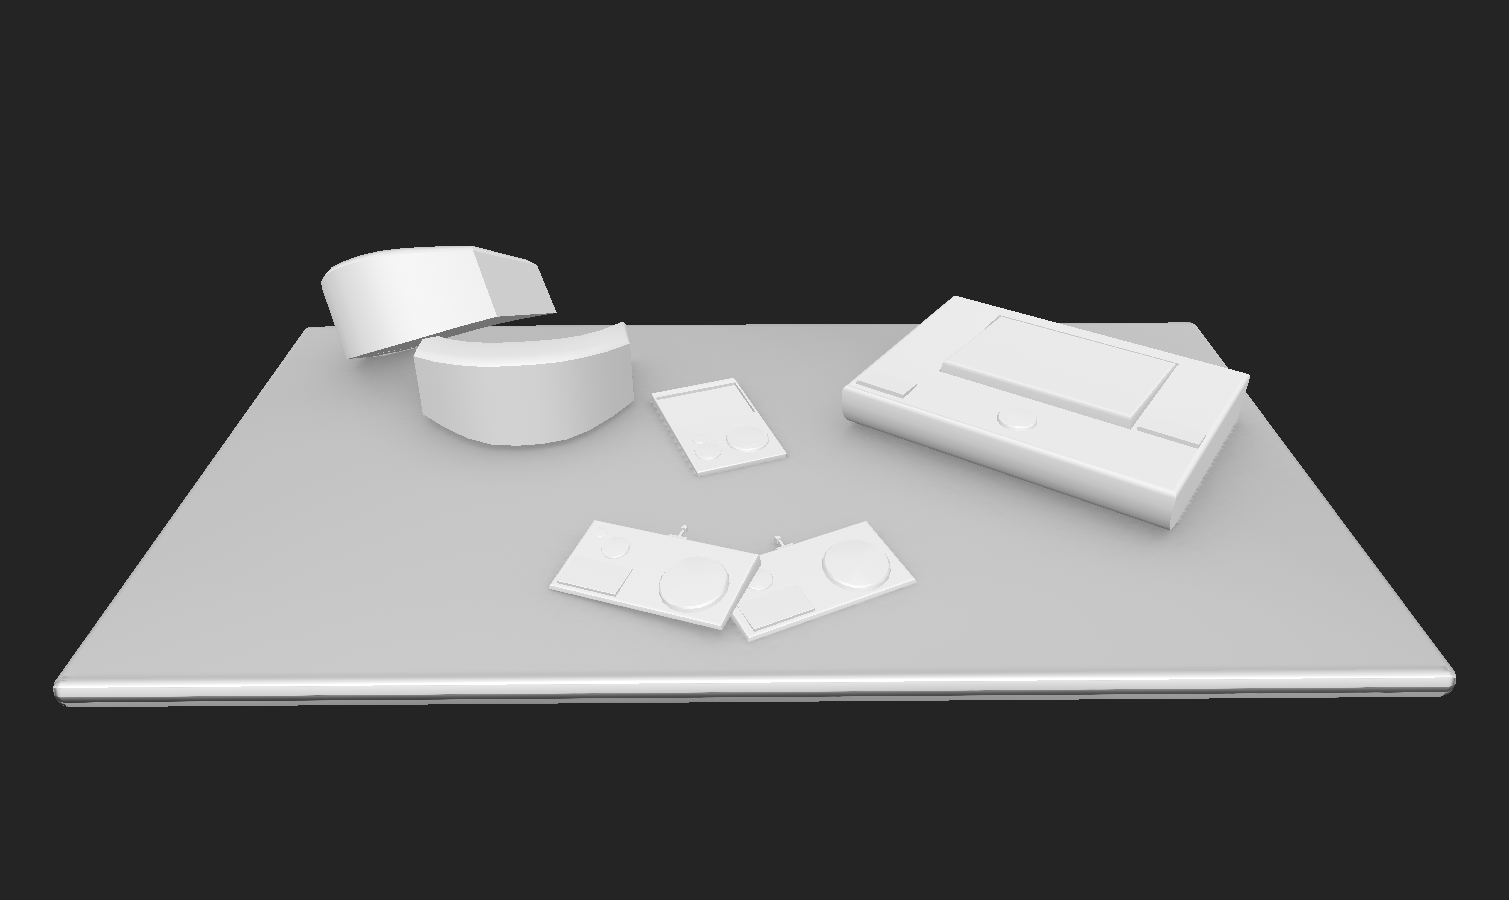
Figure 4-5. A look at the assets before they receive their materials
Here are a few more things to keep in mind when modeling:
-
Avoid n-gons. An n-gon is a face that has more than four sides. Most engines have issues with n-gons. They can cause issues with collision, they might be rendered completely wrong, and they can also even be invisible. 3D modeling software such as Autodesk’s Maya provides you with an option to clean up the scene and remove any n-gons that are found.
-
Run a cleanup using your modeling software to find and remove all coplanar faces. You might often find sneaky faces hidden within a clone of itself, which will appear invisible to the naked eye and will increase your poly count. There is also the issue of z-fighting. Z-fighting is when there are two faces occupying the same 3D space.
-
Turn on a viewer to ensure that the normals are facing in the direction that is intended. Normals will be rendered from one direction in your preferred engine, so don’t let 3D modeling software fool you with two-sided rendering.
It’s important to think about all of these considerations at the very beginning before you start working on a 3D model.
Figure 4-6 presents an example of an optimization project that I personally worked on. I was given a 3D model of glasses that comprised 69,868 triangles. This amount totaled more than my avatar itself, which is around 40,000, including the body, clothing, hair, and accessories. The glasses were purchased from an online store selling files of 3D models, and it was clear that the artist created this with the intention to show that they can model to match what the object is like in “real life.” The artist hand-modeled each and every piece, including hinges for the temples.
Because I was going to create these glasses for people to wear in a social VR platform, I knew that most of the detail was neither going to be seen nor needed, so I deleted a lot of those pieces. I managed to preserve the look of the glasses while deleting and redirecting most edge loops. The finished result was just under 1,000 triangles.
Specifically, for AR use, getting it under 1,000 triangles would be an absolute must. On a Hololens, for example, you will want to aim for a maximum of about 60,000 triangles in an entire scene. Unless the application focuses heavily on inspecting a realistically detailed pair of sunglasses, you would want to reduce them all the way down like I did in this example. Figure 4-7 presents a close-up showing the hard edges you can see around the rounded parts of the frames, which are unnoticeable if looked at from a distance.
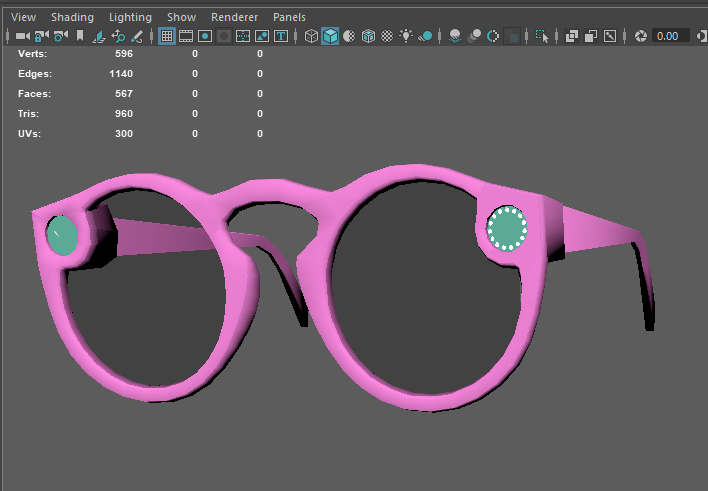
Figure 4-7. Example of hard edges around the rounded parts of the frames
Baking
Another trick you can do to help your poly count is by baking your high-poly model’s details into a lower-poly model. By doing so, you can generate a normal map that will trick viewers into seeing height and depth that is not present on the geometry itself.
Now that we’ve covered a lot of what goes into a model, let’s talk about UV unwrapping and texture painting.
UVs are used to describe a 3D model on a flat plane. Those UVs reference a texture that the model uses in order to have color and material information mapped accordingly. For optimization, let’s go over the approach to texture creation that is created, with the goal being to keep the draw call count low. (More on draw calls later.)
A texture atlas is a texture image that contains data describing what the materials are made up of. It’s always better to create a texture atlas because it drastically reduces the number of draw calls.
Figure 4-8 demonstrates a robot avatar that is made up of many pieces, has been merged into one mesh, and has its UVs shared within the one space, all unwrapped and ready to be textured.
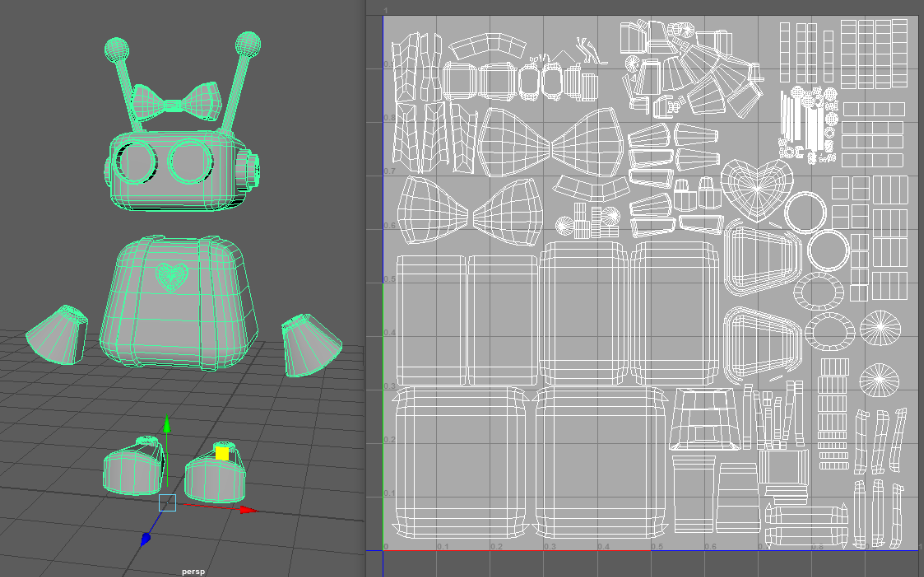
Figure 4-8. These are the pieces that comprise the robot and its accompanying textures
There is one area on this model that I wanted to keep higher resolution: the detail on the eyes. The model itself is flat; however, I gave it a texture map of one eye that was shared across both flat, circular meshes. The detail on the flat 2D image tricks the viewer into thinking that there could be more depth than there really is.
If I had included it in the texture atlas, I would have needed to increase the texture size and make the rest of the UVs much smaller because the detail on the pupil and the highlights on the eyes were more important, requiring more UV space.
Instead, the UVs of an eye mesh take up the entire UV space in the quadrant for the eye texture. The submesh shows all of the details that the eyes need. That same submesh is then duplicated to the other socket because there is no neeed for unique details to differentiate between the eyes. Figure 4-9 shows the areas of the UVs that are shared on the small texture for the eyes.
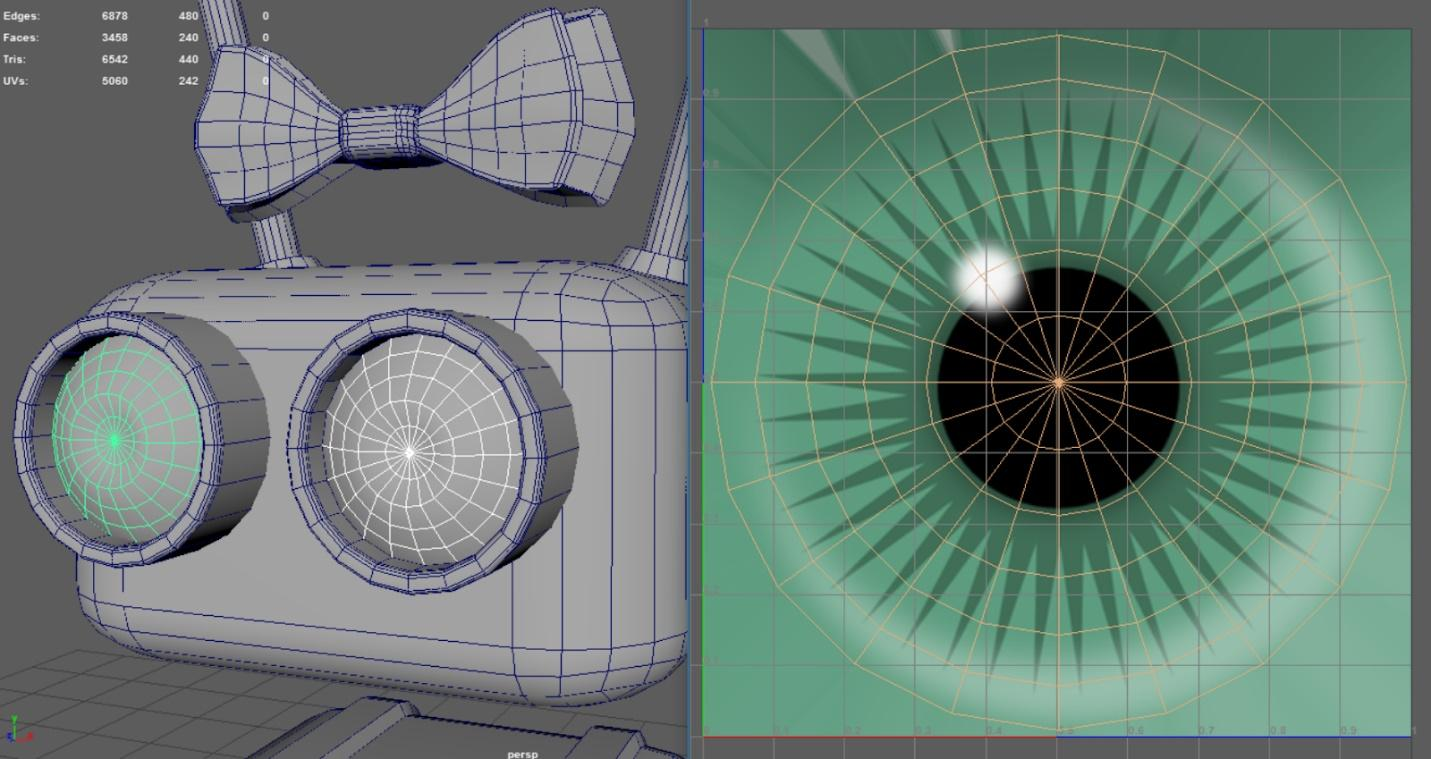
Figure 4-9. The robot model’s eye shares the same UVs, duplicated before combining into a single mesh
For more realistic art styles, you will still need to keep the poly count on the lower side; however, you can keep the quality of the models high by using physically based shaders and rendering. This robot model uses physically based rendering (PBR) to have a realistic look, as illustrated in Figure 4-10. PBR uses realistic lighting models and surface values that represents real materials.
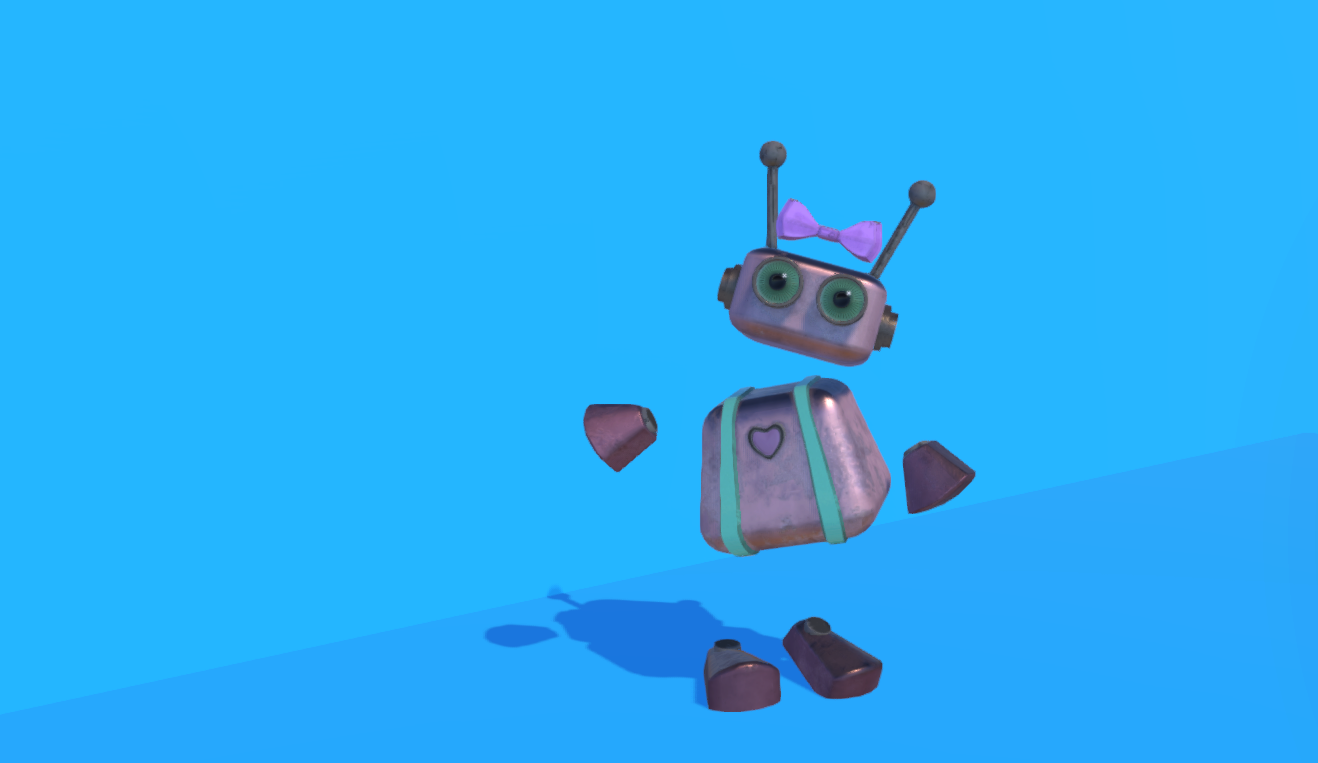
Figure 4-10. A look at the robot with all of its PBR materials
Let’s go over some PBR textures that I used on the robot model as an example. Hopefully this helps you to understand how PBR will work on models for your VR experience.
Remember the gaming console models that we looked at earlier in this chapter? Figures 4-11 through 4-13 show the texture atlas used for that set; notice the individual textures used for its PBR material.
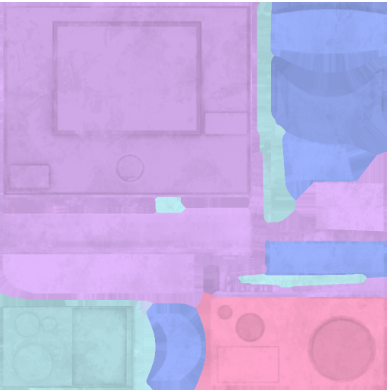
Figure 4-11. A color map where texture defines the colors that are represented on the model
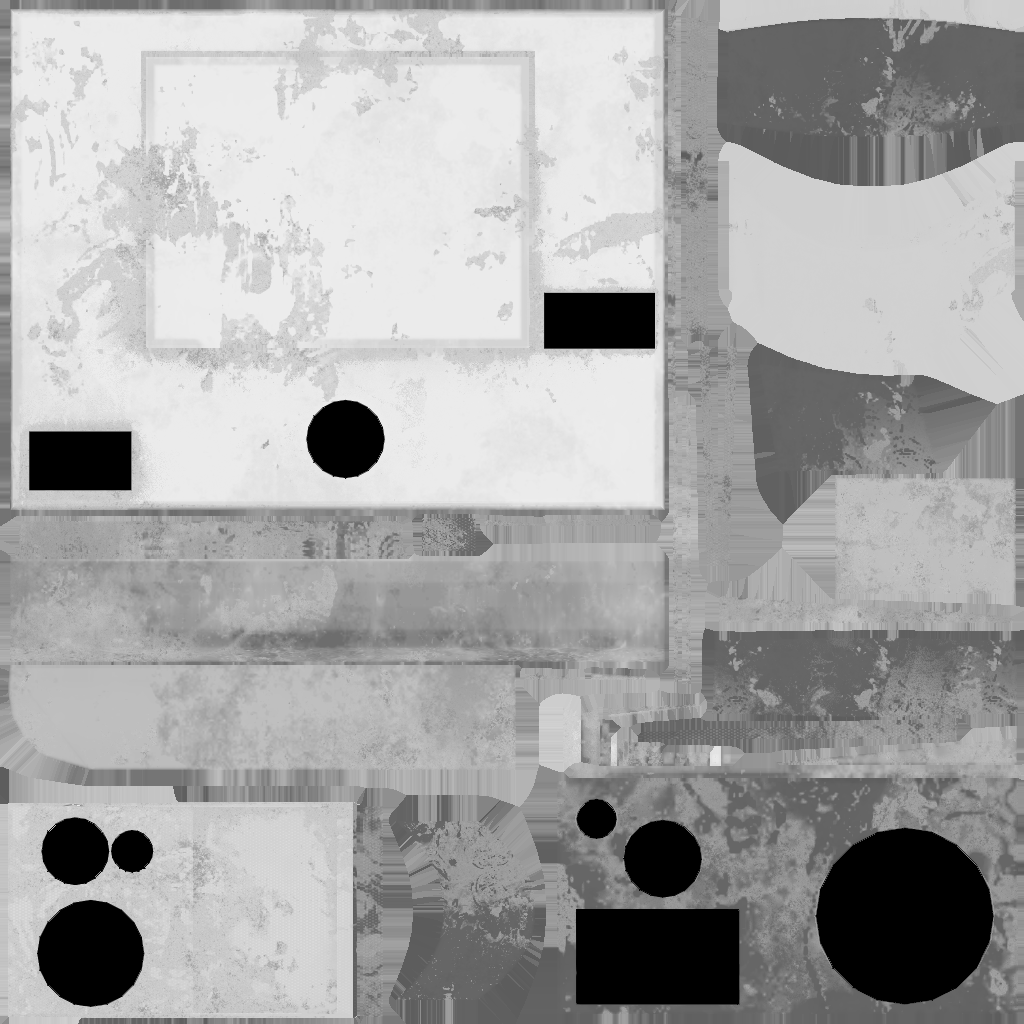
Figure 4-12. A roughness map where texture defines the surface of the model, ranging from smooth to rough
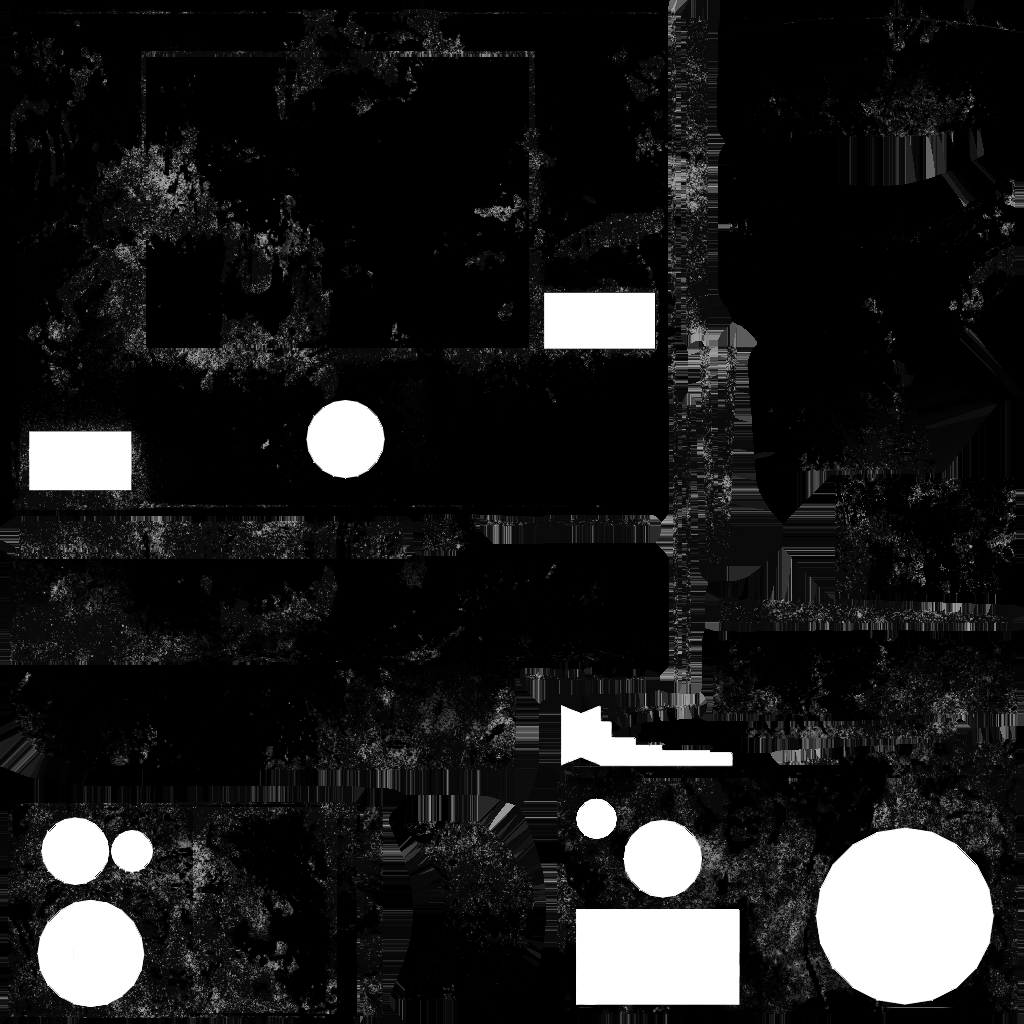
Figure 4-13. The metallic map where texture defines whether a surface is metallic
Figures 4-14 through 4-17 show a final look at the 3D models within the program they were painted in, Allegorithmic Substance Painter, and showing how they look in VR within the social VR application, High Fidelity.

Figure 4-14. A look at the gaming systems, combined into one mesh using one material that uses PBR textures to define the color and surface
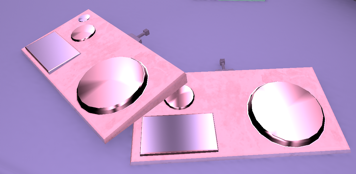
Figure 4-15. These controllers show the high contrast that the texture uses to define metallic and nonmetallic surfaces
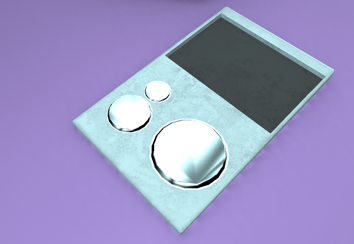
Figure 4-16. This gaming system has more roughness information on the nonmetallic parts, showing grime and dirt
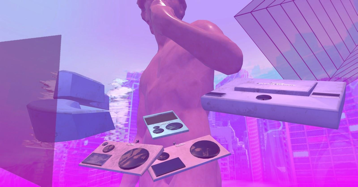
Figure 4-17. Here is their final version located in a large-scale virtual art gallery where the models float in a sky
There are other types of texture maps such as normal, bump, and ambient occlusion maps. They each play a role in defining the look of the model whether it’s faking depth or creating shadows. Spend some time experimenting with these texture maps and find what your models need.
Now that you’ve seen how you can create texture atlases, we next talk about why it’s important to make them as we examine draw calls.
Draw Calls
A draw call is a function that results in rendering the objects on your screen. The CPU works with the graphics processing unit (GPU) to draw every object using information about the mesh, its textures, shaders, and so on. You should always work toward having the smallest number of draw calls possible because having too many will cause a reduction in frame rate.
To lower how many draw calls you have, follow these guidelines:
-
Combine all of the submeshes of your model into one combined mesh.
-
Give your mesh the fewest number of materials possible that uses all of the textures the model or models need.
Think of any of your favorite VR experiences and picture all of the 3D models that make up those scenes. Each and every one of those contribute to draw call counts in one way or another. They always add up. If this context is experienced in social VR, also consider how many people will experience rendering everything in your scenes, as well.
As we get close to the end of this chapter, I want to restate that it is important to keep optimization a high priority in the entire design process—from the start of a model to the completed textures. Keep numbers and sizes small without having to sacrifice everything you wanted for your VR content.
Using VR Tools for Creating 3D Art
At this juncture, you might be wondering why thus far this chapter has been focused on 3D artwork created on a 2D screen if we are talking about VR here. Although we are seeing a lot of options for artwork creation arise with many tools available (such as Tiltbush, Medium, Unbound, Quill, and Google Blocks), traditional manipulation of 3D assets will be done on programs meant for 2D viewers.
It’s not much different when it comes to having a model that needs optimizing. Currently, it is not surprising to export a considerable amount of content from these programs. The magical feeling of creating art in a 3D space around you comes from the content coming out as expected. This means that a lot of the geometry is created with enough edge loops to give you the expected curves. Several materials might also be used to make the piece extremely colorful and bright. What you make with these programs will most likely need to be optimized if being added to a space with more content that will need to be drawn on your screen.
No matter what program you use, even if you find tools that will help optimize the assets used for your immersive experience, it will most likely require creators and designers to make the choices to ensure sizes, counts, and quality are acceptable for the experience. An appropriate balance will always be required, no matter what medium is used to create this content.
Acquiring 3D Models Versus Making Them from Scratch
Be careful when purchasing models from online stores. Take into consideration how long ago the model was made. Do you think it was made with VR in mind? Will you need to clean up the model and optimize it for your use? Does the time you might need to spend on it cost less than your time creating one from scratch? Purchasing 3D models can be fast and easy, but it can affect your performance later on and take up a large amount of time to modify it so that it performs well.
Following is a list of what to look for in an item’s listing and what questions you should ask when downloading a 3D model from places like Poly, Turbosquid, CGTrader, and so on (if you don’t see any of the information listed, be very cautious and plan for inconvenience):
-
If the model is good but high poly, how much time will you spend reducing the poly count and cleaning up the geometry to make the asset VR-ready?
-
Is the model textured in an optimized way, using a texture atlas?
-
If there are several separate texture maps, do you think the time it will take to optimize them is acceptable?
-
Are the texture files in a format supported by the engine that will be rendering it?
-
What are the texture file sizes? Beware of textures larger than 2,048, especially if a texture that large is for a model that will be small in scale. Also, look for small textures if what you want is higher resolution on some models.
-
File format.
-
Are you buying files you can work with?
-
Do your programs support opening and editing of the models?
Always test the appearance of your model. Drop it into your engine of choice and see it in VR or AR for yourself. You will be surprised by how different scale feels when you are immersed by it.
Summary
In this chapter, you looked at different approaches and thought processes to consider in various areas involved in creating 3D art. It will take time and practice to learn how to optimize 3D art, so make sure optimization is always kept a high priority during the entire design process. You might be an artist new to creating for VR or AR. You might be a developer learning about areas other people work in. You might be a producer who is curious about the artists’ pipeline. I’m glad you made it this far to learn about the importance of optimization because it is an immense challenge when it comes to developing assets for VR and AR. Everyone working on immersive experiences should know about the challenging work that goes into asset creation.
With technology changing rapidly, some of the techniques or programs you looked at in this chapter might be irrelevant in the near future, so it is important to remember the reasons behind these methods. As mentioned earlier, it is important to keep people comfortable in your experiences. Make sure to be mindful and keep that frame rate high with optimized art!
Get Creating Augmented and Virtual Realities now with the O’Reilly learning platform.
O’Reilly members experience books, live events, courses curated by job role, and more from O’Reilly and nearly 200 top publishers.
