// Read the name from the grid
GridViewRow row = grid.Rows[selectedRowIndex];
string name = row.Cells[0].Text;
// Update the details label
detailsLabel.Text = "You selected " + name + ".";
}
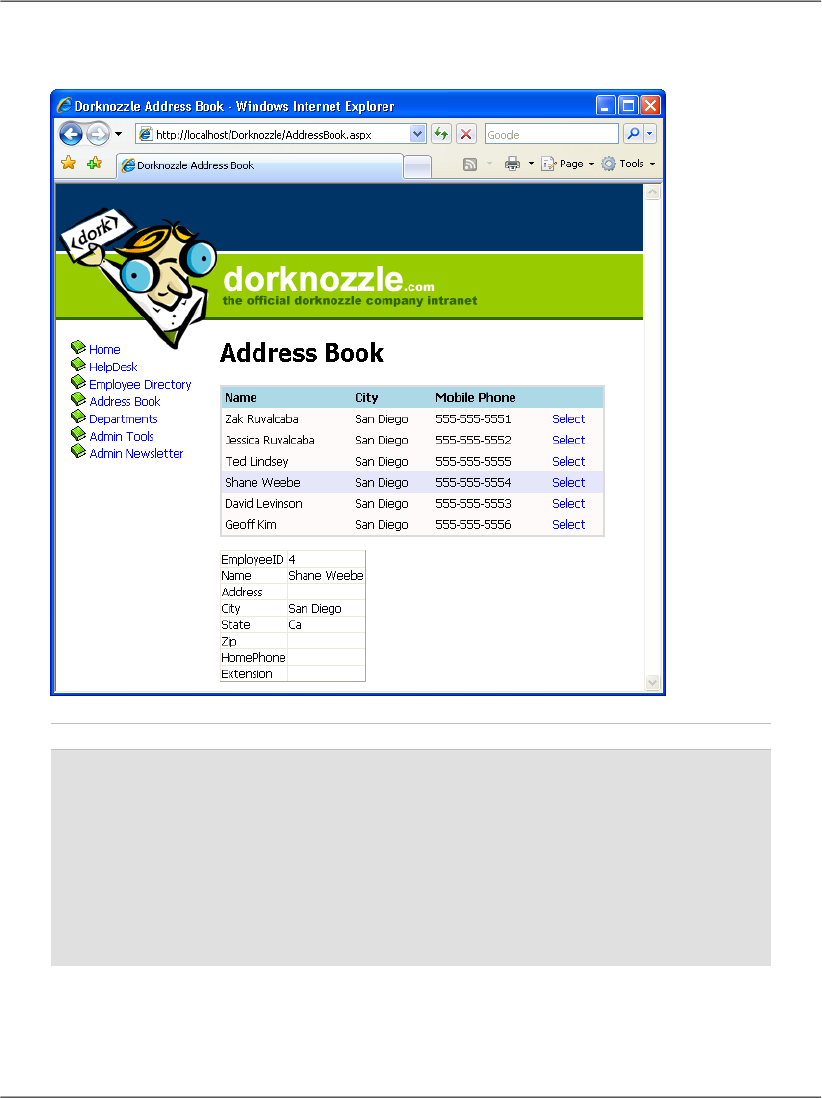
Execute the project, and select one of the records. You should see a display like
the one in Figure 11.9.
Figure 11.9. Displaying details about the selected row
It was easy to add this new feature, wasnt it?
Using the DetailsView Control
ASP.NET 2.0 introduced the DetailsView control, which can come in very handy
when you want to display more details about one record in a grid. Youll find
this control very useful when you need to display details about a record that
445
Using the DetailsView Control
contains many fieldsso many, in fact, that the main grid cant display all of
them.
A common use of the DetailsView control is to create a page that shows a list
of items, and allows you to drill down to view the details of each item. For in-
stance, an ecommerce site might initially present users with only a little inform-
ation about all available products, to reduce download time and make the inform-
ation more readable. Users could then select a product to see a more detailed
view of that product.
Lets see how this works by using a GridView and a DetailsView in our Address
Book web form.
Replace detailsLabel with a DetailsView control, as shown in the following
code snippet:
File: AddressBook.aspx (excerpt)
</asp:GridView>
<br />
<asp:DetailsView id="employeeDetails" runat="server" />
</asp:Content>
Next, well modify the BindGrid method to specify the grids data key. The data
key feature of the GridView control basically allows us to store a piece of data
about each row without actually displaying that data. Well use it to store the
EmployeeID of each record. Later, when we need to retrieve additional data about
the selected employee, well be able to read the employees ID from the data key,
and use it in our SELECT query.
Add this row to your code-behind file:
Visual Basic File: AddressBook.aspx.vb (excerpt)
' Open the connection
conn.Open()
' Execute the command
reader = comm.ExecuteReader()
' Fill the grid with data
grid.DataSource = reader
grid.DataKeyNames = New String() {"EmployeeID"}
grid.DataBind()
' Close the reader
reader.Close()
446
Chapter 11: Managing Content Using Grid View and Details View
Figure 11.10. The DetailsView control in action
C# File: AddressBook.aspx.cs (excerpt)
// Open the connection
conn.Open();
// Execute the command
reader = comm.ExecuteReader();
// Fill the grid with data
grid.DataSource = reader;
grid.DataKeyNames = new string[] { "EmployeeID" };
grid.DataBind();
// Close the reader
reader.Close();
As you can see, we tell the GridView which keys to store by setting the
DataKeyNames property. This property needs to be populated with an array of
447
Using the DetailsView Control
keys, because the GridView supports storing zero, one, or many keys for each
row it displays. In this case, we create an array that contains just one value: Em-
ployeeID. In the code youve just written, you can see the syntax that creates
such an array on the fly, without declaring an array first.
After you make this change, youll be able to access the EmployeeID value for
any given row through the GridViews DataKeys property.
With this new data at hand, loading the details of the selected employee into the
DetailsView is a straightforward process. In the GridViews SelectedIndex-
Changed event handler, we just need to make another database query to read the
details we want to display for the selected employee, then simply feed the results
to the DetailsView object, like this:
Visual Basic File: AddressBook.aspx.vb (excerpt)
Protected Sub grid_SelectedIndexChanged(ByVal sender As Object, _
ByVal e As System.EventArgs) Handles grid.SelectedIndexChanged
BindDetails()
End Sub
Private Sub BindDetails()
' Obtain the index of the selected row
Dim selectedRowIndex As Integer = grid.SelectedIndex
' Read the employee ID
Dim employeeId As Integer = _
grid.DataKeys(selectedRowIndex).Value
' Define data objects
Dim conn As SqlConnection
Dim comm As SqlCommand
Dim reader As SqlDataReader
' Read the connection string from Web.config
Dim connectionString As String = _
ConfigurationManager.ConnectionStrings( _
"Dorknozzle").ConnectionString
' Initialize connection
conn = New SqlConnection(connectionString)
' Create command
comm = New SqlCommand( _
"SELECT EmployeeID, Name, Address, City, State, Zip, " & _
"HomePhone, Extension FROM Employees " & _
"WHERE EmployeeID=@EmployeeID", conn)
' Add the EmployeeID parameter
comm.Parameters.Add("EmployeeID", Data.SqlDbType.Int)
comm.Parameters("EmployeeID").Value = employeeId
' Enclose database code in Try-Catch-Finally
448
Chapter 11: Managing Content Using Grid View and Details View

Get Build Your Own ASP.NET 2.0 Web Site Using C# & VB, Second Edition now with the O’Reilly learning platform.

O’Reilly members experience books, live events, courses curated by job role, and more from O’Reilly and nearly 200 top publishers.