Wiring a Wii Nunchuk
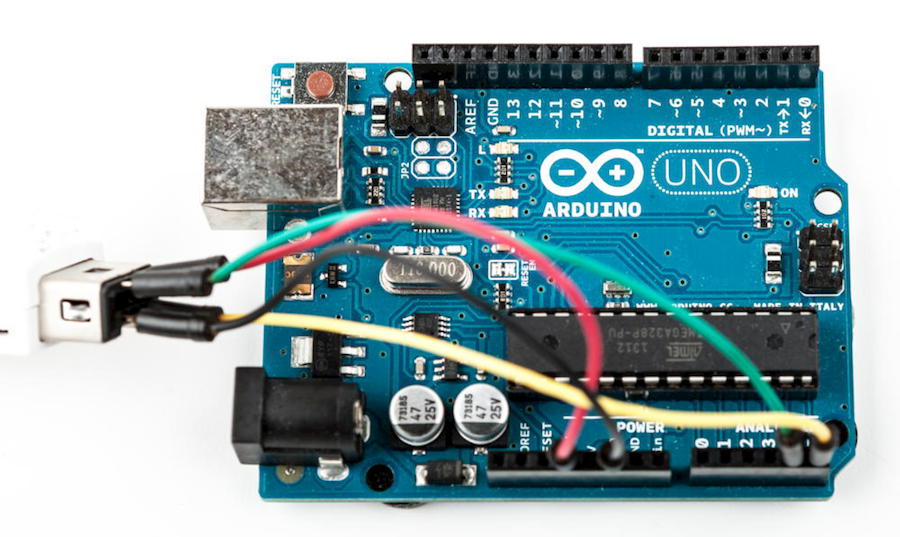
Wiring a Nunchuk to an Arduino really is a piece of cake. You don’t have to open the Nunchuk or modify it in any way. You only have to put four wires into its connector and then connect the wires to the Arduino:


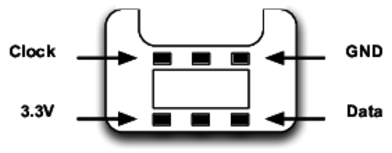
It has six connectors, but only four of them are active: GND, 3.3V, Data, and Clock. Here’s the pinout of a Nunchuk plug:
Put a wire into each connector and then connect the wires to the Arduino. Connect the data wire to analog pin 4 and the clock wire to analog pin 5. The GND wire has to be connected to the Arduino’s ...
Get Arduino: A Quick-Start Guide, 2nd Edition now with the O’Reilly learning platform.
O’Reilly members experience books, live events, courses curated by job role, and more from O’Reilly and nearly 200 top publishers.

