ADOBE PREMIERE ELEMENTS 7 CLASSROOM IN A BOOK 193
1 In the Edit tab of the Tasks panel, click the Project button
( ) . In Project
view, locate the fi le Lesson09_Movie.wmv, and then double-click it to open the
video into the Preview window.
2 In the Preview window, click the Play button (
) to watch the video about
a visit to the water park, which you will build in this lesson.
3 When done, close the Preview window by clicking the Close button (
) in the
upper-right corner of the window.
Creating a simple title
You can add titles to your movie—whether simple still titles, advanced titles with
added graphics, or styled text scrolling across the screen horizontally or vertically—
directly in the Monitor panel of Adobe Premiere Elements. To begin, you will cre-
ate a basic still title. You will work with the water park project, starting by adding
a title clip at the beginning of the movie. First you will add a few seconds of black
video, over which you can then type the title text.
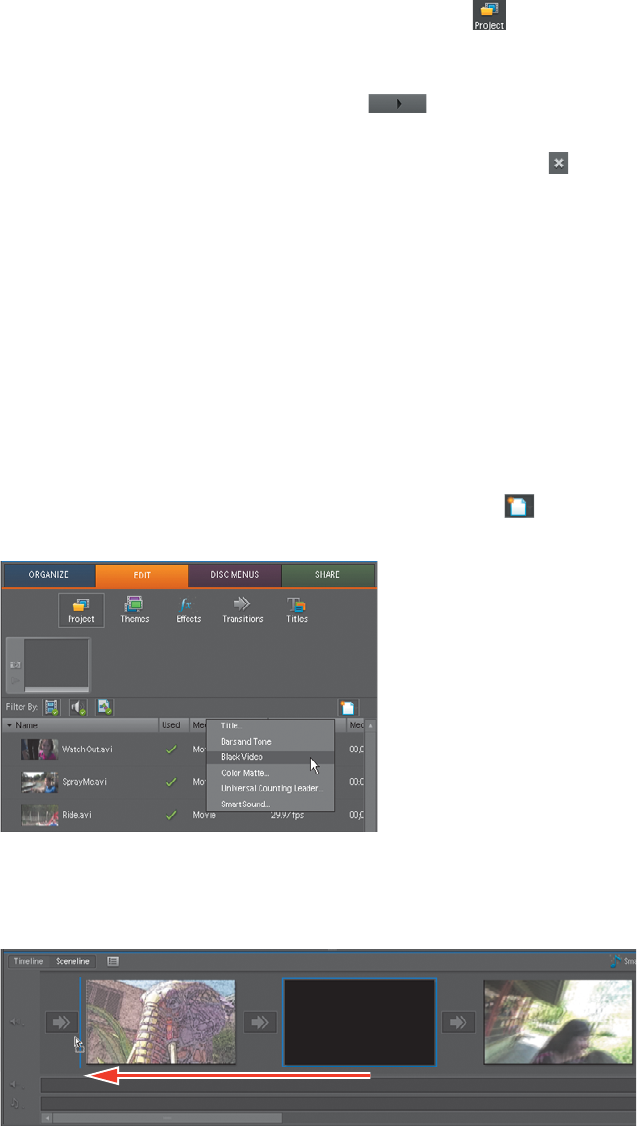
1 In the Sceneline of the My Project panel, click the fi rst clip to select it. In the
upper-right corner of Project view, click the New Item button (
), and then
choose Black Video from the menu that appears.
2 Adobe Premiere Elements inserts a 5-second black video clip after the fi rst clip
in the Sceneline. To move the black video clip to the beginning of the movie,
click and drag it to the left of the fi rst clip in the Sceneline.

194 LESSON 9 Titles and Credits
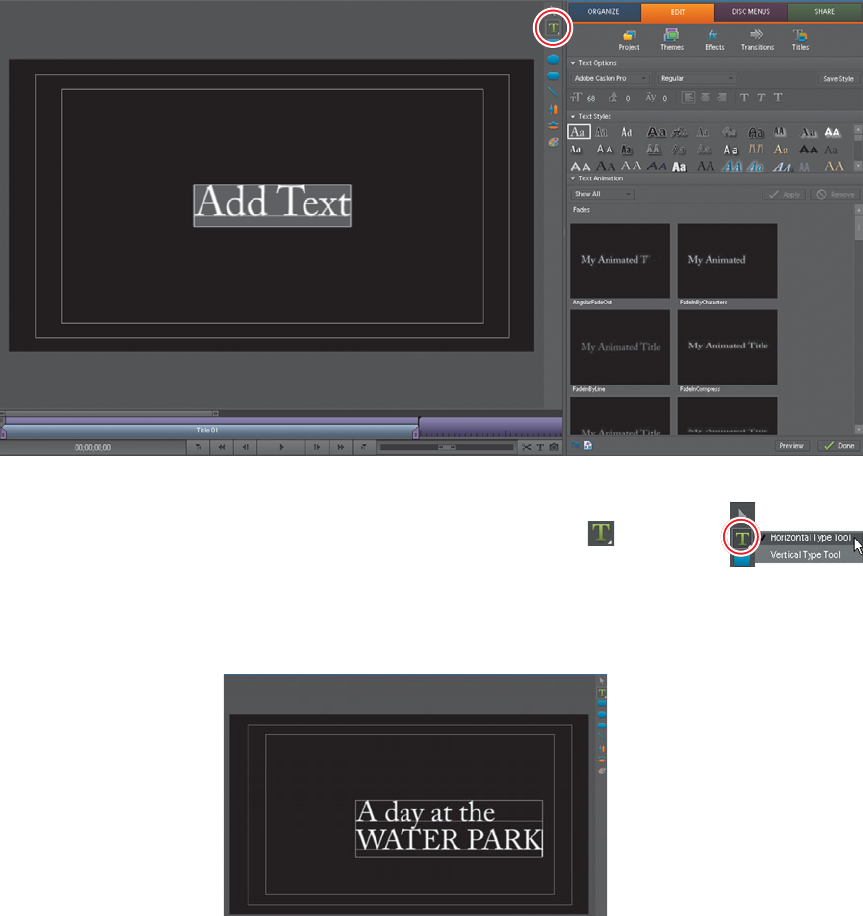
3 With the black video still selected in the Sceneline, choose Title > New Title >
Default Still. Adobe Premiere Elements places the default title text over
the black video in the Monitor panel and switches to title-editing mode. In
the mini-timeline of the Monitor panel, notice the bluish gray-colored clip
representation for the new title clip that is placed on top of the lavender-colored
clip representation for the black video clip. Also notice the text and drawing
tools now visible on the right side of the Monitor panel, and the text options,
text styles, and text animation choices accessible from Properties view.
4 e Horizontal Type tool should be selected by default.
If not, click the Horizontal Type tool button (
) to the
right of the Monitor panel to select it now.
5 Click in the text box and drag your pointer over the
default text to select it, type the words A day at the, and then press the Return
key to create a new line. Next, type the words WATER PARK.
쎲
Note: The Horizontal
Type tool is grouped
with the Vertical Type
tool. To switch between
the two, click and hold
the Tool button, and
then choose from the
menu that appears.
Get Adobe Premiere Elements 7 Classroom in a Book now with the O’Reilly learning platform.
O’Reilly members experience books, live events, courses curated by job role, and more from O’Reilly and nearly 200 top publishers.

