184 LESSON 8 Working with Sound
Creating a split edit
At times, you may want the audio to begin before the video or to extend after the
video into the next clip (or vice versa). Trimming linked audio and video separately
is called a split edit. Usually, when you
create a split edit in one clip, you must create
one in the adjacent clip so they don’t overlap each other. You can create two kinds
of split edits:
• A J-cut, or audio lead, in which audio starts before linked video, or video
continues after the audio.
• An L-cut, or video lead, in which video starts before linked audio, or audio
continues after the video.
—From Adobe Premiere Elements Help
Adding narration
Now let’s add narration to the project.
1 Make sure you have Timeline selected in the My Project panel.
2 Choose File > Get Media from > PC Files and Folders, select the fi le Lesson08_
Narration.wav, and click Open.
3 Press the Home key to move the current-time indicator to the start of the clip.
en drag the Lesson08_Narration.wav clip from Project view and drop it onto
the Narration track in the Timeline.

ADOBE PREMIERE ELEMENTS 7 CLASSROOM IN A BOOK 185
4 Click the Play button (
) to hear the voiceover added to the project.
Note that you need to lower the volume of the background music to make the
narration more audible.
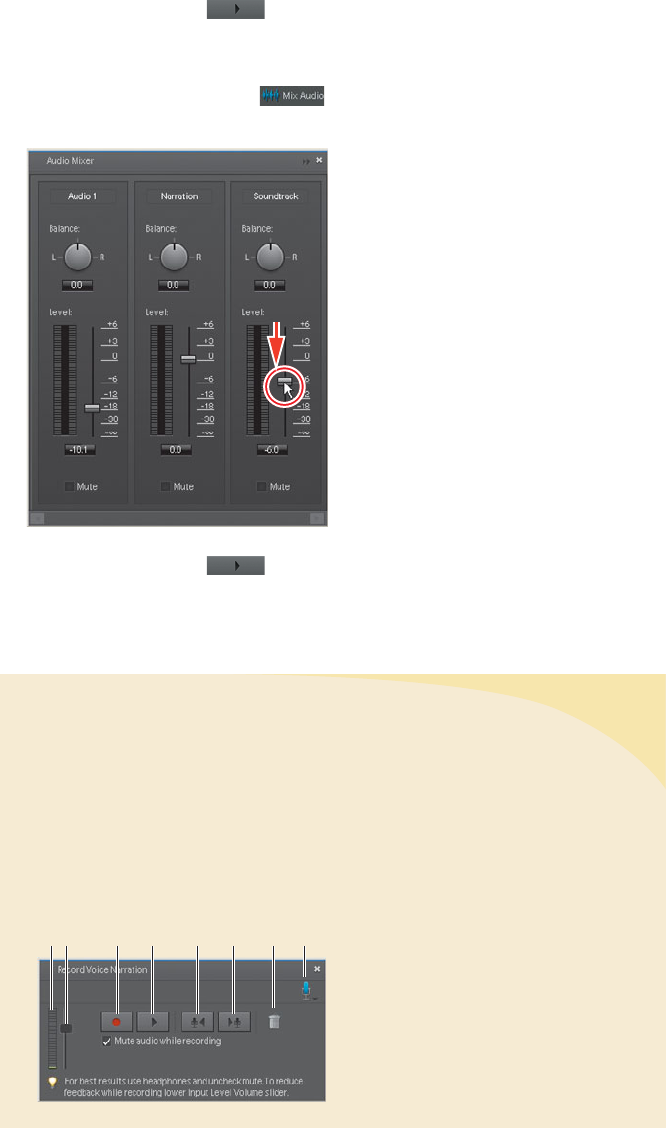
5 Click the Mix Audio button (
), and in the Audio Mixer panel that
opens, drag the handle in the Soundtrack channel down to -6.0 dB.
6 Click the Play button ( ) and listen to the improved audio mix.
While the overall sound is better, the narration is still a bit indistinct. You’ll fi x that
by applying the Dynamics sound eff ect in the next exercise.
Narrating a clip
In this exercise, you’re working with a narration that we supplied, but at some point,
you may want to create your own narration. For best results, confi rm that your
microphone is working correctly with your computer and Adobe
Premiere Elements
before narrating a clip.
Using your computer’s microphone, you can narrate clips while previewing them in
the Monitor panel. Your narration is then added to the Narration soundtrack visible
in either the Timeline or Sceneline.
Record voice narration: A. Volume
indicator. B. Input Volume Level slider.
C. Record. D. Play. E. Go To Previous
Narration Clip. F. Go To Next Narration
Clip. G. Delete. H. Microphone source.
(continues)
A B C D E F G H
Get Adobe Premiere Elements 7 Classroom in a Book now with the O’Reilly learning platform.
O’Reilly members experience books, live events, courses curated by job role, and more from O’Reilly and nearly 200 top publishers.

