102 LESSON 5 Editing Video
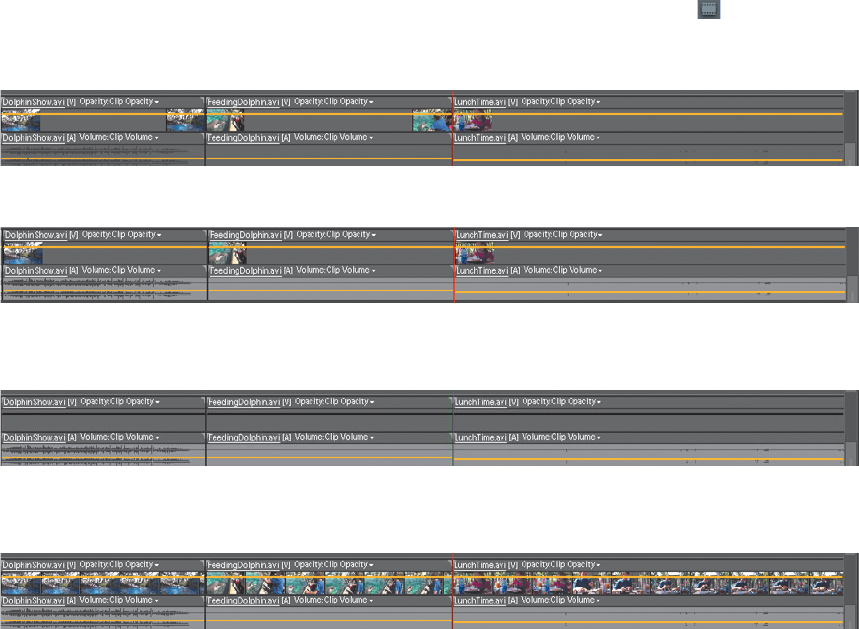
1 By default, Adobe Premiere Elements displays all the frames in a video clip.
However, at times you may fi nd you would like to work with fewer visual
distractions in your clip. Click the Set Display Style button (
) to the left of
the Video 1 track to set the display style to Show Head and Tail. is will show
you the fi rst frame and last frame of all the clips in Video 1.
2 Click the Display Style button again to view the Head Only of the clip.
3 Click the Display Style button again to view the clip by its name only. No
thumbnails will be displayed on the clip.
4 Click the Display Style button one more time to view the default style all of the
frames.
Editing in the Timeline
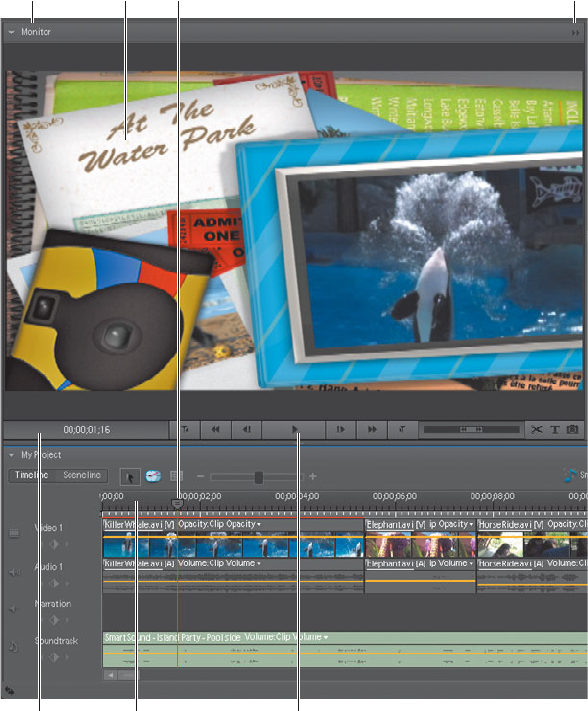
Editing in the Timeline is very similar to editing in the Sceneline, although sev-
eral controls are in diff erent places. Most notably, the mini-timeline beneath the
Monitor panel moves to the Timeline itself, as does the current-time indicator.
Other than that, all playback controls are identical.

ADOBE PREMIERE ELEMENTS 7 CLASSROOM IN A BOOK 103
A CB
D E F
G
Beyond the interface issues, most of the basic clip-related operations are also
identical. For example, you add clips to the Timeline the same way you add them
to the Sceneline. You move clips around the same way, and you delete clips the
same way. If you repeat the exercises you’ve already completed in this chapter
using the Timeline rather than Sceneline, you’ll quickly become adept at all of these
operations.
Trimming and splitting clips is also very similar, but because these operations are
so critical to everyday editing, let’s run through them again in the Timeline.
A. Docking header.
B. Preview area.
C. Panel menu.
D. Current Time.
E. Time ruler.
F. Playback controls.
G. Current-Time
Indicator.

104 LESSON 5 Editing Video
Trimming clips in the Timeline
Every clip has a beginning and an end. In editing terminology these are referred to
as the In points and Out points, as described earlier in this lesson. Setting In and
Out points does not actually delete frames from the hard disk, but instead isolates a
portion of the clip for use in your movie. When you trim a clip in Adobe Premiere
Elements you are simply changing the In and Out points.
1 Press the Home key to move the current-time indicator to the fi rst frame of the
project.
2 Press the Page Dn key to move to the start of Elephant.avi, the second clip in
the Timeline, and then press the spacebar to play the clip. As you’ll see, about
halfway through the clip, the video goes black. ese are the frames you’ll trim
away.
3 Click the Zoom In button (
) at the top of the Timeline to magnify your view.
Trimming in the Timeline is easier when you’re zoomed into the clip. Zooming
in and out to make these adjustments will feel awkward at fi rst, but will quickly
become second nature.
4 Click and drag the scroll bar at the bottom of the Timeline to move the
elephant.avi clip beneath the Monitor panel.
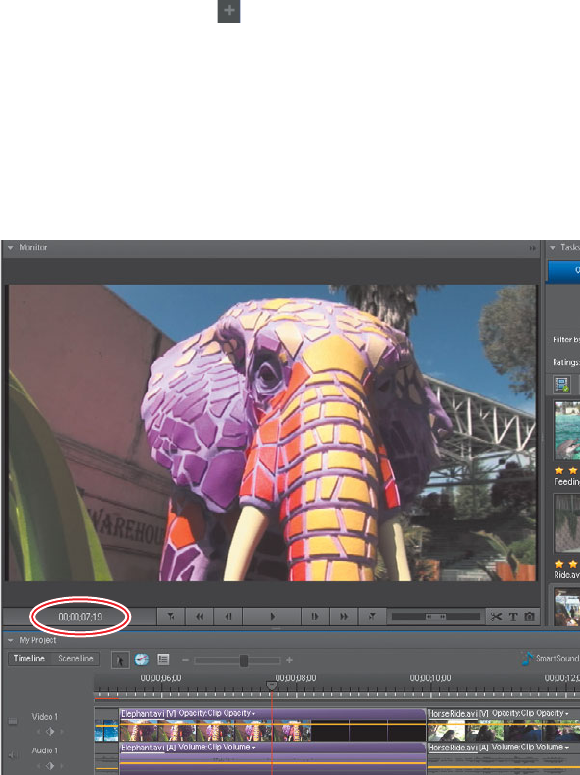
5 Watching the current timecode in the bottom left of the Monitor panel, drag
the current-time indicator to the 00;00;07;19 mark.
Get Adobe Premiere Elements 7 Classroom in a Book now with the O’Reilly learning platform.
O’Reilly members experience books, live events, courses curated by job role, and more from O’Reilly and nearly 200 top publishers.

