284 LESSON 13 Working with Adobe Photoshop Elements
Viewing the completed
movie before you start
To see what you’ll be creating, you can take a look at the completed movie.
1 Before you begin, make sure that you have correctly copied the Lesson13
folder from the DVD in the back of this book onto your computer’s hard disk.
See “Copying the Classroom in a Book fi les” in the Getting Started section of
this book.
2 Navigate to the Lesson13 folder, and double-click Lesson13_Movie.wmv to play
the movie in your default application for watching Windows Media Video fi les.
Getting started
You will now open Adobe Photoshop Elements 7 and import the fi les needed for
the Lesson13 project.
1 Launch Photoshop Elements.
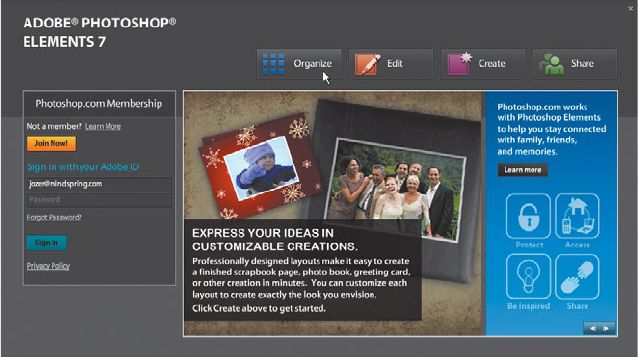
2 In the Welcome screen, click the Organize button to open the Photoshop
Elements Organizer.
3 If you’ve previously used Photoshop Elements, your Organizer may be
displaying the photos in your current catalog. If this is the fi rst time you’re
launching Photoshop Elements, you may receive a message asking if you would
like to designate a location to look for your image fi les. Click No, starting with
an empty Organizer panel.

ADOBE PREMIERE ELEMENTS 7 CLASSROOM IN A BOOK 285
4 Choose File > Get Photos and Videos > From Files and Folders. Navigate to your
Lesson13 folder and select—but do not open—the images subfolder. en, click
Get Photos.
5 Photoshop Elements will open the Import Attached Keyword Tags dialog. Click
OK to import all keyword tags.
All the photos in this folder will be imported into Photoshop Elements.
6 If a message appears telling you that only the newly imported fi les will appear,
click OK. In the Organizer, you should see 12 thumbnail images from a
wedding. umbnail images are small versions of the full-size photos. You will
be working with the full-size photos later in this lesson.
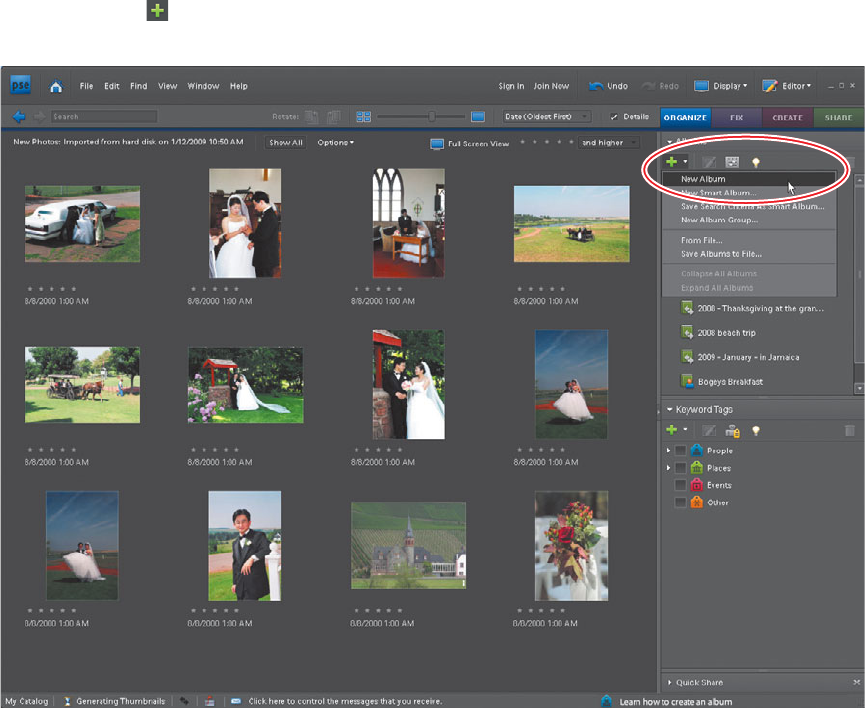
7 Under Albums in the Tagging window, click the Create new album or album
group button (
), and choose New Album. Adobe Premiere Elements opens
the Album Details dialog.

286 LESSON 13 Working with Adobe Photoshop Elements
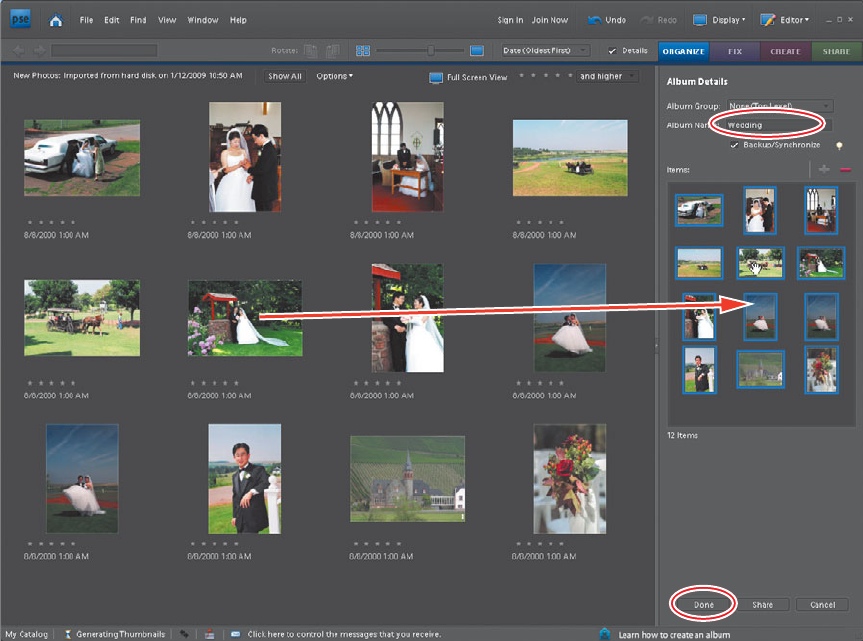
8 In the Photoshop Elements menu, choose Edit > Select All to select the 12 new
images. en click on any one image and drag all the images into the Items
window on the right and release the pointer.
9 In the Album Name fi eld in the Album Details dialog, type Wedding.
10 On the lower left of the Album Details dialog, click Done to save the Album.
As you may recall from Lesson 4, the Organizer workspace in Adobe Premiere
Elements can access albums created in Photoshop Elements. You’ll learn how to
access the newly created Wedding album from Adobe Premiere Elements in a later
lesson.
Get Adobe Premiere Elements 7 Classroom in a Book now with the O’Reilly learning platform.
O’Reilly members experience books, live events, courses curated by job role, and more from O’Reilly and nearly 200 top publishers.

