334 IBM WebSphere Host Publisher Version 3.5
11.6.2 The interactive composite application
Once you have created the host Integration Objects, you will be able to create the
Web application using the Host Publisher Studio. In this scenario, the two
Integration Objects (inquiry and update) are used as independent JavaBeans to
generate information for two different HTML pages presented to the Web user.
This will illustrate the simplest way to create an interactive Web application that
can display and update data maintained by a legacy host (in our case CICS)
application. We use the existing application logic to create a new user interface.
As illustrated in Figure 11-5 on page 328, three Web pages are created:
1. Update_p1 prompts the user to enter an account number.
2. Update_p2 displays account information and prompts the user to modify
fields he wants to change.
3. Update_p3 returns a message confirmation that the update was successful.
All account fields are presented to the user in edit boxes. All fields can therefore
be modified, including the account number and the last name.
Getting started
You can start by creating a new Web application using the Host Publisher Studio
and selecting File -> New Application... in the Studios main window. Clicking
the Next button in the sequence of definition windows will guide you through the
process of setting up the environment to create the application.
In the scenario, the new application is named Update and if you select the option
I prefer to start with data, you will have to open the host Integration Objects that
were previously created (import). As the final step of this introductory phase, one
would normally create an error (HTML) page to be sent to the Web user in case
something goes wrong. However, for simplicity, this last step is omitted in this
sample scenario.
Creating the HTML page: displaying account information
You can start with the applications second page Update_p2 (display account
details). Click Create -> HTML page and follow the sequence of windows. It is an
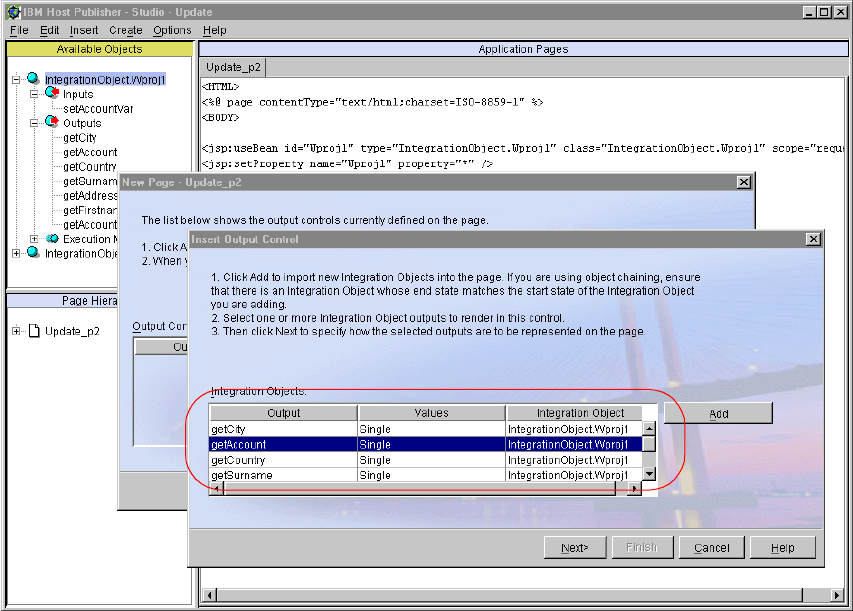
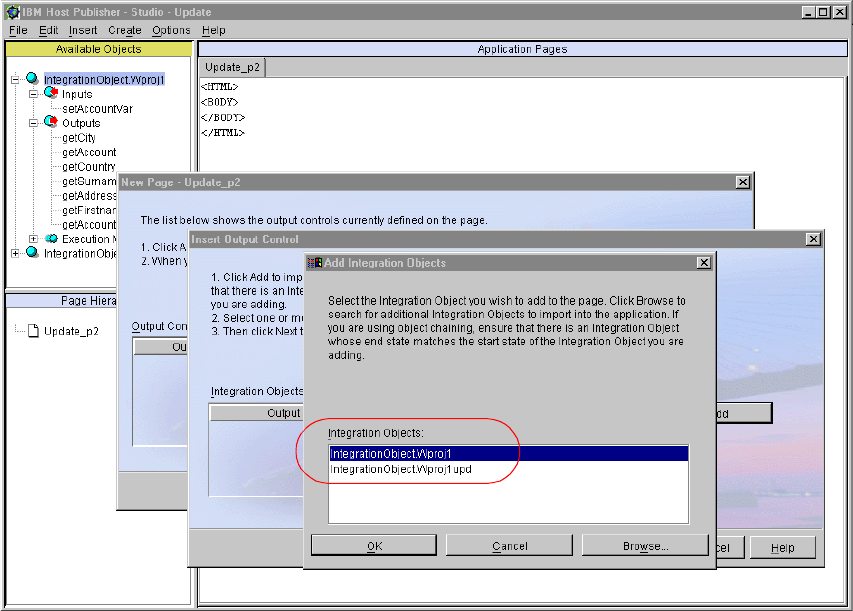
execution page and you have to add the Integration Object Wproj1 to this page,
using the sequence of windows shown in Figure 11-10 on page 335.
Chapter 11. Composite applications 335
Figure 11-10 Adding Integration Objects
Following the sequence of definition windows, you will be prompted to define the
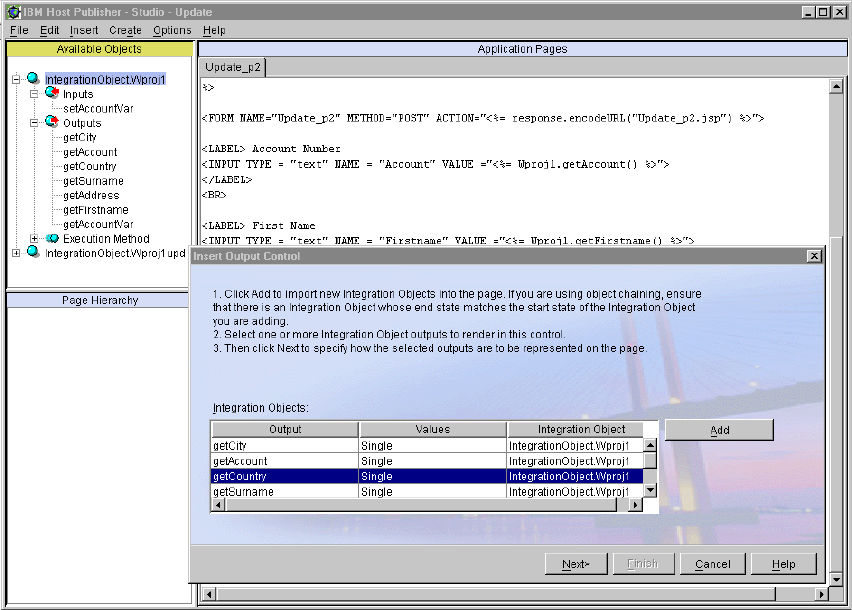
output fields for the HTML page. For example, select the first field (named
getAccount; see Figure 11-11 on page 336) to be displayed, select Edit box as
the type of output field, and type a descriptive caption for the output control.
336 IBM WebSphere Host Publisher Version 3.5
Figure 11-11 Defining output fields
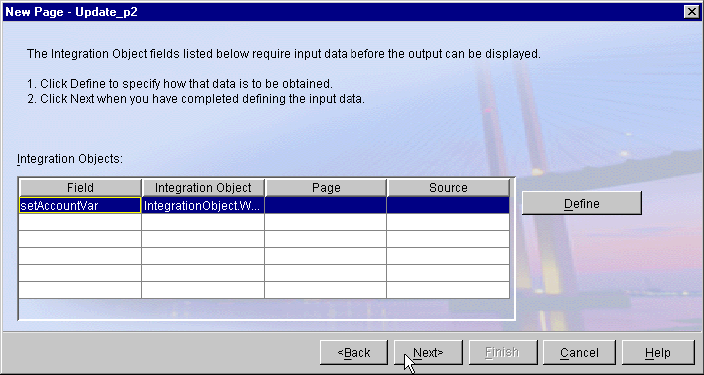
The Host Publisher Studio recognizes that you have defined an output field as an
edit box that will provide input for an Integration Object to be executed on a page
that is next in sequence. You will be therefore prompted to provide a name for this
page (Update_p3 in our example).
You can also watch the HTML page being filled with the output fields you select in
the sequence you want to have them displayed to the user (see Figure 11-12 on
page 337).
Chapter 11. Composite applications 337
Figure 11-12 Filling in the page
When you have added all output fields to the page, you can continue by clicking
Next and you will be guided through a sequence of windows that allow you to
define the layout of the required input page (Update_p1). Figure 11-13 shows the
first in that sequence of definition windows.
338 IBM WebSphere Host Publisher Version 3.5
Figure 11-13 Defining an input field on a new page
Creating the HTML page: updating detail information
After you have finished creating the first two pages, Update_p1 and Update_p2,
of the sequence of three HTML pages, the next step is to create the third page to
execute the update transaction and display the result. Click Create -> HTML
page and follow the sequence of windows that pops up.
In this scenario, the name of this new page is Update_p3 (note that this name
was already used on the second page); add (import) the Integration Object
Wproj1upd to this page. This Integration Object provides us only with one output
field, which is the host message confirming the successful update, or giving an
error indication, if the update was unsuccessful. This message is displayed
without any change to the resulting HTML page sent to the user.
Next, you will need to define the input fields. You can select fields one by one
from the list of input fields defined for the Integration Object Wproj1upd (see
Figure 11-14).

Get A Comprehensive Guide to IBM WebSphere Host Publisher Version 3.5 now with the O’Reilly learning platform.

O’Reilly members experience books, live events, courses curated by job role, and more from O’Reilly and nearly 200 top publishers.